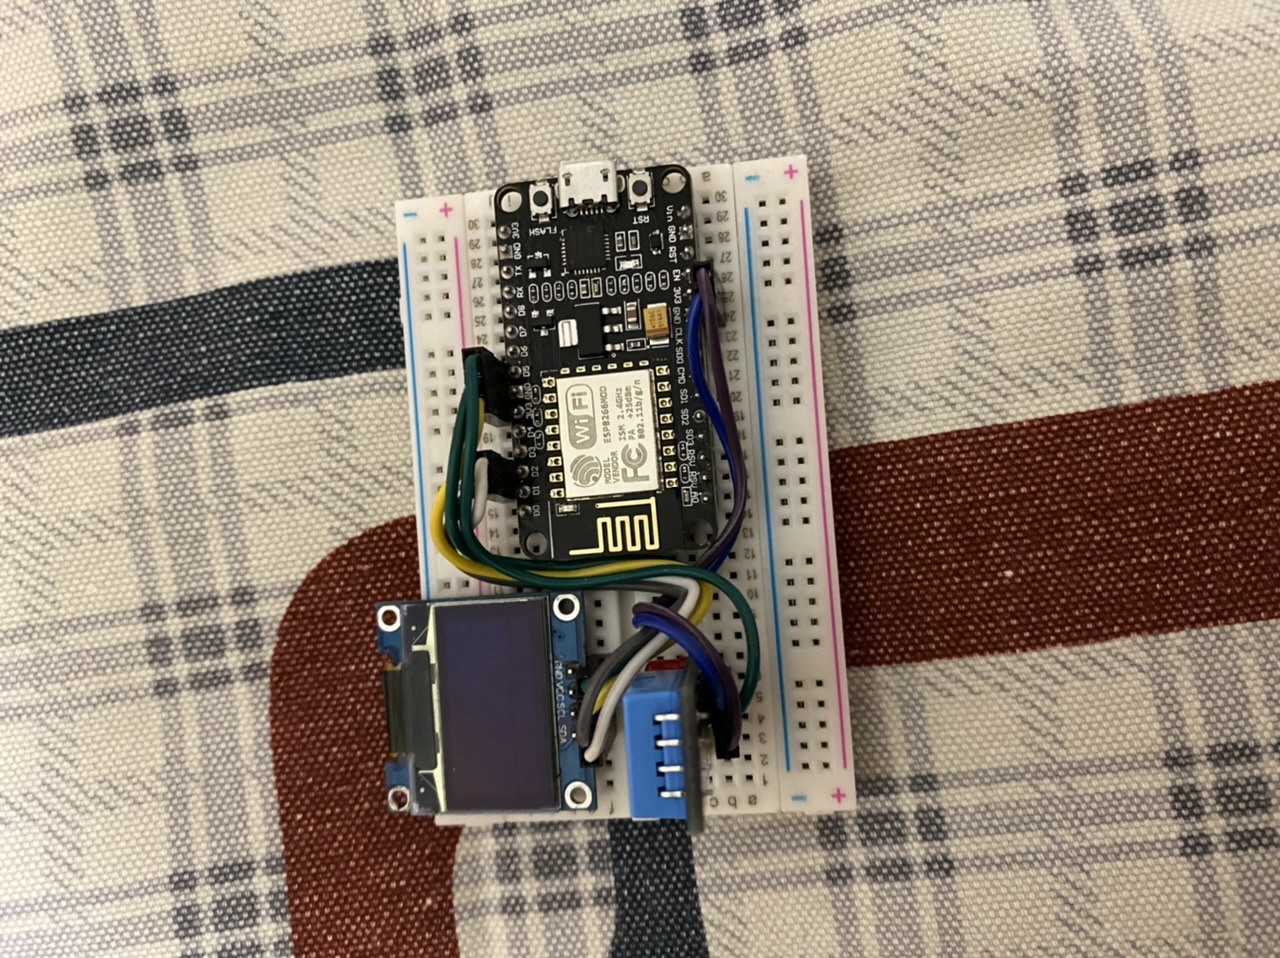
ESP8266 Arduino-drive SSD1306 OLED-use ESP8266 and ESP32 Oled Driver for SSD1306 display library
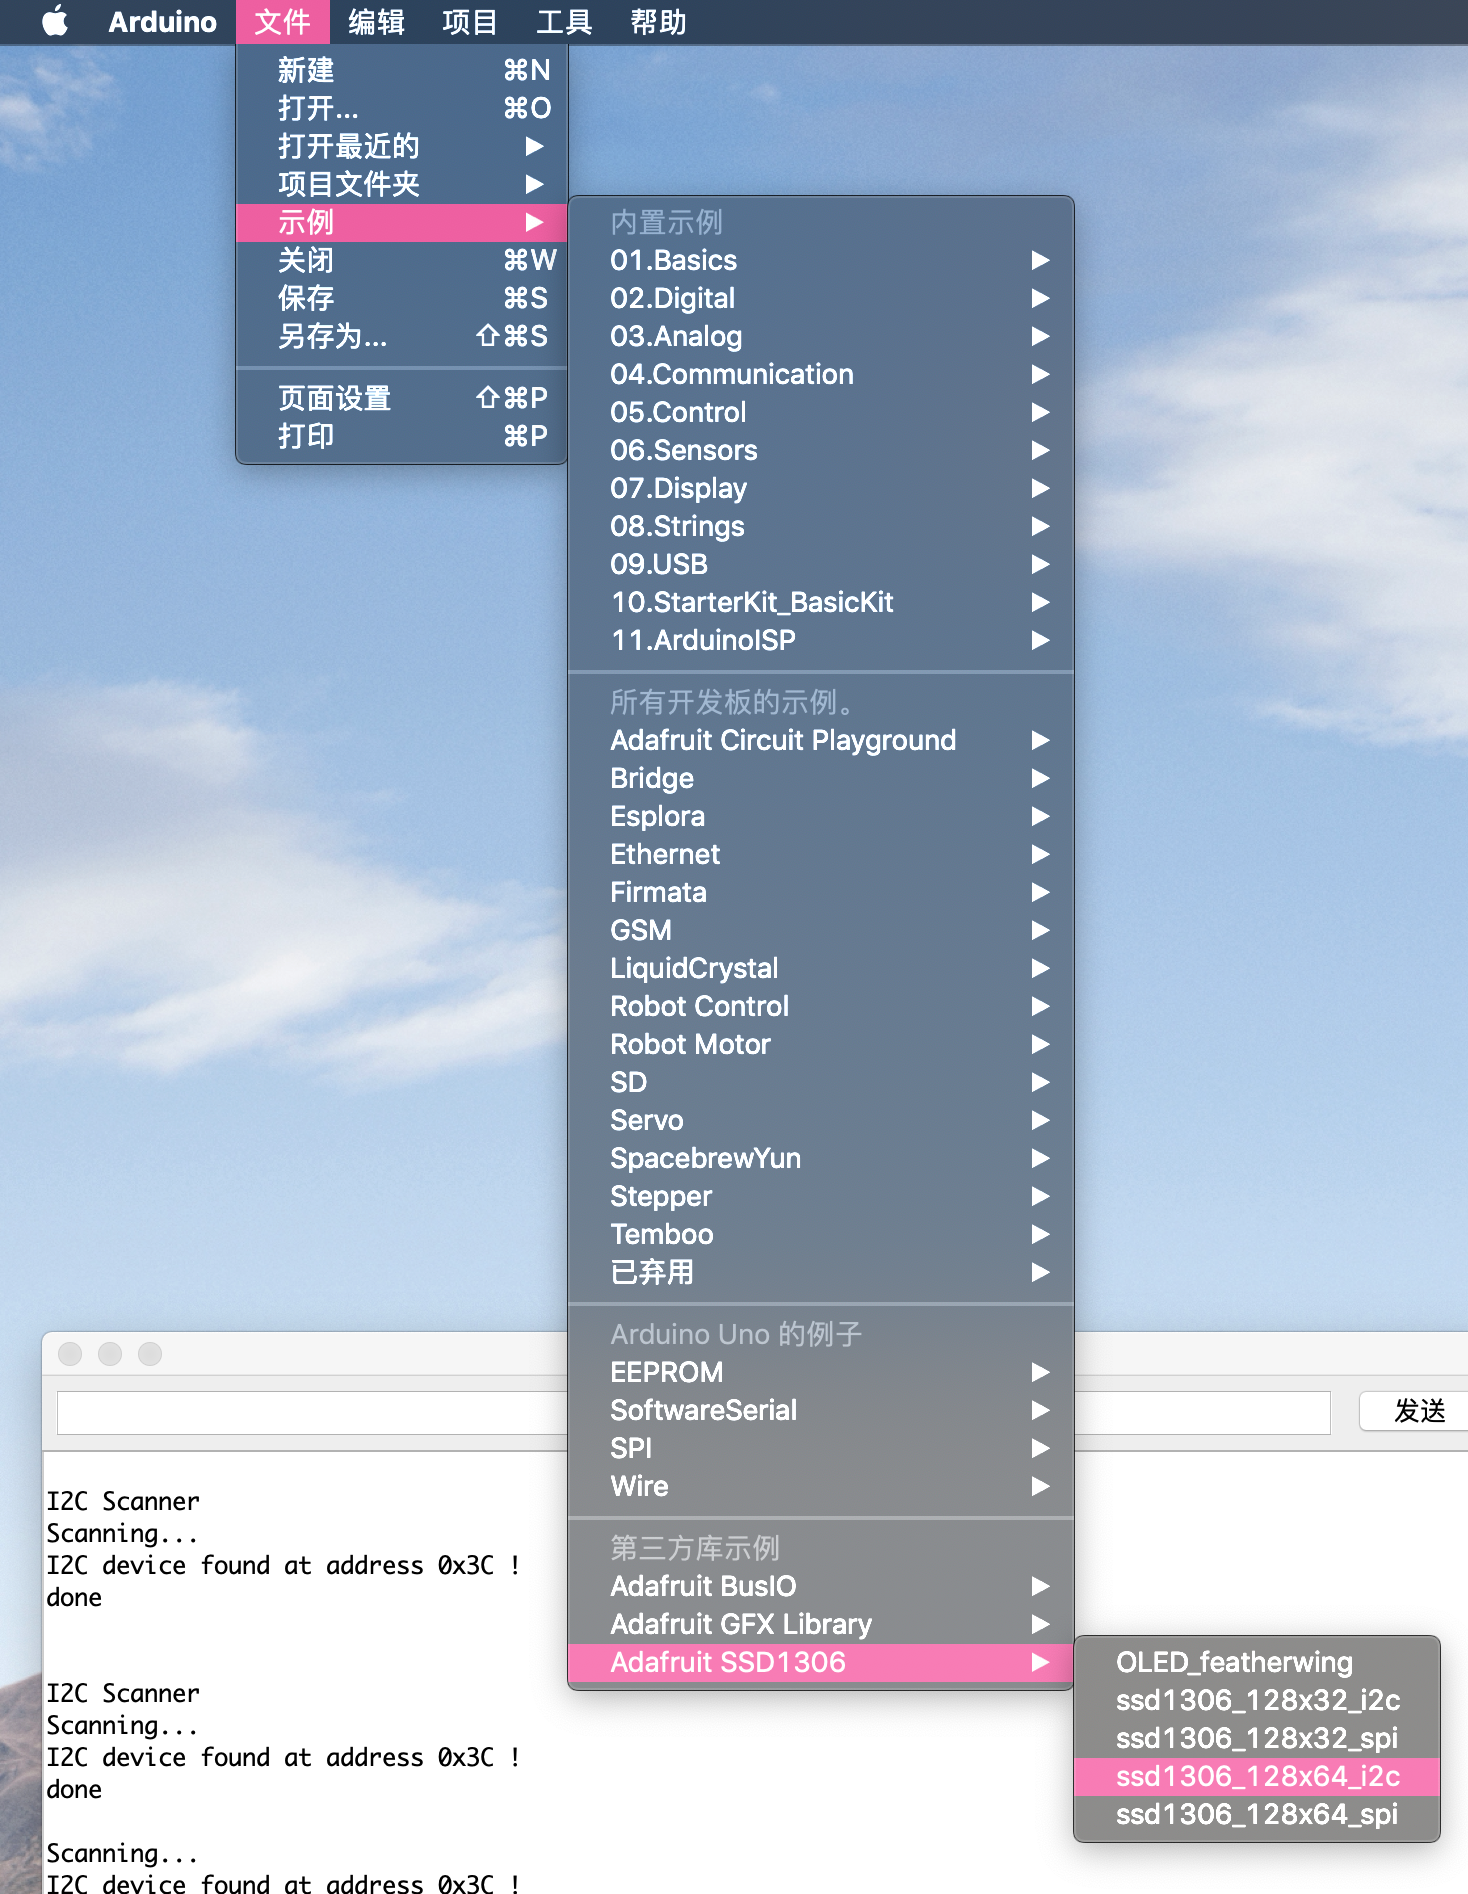
1. Download the peripheral library
Tools->Manage library, search for ssd1306, install ESP8266 and ESP32 Oled Driver for SSD1306 display

Second, the implementation code
#include <Wire.h>
#include "SSD1306Wire.h"
#include "images.h"
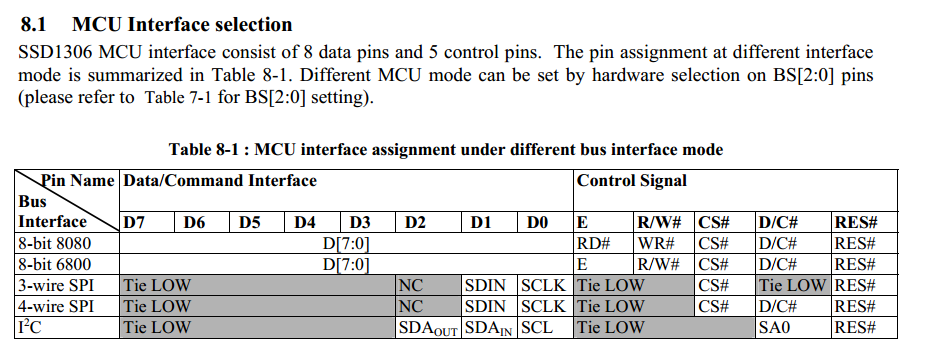
// Initialize the OLED display using SPI
// D5 -> CLK
// D7 -> MOSI (DOUT)
// D0 -> RES
// D2 -> DC
// D8 -> CS
// SSD1306Spi display(D0, D2, D8);
// or
// SH1106Spi display(D0, D2);
// Initialize the OLED display using brzo_i2c
// D3 -> SDA
// D5 -> SCL
// SSD1306Brzo display(0x3c, D1, D2);
// or
// SH1106Brzo display(0x3c, D1, D2);
// Set IIC address and OLED pin
SSD1306Wire display(0x3c, D1, D2);
#define DEMO_DURATION 3000
typedef void (*Demo)(void);
int demoMode = 0;
int counter = 1;
void setup() {
// Initialize OLED
display.init();
// Set the screen display to vertical
display.flipScreenVertically();
// Set font size
display.setFont(ArialMT_Plain_10);
}
void drawFontFace() {
// Character display example
//Visithttp://oleddisplay.squix.ch/Get font generator
// Set the text display mode to be left aligned
display.setTextAlignment(TEXT_ALIGN_LEFT);
// Set font size
display.setFont(ArialMT_Plain_10);
// Specify the location to output text
display.drawString(0, 0, "Hello world");
// Set font size
display.setFont(ArialMT_Plain_16);
// Specify the location to output text
display.drawString(0, 10, "Hello ESP8266");
// Set font size
display.setFont(ArialMT_Plain_24);
// Specify the location to output text
display.drawString(0, 26, "************");
}
void drawTextFlow() {
// Set font size
display.setFont(ArialMT_Plain_10);
// Set the text to be left aligned
display.setTextAlignment(TEXT_ALIGN_LEFT);
// Set string display width
display.drawStringMaxWidth(0, 0, 64,
"Lorem ipsum\n dolor sit amet, consetetur sadipscing elitr, sed diam nonumy eirmod tempor invidunt ut labore." );
}
void drawTextAlignment() {
// Set text size
display.setFont(ArialMT_Plain_10);
// Set the text to be left aligned
display.setTextAlignment(TEXT_ALIGN_LEFT);
// Output text content
display.drawString(0, 10, "Left aligned (0,10)");
// Set the text to be center aligned
display.setTextAlignment(TEXT_ALIGN_CENTER);
// Output text content
display.drawString(64, 22, "Center aligned (64,22)");
// Set the text to be right aligned
display.setTextAlignment(TEXT_ALIGN_RIGHT);
// Output text content
display.drawString(128, 33, "Right aligned (128,33)");
}
void drawRect() {
// Draw pixels at the specified position
for (int i = 0; i < 10; i++) {
display.setPixel(i, i);
display.setPixel(10 - i, i);
}
// Draw a hollow rectangle at the specified position
display.drawRect(12, 12, 20, 20);
// Draw a solid rectangle at the specified position
display.fillRect(14, 14, 17, 17);
// Draw a horizontal straight line
display.drawHorizontalLine(0, 40, 20);
// Draw a vertical straight line
display.drawVerticalLine(40, 0, 20);
}
void DrawCircle() {
for (int i = 1; i < 8; i++) {
display.setColor(WHITE);
display.drawCircle(32, 32, i * 3);
if (i % 2 == 0) {
display.setColor(BLACK);
}
display.fillCircle(96, 32, 32 - i * 3);
}
}
void drawProgressBar() {
int progress = (counter / 5) % 100;
// Draw the progress bar
display.drawProgressBar(0, 32, 120, 10, progress);
// Display percentage
display.setTextAlignment(TEXT_ALIGN_CENTER);
display.drawString(64, 15, String(progress) + "%");
}
void drawImage() {
//Visithttp://blog.squix.org/2015/05/esp8266-nodemcu-how-to-create-xbm.htmlSee how to generate xbm files
// display image
display.drawXbm(34, 14, WiFi_Logo_width, WiFi_Logo_height, WiFi_Logo_bits);
}
Demo demos[] = {drawFontFace, drawTextFlow, drawTextAlignment, drawRect, DrawCircle, drawProgressBar, drawImage};
int demoLength = (sizeof(demos) / sizeof(Demo));
long timeSinceLastModeSwitch = 0;
void loop() {
// Clear the screen display
display.clear();
// draw the current demo method
demos[demoMode]();
display.setTextAlignment(TEXT_ALIGN_RIGHT);
display.drawString(10, 128, String(millis()));
// Display the content in the cache
display.display();
// Switch to display the next instance
if (millis() - timeSinceLastModeSwitch > DEMO_DURATION) {
demoMode = (demoMode + 1) % demoLength;
timeSinceLastModeSwitch = millis();
}
counter++;
delay(10);
}
Intelligent Recommendation
oled display module ssd1306
Pin definition GND: power ground VCC: Both 3.3v and 5v power supply are available D0: Serial input clock CLK D1: Serial input data RES: reset DC: Control input data/command (high level 1 is data, low ...
esp notes (7) to drive the display of OLED (SSD1306)
The development environment of this article: MCU model: ESP8266 IDE environment: Arduino IDE 1.8.9 1.27 inch full color OELD module The content of this article: esp8266 uses u8g2 graphics library to d...
[K210 + micropython] Drive SSD1306 OLED Display (I2C)
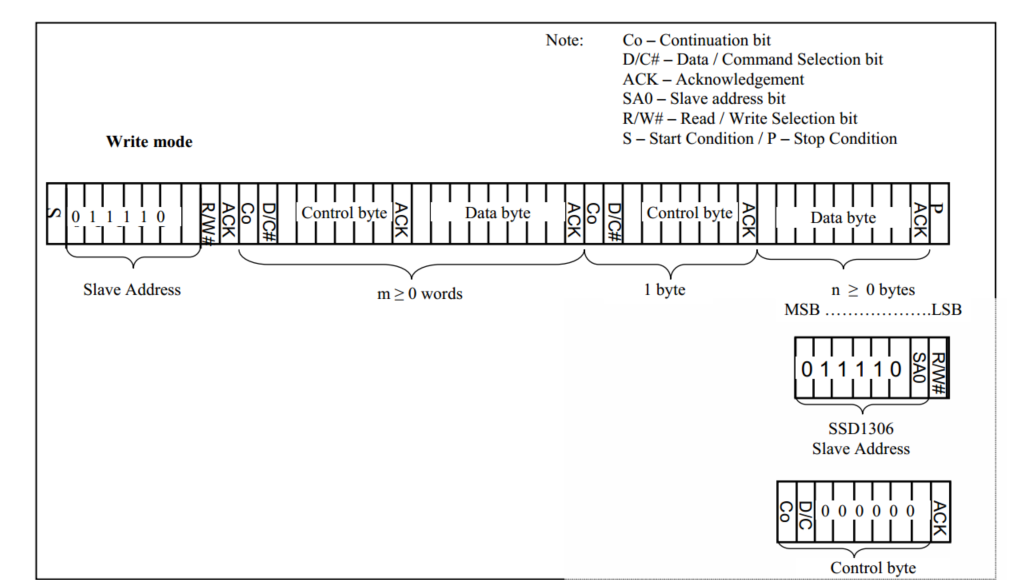
[K210 + micropython] driver SSD1306 display Article catalog [K210 + micropython] driver SSD1306 display Related knowledge preparation First, I2C and SPI Second, SSD1306 OLED display Third, SSD1306 dri...

dm3730 platform oled display clock-ssd1306 driver
Please indicate the source for reprinting: http://blog.csdn.net/bhj1119/article/details/73330863 Recently, an oled display was added to the dm3730 platform to display the time. Although the function i...
Drivers for SSD1306 and SH1106-based 128x64, 128x32,64x48 pixel OLED displays running on ESP8266 / ESP32
Drivers for SSD1306 and SH1106-based 128x64, 128x32,64x48 pixel OLED displays running on ESP8266 / ESP32 Features Fonts Hardware Abstraction I2C with wire.h For SH1106: For SPI For SH1106 API Display ...
More Recommendation
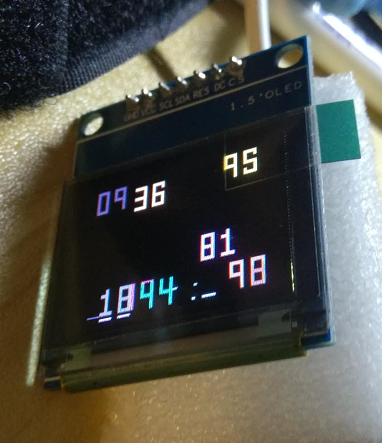
<Fool -style tutorial > ESP8266 temperature and humidity meter+lighting technology display+SSD1306 0.96 inch OLED display
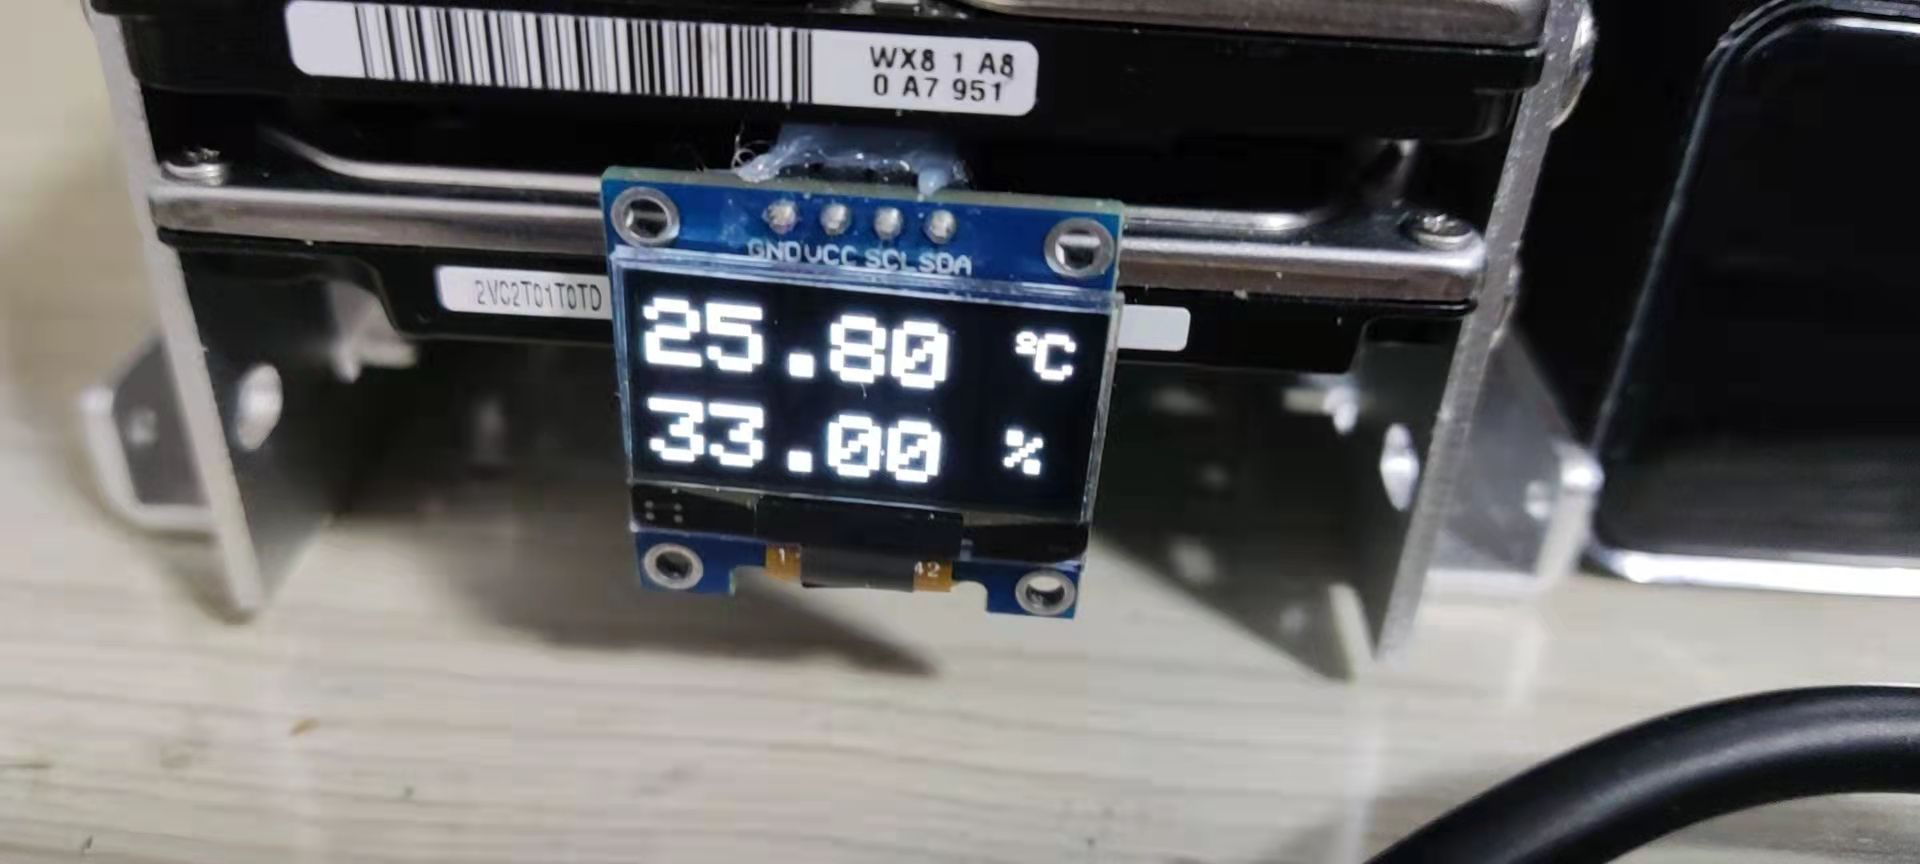
At the beginning of the picture! Intersection Intersection The original intention of production: temperature monitoring of the mechanical hard disk The display effect can be modified on demand (see th...
ESP8266+DHT11+0.96 inch SSD1306 OLED network small weather station
Don't talk nonsense, first go to the real shots 1. Introduction The development environment of this solution is Ardunio, the development board is NodeMCU using ESP-12E module, the sensor uses DHT11 mo...
Interpretation of OLED driver chip SSD1306
The driving OLED is actually the driving control chip of the controlled OLED. The commonly used chip SSD1306 and so on. Take this chip as an example to interpret it. It is also my own literacy film as...
OLED (SSD1306) module display overview
Out Disadvantages of OLED Modules Advantages: small size, high resolution, low pressure 3.3V can work, support multiple interface modes, the module provides a total of four interfaces including: 6800,...
Arduino SSD1306 OLED (IIC) Display starting point light
IIC (Inter-Integrated Circuit) is actually the iicbus (integrated circuit bus) referred to as a serial communication bus that uses a multi-dominant from architecture. It generally has two signal lines...