【ESP32 】2· ,vscode ,oled i2c ,
content
1.GPIO
#include <Arduino.h>

#define LED 22

void setup() {
  pinMode(LED,OUTPUT);
}

void loop() {
  digitalWrite(LED,0);
  delay(1000);
  digitalWrite(LED,1);
  delay(1000);
}
2.
#include <Arduino.h>

#define LED 22
#define KEY 13
int state=0;

void bt_callBack(void){
     state = digitalread (key); // Read the keys state
     DigitalWrite (LED, State); // Use the key state as the output of the LED light
}

void setup() {
  pinMode(LED,OUTPUT);
  pinMode(KEY,INPUT);
  attachInterrupt(KEY, bt_callBack, CHANGE);
}

void loop() {
}
, , 。
3.
#include <Arduino.h>
#define LED 22
#define KEY 13
int rec_data;
void setup() {
Serial.begin(9600);
}
void loop() {
if (Serial.available() > 0) {
// rec_data = Serial.read();
rec_data=Serial.parseInt();
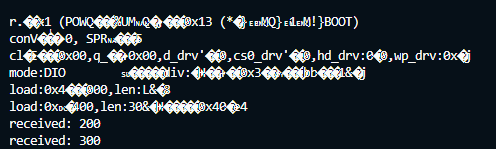
Serial.print("received: ");
Serial.println(rec_data,DEC);
}
}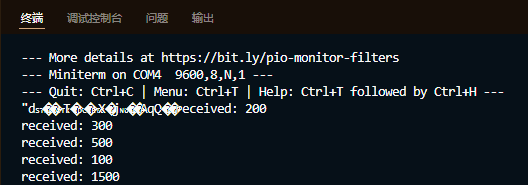
Serial.read() , ; Serial.parseInt() 。
4.
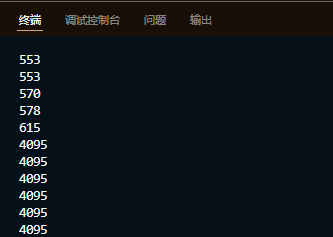
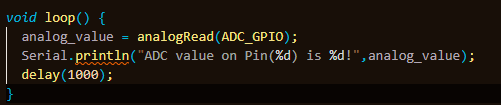
Serial.println("ADC value on Pin(%d) is %d!",analog_value); , , , , , 。
#include <Arduino.h>

#define ADC_GPIO 13

int analog_value = 0;

void setup() {
Serial.begin(9600);

}

void loop() {
  analog_value = analogRead(ADC_GPIO);
  Serial.println(analog_value,DEC);
  delay(1000);
}
5.PWM
#include <Arduino.h>

#define ADC_GPIO 13
#define LED 22
#define PWM1_Ch 0
#define PWM1_Res 10
#define PWM1_Freq 1000
int PWM1_DutyCycle=50;

int analog_value = 0;

void setup() {
  Serial.begin(9600);
  ledcAttachPin(LED, PWM1_Ch);
  ledcSetup(PWM1_Ch, PWM1_Freq, PWM1_Res);

}

void loop() {
   while(PWM1_DutyCycle < 1023)
  {
    ledcWrite(PWM1_Ch, PWM1_DutyCycle++);
    delay(2);
  }
  while(PWM1_DutyCycle > 0)
  {
    ledcWrite(PWM1_Ch, PWM1_DutyCycle--);
    delay(2);
  }
}
PWM1_Res , ,PWM1_Freq ; 9, 100khz, 11, 39khz, , , 。
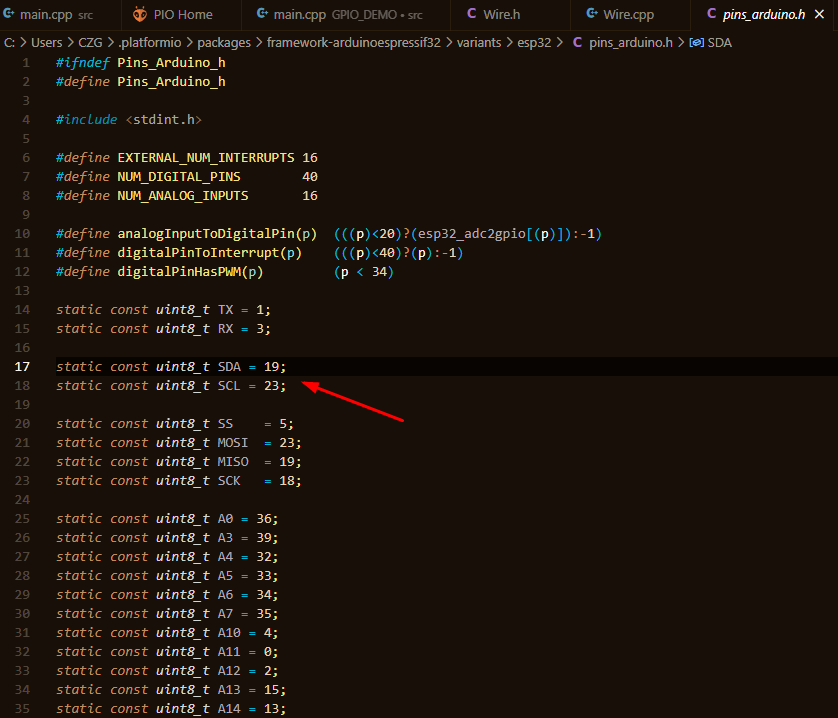
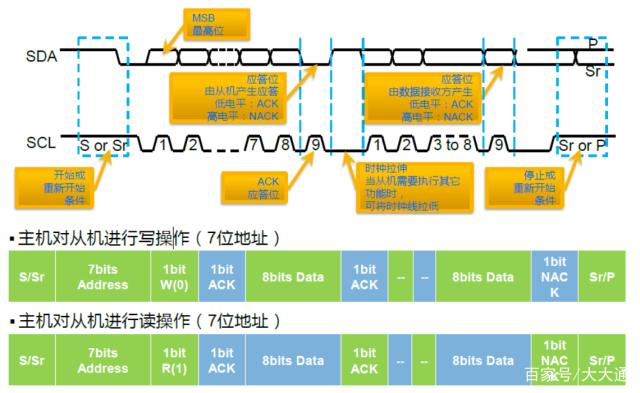
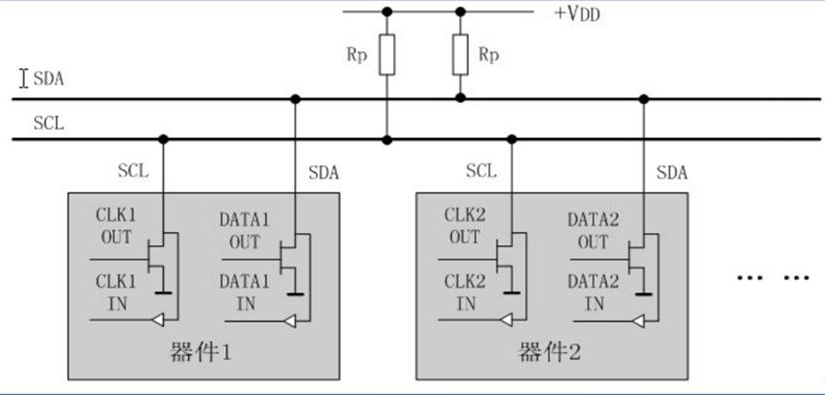
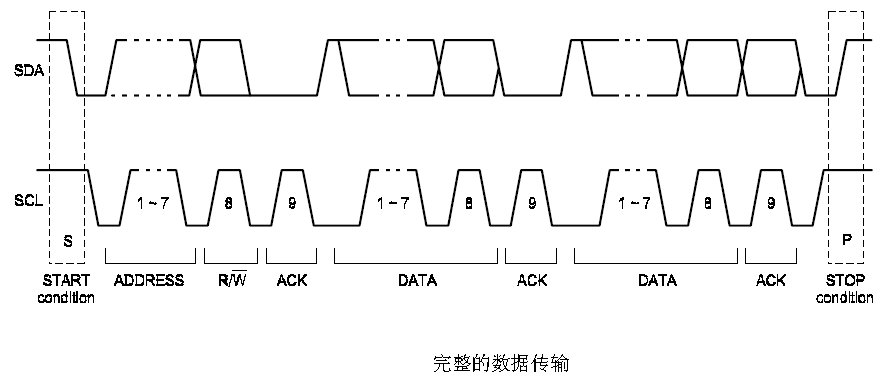
6.I2C
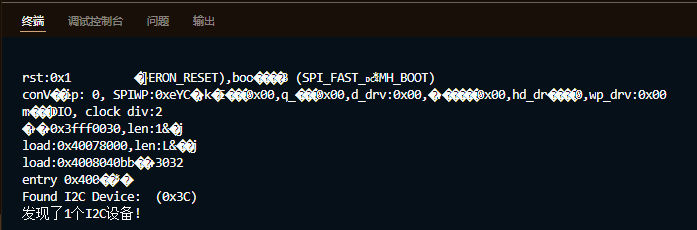
21 , F12 , i2c , 。
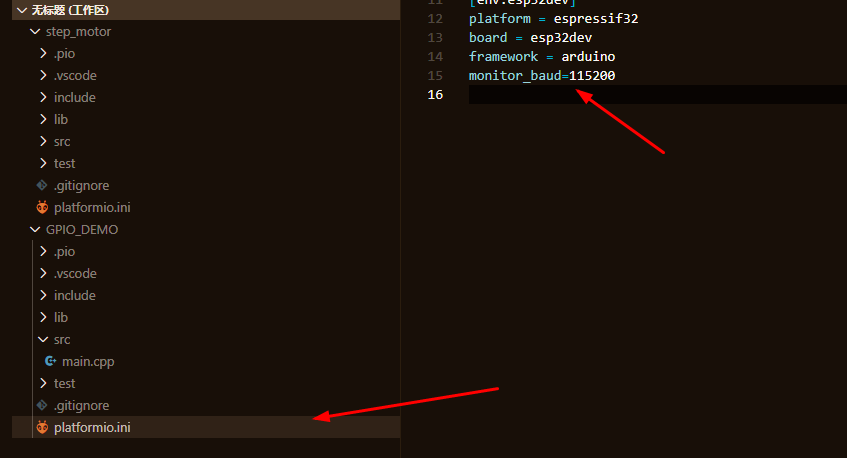
115200。
#include <Arduino.h>
#include "Wire.h"
void setup(){
Serial.begin(115200);
int I2CDevices = 0;
byte address;
Wire.begin();
for (address = 1; address < 127; address++)
{
Wire.beginTransmission(address);
if (Wire.endTransmission() == 0)
{
Serial.print("Found I2C Device: ");
Serial.print(" (0x");
if (address < 16)
{
Serial.print("0");
}
Serial.print(address, HEX);
Serial.println(")");
I2CDevices++;
}
}
if (I2CDevices == 0)
{
Serial.println ("No I2C device! \ N");
}
else
{
Serial.print ("I found");
Serial.print(I2CDevices);
Serial.println ("I2C device! \ N");
}
}
void loop() {
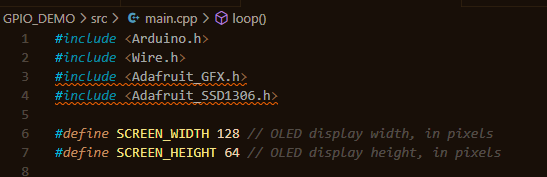
}7.OLED
, platformio , , , , ! Intersection
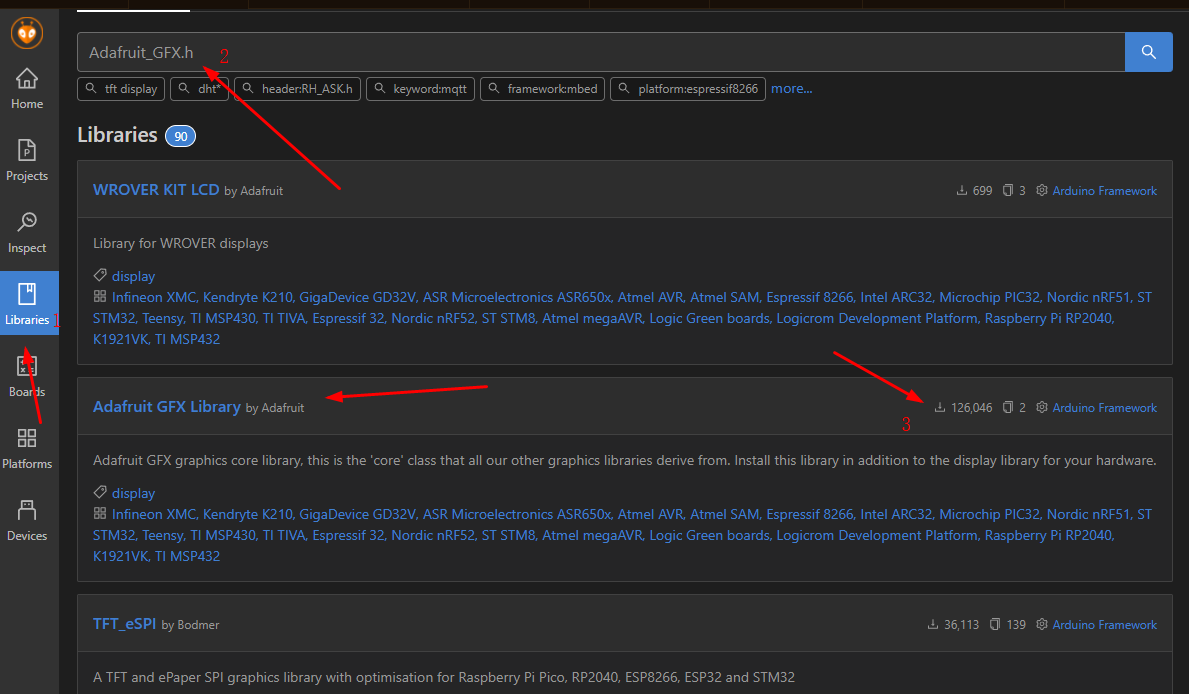
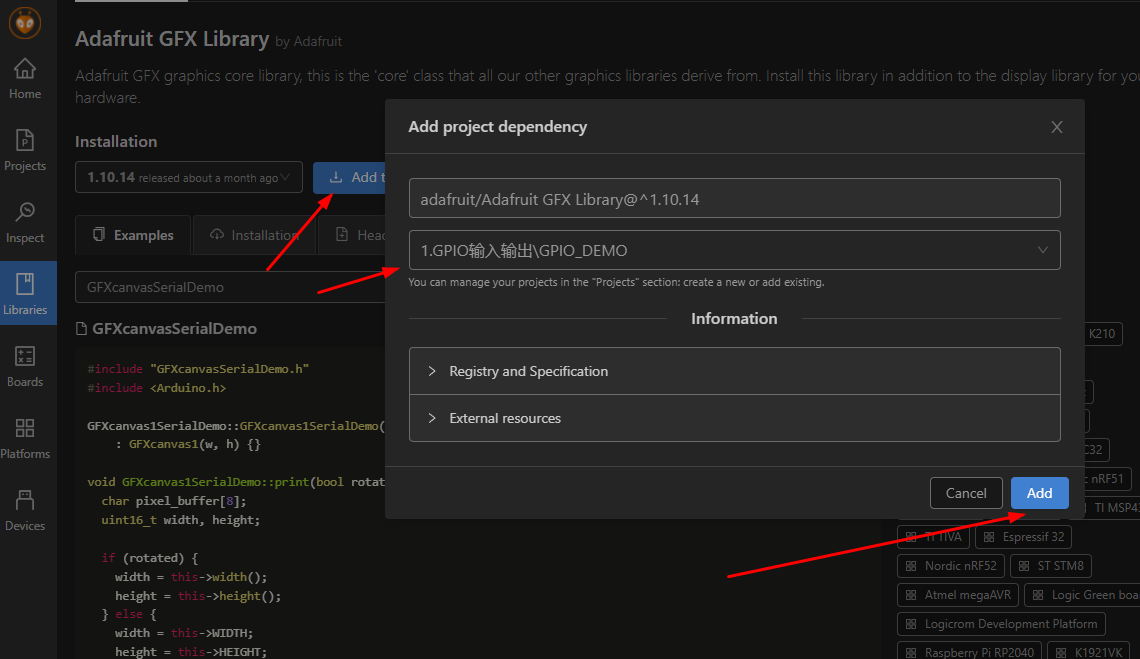
, Adafruit_I2CDevice.h, , “header:Adafruit_I2CDevice.h” 。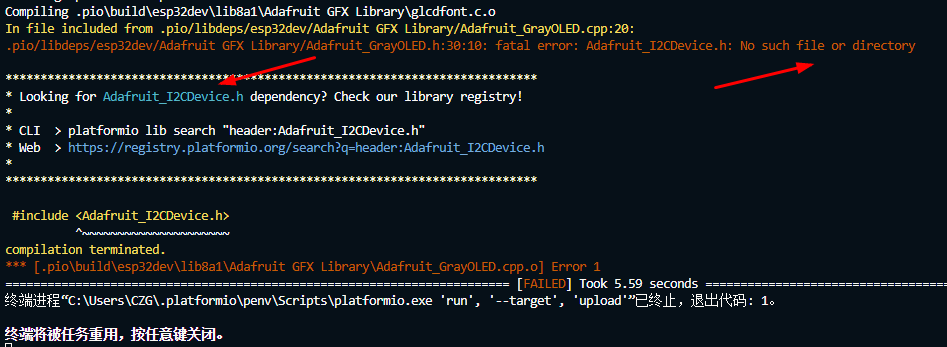
, 。
#include <Arduino.h>
#include <Wire.h>
#include <Adafruit_GFX.h>
#include <Adafruit_SSD1306.h>
#define SCREEN_WIDTH 128 // OLED display width, in pixels
#define SCREEN_HEIGHT 64 // OLED display height, in pixels
Adafruit_SSD1306 display(SCREEN_WIDTH, SCREEN_HEIGHT, &Wire, -1);
int recData=0;
void setup() {
Serial.begin(115200);
if(!display.begin(SSD1306_SWITCHCAPVCC, 0x3C)) {
Serial.println(F("SSD1306 allocation failed"));
for(;;);
}
delay(1000);
display.display();
display.clearDisplay();
display.setTextColor(WHITE);
display.setTextSize(2);
}
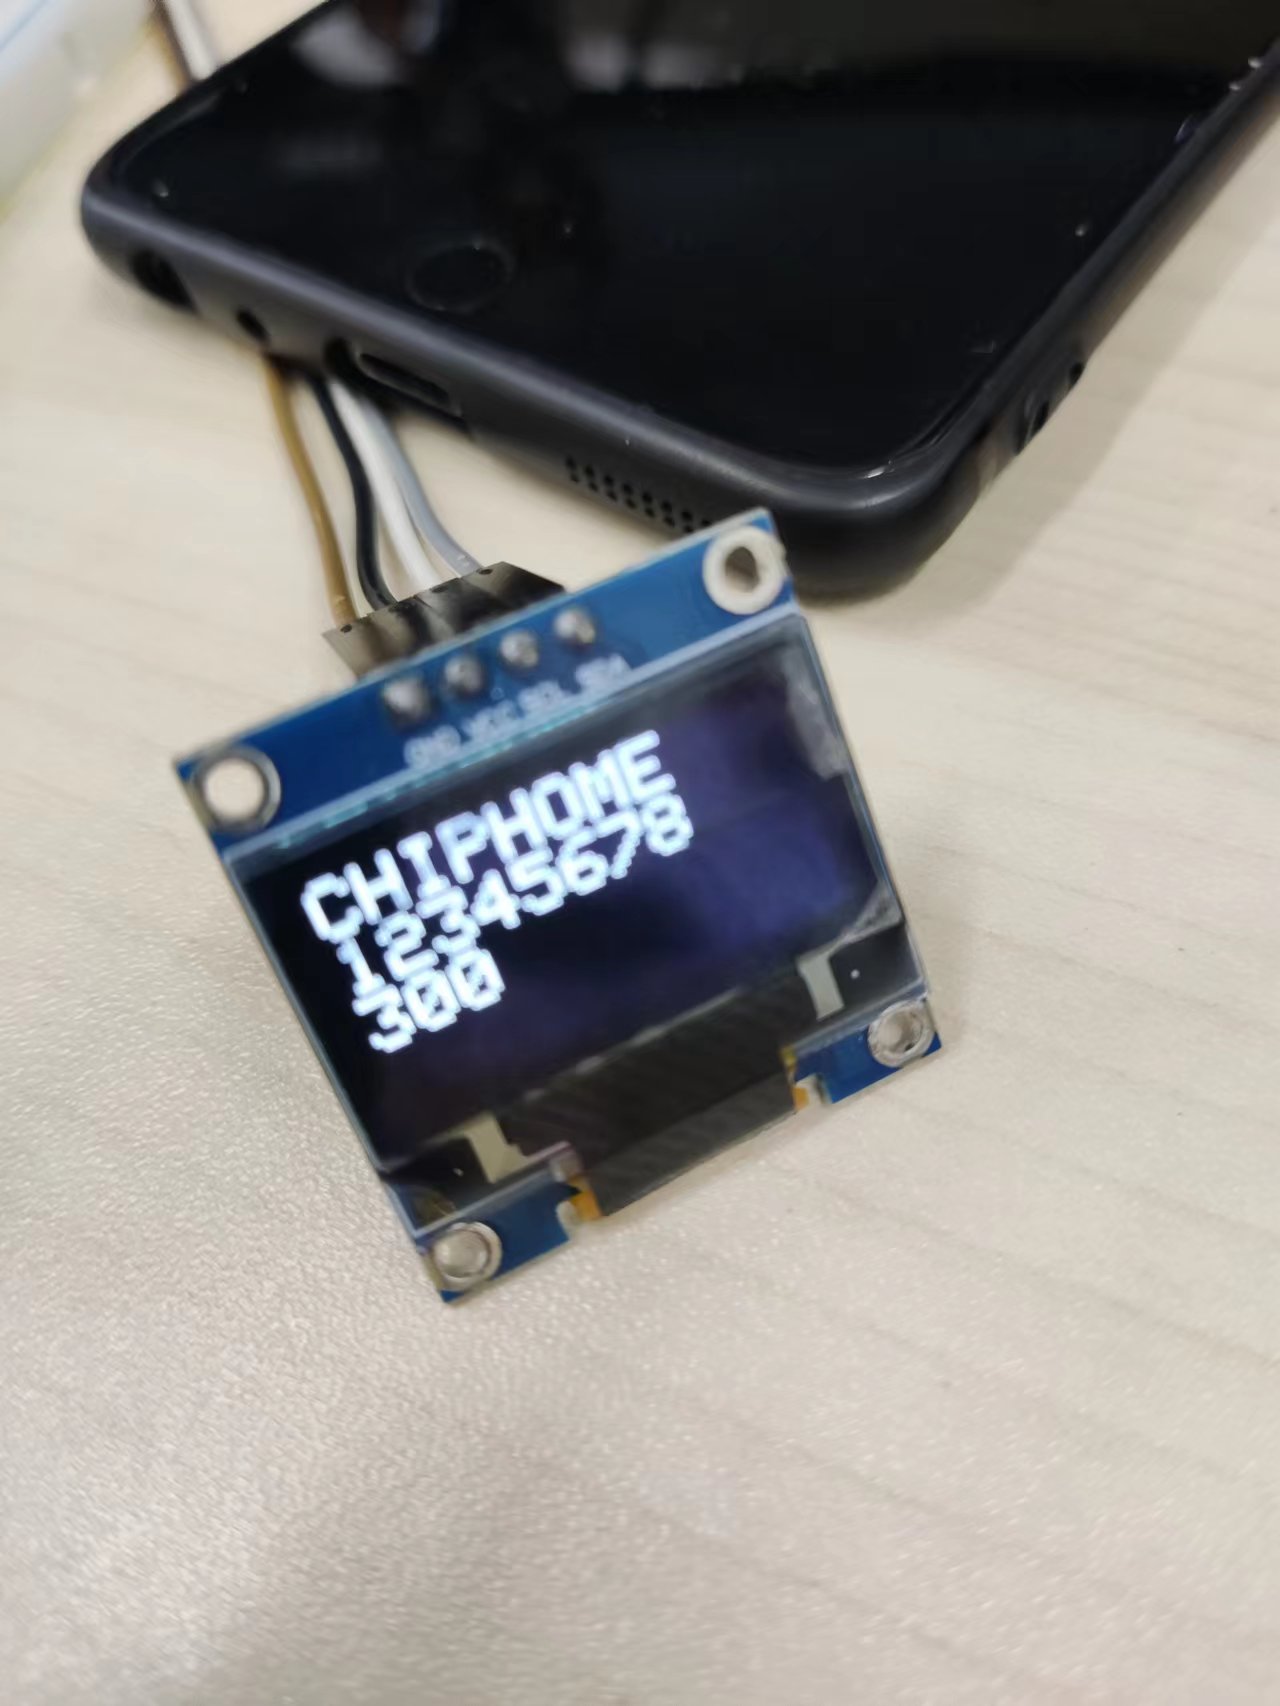
void loop() {
if (Serial.available() > 0)
{
recData = Serial.parseInt();
Serial.print("received: ");
Serial.println(recData,DEC);
display.setCursor(0,0);
display.print("CHIPHOME");
display.display();
display.setCursor(0,16);
display.print("12345678");
display.display();
display.setCursor(0,32);
display.print(recData,DEC);
display.display();
display.clearDisplay();
}
}
Intelligent Recommendation
OLED-ESP32 and Python 1
connection Code Framebuf frame buffer class Draw the original shape FrameBuffer.fill (c) Fill the entire FrameBuffer with the specified color. FrameBuffer.pixel(x, y[, c]) If C is not given, the color...
Esp32 - Arduino - Using OLED
ESP32, this board is not welded. I borrowed my colleague's soldering iron. Each time you burn it, you have to press Boot and press EN. It's a trouble, the picture is cheap. -------------------------- ...
ESP32-I2C learning
Overview I2C is aSerial, synchronous, half-duplex communication protocol, Allowing multiple masters and slaves on the same bus. The I2C bus consists of two lines: the serial data line (SDA) And serial...
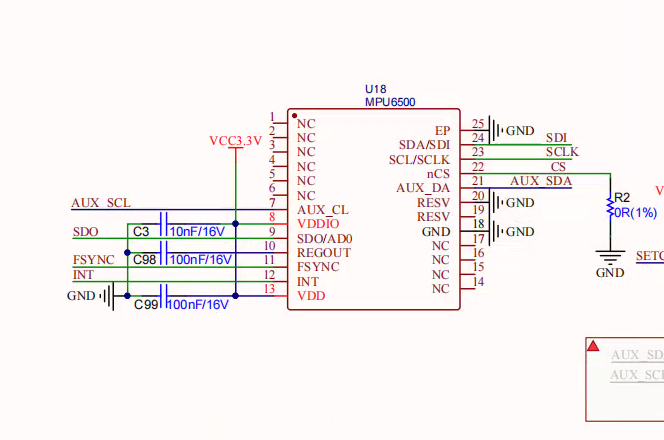
ESP32 and MPU6500 I2C communication
Pay attention: The MPU6500 has two communication methods SPI and I2C. The default is SPI, when the CS is high, the SPI is valid, when the CS is low, the SPI is invalid, and I2C can communicate with I2...
ESP32 initializes I2C error
Initialization code E (330) i2c: i2c_param_config(646): i2c clock choice is invalid, please check flag and frequency E (1340) i2c: i2c_set_pin(827): scl and sda gpio numbers are the same E (2340) i2c:...
More Recommendation

I2c debug OLED without ACK
I recently debugged an oled on the tiny4412. This oled has two interfaces, SPI and I2c, which are available for selection. The SPI interface is quickly debugged. However, the I2c interface has been de...
STM32 I2C first test OLED
STM32 I2C first test OLED Experimental environment 1. Wildfire STM32 Guide (STM32F103VET6) 2.AHT20 sensor 3. OLED screen 0.96 inch (address) Not advertising is just which product is used 2. Environmen...
OLED display under the I2C interface
OLED display under the I2C interface First, introduction to I2C Second, the data download Third, I2C interface experiment 1, ready to work 2, generate a word model 3, modify the code 4, connect IIC to...
STM32F103C8T6 drives 4PIN OLED (I2C)
STM32 HAL library OLE related drive functions 4pin OLED display string, single character, etc. STM32Cubemx configurationJust open the relevant I2C, the remaining parameters can be default GPIO-related...
I2C communication implements OLED screen
I2C communication Half dual -work communication Fundamental Idle state The two signal lines of SDA and SCL of the I2C bus are at the same time at the same time, and it is stipulated as the idle state ...