javaweb
tags: Java
##SQL Classification##
1. DDL (Data Definition Language) data definition language:
is used to define database objects: databases, tables, columns, etc. Keywords: create drop alter, etc.
2, DML (Data Manipulation Language) data manipulation language
is used to add, delete and modify the data in the table in the database. Keywords: insert delete update, etc.
3. DQL (Data Query Language) data query language
is used to query the records (data) of the tables in the database. Keywords: select, where, etc.
4. DCL (Data Control Language) data control language (understand)
is used to define database access rights and security levels, and to create users. Keywords: GRANT REVOKE, etc.
##DDL: Operation database, table##
1. Operating database: CRUD
-1. C(Create): Create
*When creating the database, determine whether it already exists and specify the character set
CREATE DATABASE IF NOT EXISTS db3 CHARACTER SET GBK;
2. R (Retrieve): query
*Query the names of all databases:
*show databases;
*Query the character set of a database, query the creation statement of a database:
*show create database database name;
3. U (update): modify
*Modify the character set of the database
alter database database name character set character set name
4. D (Delete): delete
*Delete database
drop database if exists database name;
5. Use the database
*Query the name of the database currently in use
select database();
*Use database
use database name;
2. Operation table: CRUD
1.C(Create):
*Create
1. Syntax:
create table if not exists table name(
Column name 1 data type,
Column name 2 data type,
----------,
column name n data type
);
*Copy table:
create table table name like the name of the copied table;
	2.R (Retrieve): query
		 *Query all table names in a database
			*show tables;
		 *Query a table in a database
			 *show table table name;
		 *Inquiry table structure
			 *desc table name
	 3.U (update): modify
		 1. Modify the table name:
			 alter table table name rename to new table name;
		 2. Modify the character set of the table:
			 alter table table name character set character set name
		 3. Add a column:
			 alter table table name add column name type;
		 4. Modify the column name:
		 	 alter table table name change column name new column name new data type;
			 alter table table name modify column name new data type;
		 5. Delete column
			 alter table table name drop column name;
	 4.D (Delete): delete
		 drop table if exists table name;
##DML:Add and delete data in the table##
1. Add data:
*Syntax:
*insert into table name (column name 1, column name 2, ... column name n) values (value 1, value 2, ... value n);
*Note:
1. The column name and value should correspond one to one.
2. If the column name is omitted, it will add values to all columns by default.
3. In addition to number types, other types should be enclosed in quotation marks (both single and double)
2. Delete data:
*Syntax:
delete from table name [where condition];
*Note:
1. If no conditions are added, all records in the table will be deleted.
2. If you want to delete all records
1. delete from table name; it is not recommended to use as many delete operations will be performed as many records as there are.
2. truncate table table name; recommended to use, first delete the table, and then create the same table.
3. Modify the data:
	 * Syntax:
		 * update table name set column name 1 = value 1, column name 2 = value 2,... column name n = value n[where condition];
	 * Note:
		 If no conditions are added, all records in the table will be modified by default
##DQL##
1. Sort query
* Syntax: order by clause
* order by sort field 1 sort method 1, sort field 2 sort method 2,..., sort field n sort method n;
* Sorting method:
* ASC: Ascending order, default.
* DESC: descending order.
* Note:
* If there are multiple sorting conditions, the second condition will be judged only when the previous condition values are the same.
2. Aggregate query: Take a column of data as a whole and perform vertical calculations.
1. count: count the number
2. max: calculate the maximum value
3. min: calculate the minimum value
4. avg: calculate the average
* Note: The calculation of aggregate functions excludes null values
Solution:
1. Select columns that do not contain non-empty columns for calculation
2. IFNULL function
3. Group query:
	1. Syntax: group by group field
	 2. Note:
		 1. Fields to be queried after grouping: grouping fields, aggregate functions
		 2. Where oh having the difference:
			 1. Where is limited before grouping. If the conditions are not met, it will not participate in grouping. Having is limited after grouping. If the result is not satisfied, it will not be queried.
			 2. Aggregate functions cannot be followed after where. Having can judge aggregate functions.
 4. Paging query
	 1. Syntax: index starting with limit, the number of queries per page.
	 2. Formula: starting index = (current page number -1) * number of items displayed per item
 5. Query records in the table
	 * select * from table name;
	 1. Syntax:
	  	select
			 Field list
		from
			 Table name list
		where
			  Condition list
		group by
			 Grouping field
		having
			 Condition after grouping
		order by
			 Sort
		limit
			 Paging limit
	 2. Basic query
		 1. Query of multiple fields
			 1. select field name 1, field name 2, ... from table name
		 2. Remove duplication
			1. distinct
		 3. Calculated column
			 1. ifnull (expression 1, expression 2)
				 1. Expression 1: Which field needs to be judged whether it is null
				 2. Expression 2: Replacement value if the field value of expression 1 is null
		 4. Make an alias
			 as: as can also be omitted
	 3. Condition query
		 1. where clause followed by conditions
		 2. Operator
##constraint##
* Concept: Limit the data in the table to ensure the correctness, validity and completeness of the data.
* Category:
1. Primary key constraint: primary key
2. Non-empty constraint: not null
3. Unique constraint: unique
4. Foreign key constraint: foreign key
* Non-empty constraint
1. When creating a table, add constraints
create table table name (
column name type not null,
…
);
2. After creating the table, add constraints
1. alter table table name modify column name type constraint;
2. alter table table name change column name new column name type constraint;
3. Remove non-empty constraints
1. alter table table name modify column name type;
* Unique constraint: unique, the value cannot be repeated
1. When creating a table, add a unique constraint
create table table name (
column name type unique,
…
);
*Note that in mysql, the value of a column limited by a unique constraint can have multiple nulls
2. Delete the unique constraint
alter table table name drop index column name
3. After creating the table, add a unique constraint
alter table table name modify column name type unique;
	(sqlyog executes "select * from table name" and reports error 1064, which is not resolved
		 The reason is mysql5.5, no need to change the suffix)
 * Primary key constraint: primary key
	 1. Note:
		 1. Meaning: non-empty and unique
		 2. A table can only have one field as the primary key
		 3. The primary key is the unique identifier of the records in the table
	 2. When creating a table, add a primary key constraint
		  create table table name (
			 Column name 1 type primary key,
				...
		 );
	 3. Delete the primary key
		 alter table table name drop primary key;
	 4. After creating the table, add the primary key
		 alter table table name modify column name type primary key;
	 5. Automatic growth: the increased value of a column is only related to the value of the previous column
		 1. Concept: If a column is of numeric type, auto_increment can be used to complete the value of automatic growth.
		 2. When creating a table, add a primary key constraint and complete the automatic growth of the primary key
			 create table table name (
				 Column name 1 type primary key auto_increment,
					...
			);
		 3. Delete the primary key
			 alter table table name modify column name type;
		 4. Add automatic growth
			 alter table table name modify column name type auto_increment;
 * Foreign key constraints: foreign key, let the table and the table have a relationship, so as to ensure the correctness of the data.
	 1. When creating a table, add a foreign key
		 * Syntax:
			 create table table name (
				...
				 Foreign key column
				 constraint foreign key name foreign key (foreign key column name) references main table name (main table column name)
			);
	 2. Delete foreign keys
		 alter table table name drop foreign key foreign key name;
	 3. After creating the table, add the foreign key
		 alter table table name add constraint foreign key name foreign key slave table name (foreign key column name) references master table name (main table column name);
	 4. Cascade operation (this operation is very dangerous, use it with caution)
		 1. Add cascade operation
			 Syntax: alter table table name add constraint foreign key name
					 foreign key (foreign key field name) references the main table name (main table column name) on update cascade on delete cascade;
				 - on update cascade
				 - on delete cascade cascade delete
		 2. Classification:
			 1. Cascade update: on update cascade
			 2. Cascade delete: on delete cascade
Database design
1. The relationship between multiple tables:
1. Classification
1. One-to-one (understanding): such as: person and ID
2. One-to-many (many-to-one): such as: department and employee
3. Many-to-many: such as: students and courses
2. Realize the relationship
1. One to many (many to one):
* Implementation method: create a foreign key on the more side, pointing to the primary key on the one side.
2. Many to many:
* Implementation method: the realization of many-to-many relationship requires the use of the third table. The intermediate table contains at least two fields, these two fields are used as the foreign keys of the third table, pointing to the primary keys of the two tables respectively
3. One to one:
* Implementation: You can add a unique foreign key to the primary key of the other party on either side.
2. The paradigm of database design: The main consideration is whether the data is redundant, whether there is a problem with adding new data, and whether there is a problem with deleting data.
1. Definition: The specifications that need to be followed when designing a database must follow the requirements of the following paradigm, and all the requirements of the previous paradigm must be followed.
2. Classification:
1. The first normal form (1NF): each column is an indivisible atomic data item
2. Second Normal Form (2NF): On the basis of 1NF, non-code attributes must be completely dependent on candidate codes (on the basis of 1NF, partial functional dependence of non-primary attributes on the main code is eliminated)
*Concept:
1. Functional dependency: A-->B. If the value of the attribute of A (attribute group) can be used to determine the value of the unique attribute of B, it is said that B depends on A.
2. Full functional dependency: A-->B, if A is an attribute group, the determination of the attribute value of B needs to depend on all attribute values in the attribute group A.
3. Partial functional dependence: A --> B. If A is an attribute group, the determination of the attribute value of B only needs to depend on some values in the attribute group A.
4. The transfer function depends on: A --> B, B --> C, if the value of attribute A (attribute group) is used, the value of attribute B can be determined uniquely, and the value of attribute B (attribute group) can be used to determine the uniqueness The value of the C attribute is said to be transitively dependent on A.
5. Code: If an attribute or attribute group is completely dependent on all other attributes in a table, then this attribute (attribute group) is called the code of the table.
1. Primary attribute: all attributes in the code attribute group.
2. Non-primary attributes: attributes other than the code attribute group.
3. Third Normal Form (3NF): On the basis of 2NF, any non-primary attributes do not depend on other non-primary attributes (eliminate transitive dependence on the basis of 2NF)
Database backup and restore
1. Command line:
	 1. Syntax:
		 1. Backup: mysqldump -u username -p password [database name]> save path
		 2. Restore:
			 1. Log in to the database
			 2. Create a database
			 3. Use the database
			 4. Execution file: source sql file path

 2. Graphical tool (take SQLyog as an example): Right-click the database.
Multi-table query##
1. Query syntax:
	select
			 List of column names
	form
			 Table name list
	where
		...
 2. Cartesian product
	 1. Definition: There are two sets A and B. Take all the composition of these two sets: A (number of records) * B (number of records)
	 2. To complete multi-table query, you need to eliminate useless data
 3. Classification of multi-table query:
	 1. Inner connection query:
		 1. Implicit inner join: use the where condition to eliminate useless data
		 2. Display internal connection:
			 1. Syntax:
				 select field list from table name 1 [inner] join table name 2 on condition;
		 3. Matters needing attention in inner join query:
			 1. Query data from those tables
			 2. What are the conditions
			 3. Which fields to query
	 2. Outer join query:
		 1. Classification of external connections:
			 1. Left outer connection:
				 1. Syntax:
					 select field list from table 1 left [outer] join table 2 on conditions
				 2. The left outer join queries all the data in the left table and its intersection
			 2. Right outer connection:
				 1. Syntax:
					 select field list from table 1 right [outer] join table 2 on conditions
				 2. The right outer join queries all the data in the right table and its intersection
	 3. Subquery:
		 1. Concept: nested query in query, call nested query as subquery
		 2. Classification of subqueries:
			 1. The result of the subquery is a single row and single column:
				 1. Subquery can be used as a condition, use operators to judge: >,>=,<,<=...;
			 2. The result of the subquery is multiple rows and single column:
				 1. Subquery can be used as a condition, use the operator in to judge
			 3. The result of the subquery is multi-row and multi-column:
				 1. The subquery can be used as a virtual table.
Affairs##
1. Basic introduction to things
	 1. Concept:
		 A business operation that contains multiple steps is managed by a transaction, then these operations either succeed at the same time or fail at the same time.
	 2. Operation
		 1. Start things: start transaction;
		 2. Rollback (execution error): rollback;
		 3. Submit (execution completed): commit;
	 3. Transactions in MYSQL database are automatically committed by default
		 1. Two ways of transaction commit:
			 1. Automatic submission
				 1. mysql submits automatically by default, oracle submits manually by default
				 2. A DML (addition, deletion, modification) statement will automatically commit a transaction
			 2. Manual submission
				 1. Need to open the transaction first, then submit
		 2. Modify the default commit method of the transaction:
			 1. View the default commit method of the transaction:
				 select @@autocommit; Return value: 1 means automatic submission 0 means manual submission
			 2. Modify the default commit method of the transaction
				set @@autocommit = in(0,1);

 2. Four characteristics of things
	 1. Atomicity: The smallest indivisible unit of operation that either succeeds or fails at the same time
	 2. Persistence: After the transaction is committed or rolled back, the database will save the data persistently.
	 3. Isolation: multiple transactions are independent of each other.
	 4. Consistency: The total amount of data remains unchanged before and after the transaction operation.
 3. The isolation level of things (understand)
	 1. Concept: multiple transactions are isolated and independent of each other. But if multiple transactions operate on the same batch of data, it will cause some problems, and setting different isolation levels can solve these problems.
	 2. Existing problems:
		 1. Dirty read: A transaction reads data that is not committed in another transaction.
		 2. Non-repeatable read (virtual read): In the same transaction, the data read twice is different
		 3. Phantom read: All records in a transaction operation (DML) data table, and another transaction adds a piece of data, the first transaction cannot query its own modification.
	 3. Isolation level
		 1. read uncommitted: read uncommitted
			 1. Problems: dirty read, non-repeatable read, phantom read
		 2. read committed: read committed (ORACle default)
			 1. Problems: non-repeatable reading, phantom reading
		 3. repeatable read: repeatable read (MYSQL default)
			 1. Problem: phantom reading
		 4. serializable: serialization
			 1. Can solve all problems
	 4. Note: The 4 isolation levels in the third point above are more and more secure from top to bottom, but their efficiency is getting lower and lower.
	 5. Syntax:
		 1. Database query isolation level:
			select @@tx_isolation;
		 2. Database isolation level:
			 set global transaction isolation level level string;
DCL##
1. Manage users
	 1. Add users
		 1. Syntax: create user'user name'@'host name' identified by'password';
	 2. Delete user
		 1. Syntax: drop user'username'@'hostname';
	 3. Modify user password
		 1. Syntax:
			 1. update user set password = password('new password') where user ='user name';
			 2. set password for'username'@'password' = password('new password');
		 2. Note: What to do if you forget the password of the root user:
			 1. cmd --> net stop mysql - To stop the mysql service, administrator privileges are required.
			 2. mysqld --skip-grant-tables - start mysql service without authentication
			 3. Open a new cmd window and directly enter the mysql command. You can log in successfully without entering a user name and password.
			 4. Enter the sentence to modify the user password and set a new password
			 5. Close both windows
			 6. In the task manager, close the mysqld process
			 7. Start the mysql service
			 8. Login with new password
	 4. Query users:
		 1. Steps:
			 1. Switch to mysql database
			 2. Query the user table
			 3. Note: The wildcard ‘%’ means that any host can use the root user to log in to the database.
 2. Authorization (authority management):
	 1. Query permissions
		 1. Syntax: show grants for'username'@'password';
	 2. Grant permissions
		 1. Syntax: grant permission list on database name. table name to'user name'@'password';
	 3. Withdrawal of authority
		 1. Syntax: revoke permission list on database name. table name from'user name'@'password';
#JDBCcourse notes#
##JDBC Basic Concept##
1. Concept: Java DataBase Connectivity Java Database Connectivity
2. The essence of JDBC: an officially defined set of rules for operating all relational databases, namely interfaces. Various database vendors implement this set of interfaces and provide database driver jar packages. We can use this set of interface (JDBC) programming. The code that is actually executed is the implementation class in the driver jar package.
##Quick Start##
1. Steps:
1. Import the driver jar package
2. Register the driver
3. Get the connection object Connection of the database
4. Define sql
5. Get the object that executes the sql statement Statement
6. Execute sql and receive the returned result
7. Processing result
8. Release resources
##Detailed explanation of interfaces and classes in JDBC##
1. DriverManager: Driver management object
1. Function:
1. Register the driver
1. static void registerDriver(Driver driver): Register the given driver DriverManager
2. Class.forName(“com.mysql.cj.jdbc.Driver”);
3. Note: The driver jar package after mysql5 can omit the driver registration step, and the jar will help us register the driver.
2. Get database connection
1. Method: static Connection getConnection(String url,String user,String password);
2. Parameters:
1. url: Specify the connection path
1. Syntax: jdbc:mysql://ip address (domain name): port number/database name
2. Details: If you are connecting to the local mysql server, and the default port of the mysql service is 3306, the url can be abbreviated as: jdbc:mysql:///database name;
2. user: username
3. password
2. Connection: database connection object
	 1. Function:
		 1. Get the object to execute sql
			1. Statement createStatement();
			2. preparedStatement prepareStatement(String sql);
	 2. Management affairs:
		 1. Start the transaction: void setAutoCommit(boolean autoCommit): call this method to set the parameter to false, that is, start the transaction
		 2. Roll back the transaction: void rollback();
		 3. Submit the transaction: void commit();
 3. Statement: the object to execute sql
	 1. Method:
		 1. boolean execute(String sql): can execute any sql.
		 2. int executeUpdate(String sql): execute DML (insert, delete, update) statements and DDL (create, alter, drop) statements
			 1. Return value: The number of rows affected. This return value can be used to determine whether the DML statement is executed successfully. If the return value is greater than 0, it will succeed, otherwise it will fail.
		 3. ResultSet executeQuery(String sql): execute DQL statement (selecte)
 4. ResultSet: result set object, encapsulate query results
	 1. Method:
		1. boolean next(): The cursor moves down one line and determines whether the current line is the end of the last line (whether the current line has data), if it is, it returns false, otherwise, it returns true.
		 2. Xxx getXxx (parameter): Get a single value in a row and a column
			 1. Xxx stands for data type.
			 2. Parameters:
				 1. int represents the number of the column, starting from 1
				 2. String: represents the name of the column
		 3. Note:
			 1. Use steps:
				 1. The cursor moves down one line
				 2. Determine whether there is data
				 3. Get data
			 2. Example:
				1.  while(rs.next){
				 	 };


 5. PreparedStatement (object of pre-compiled SQL statement): object to execute sql
	 1. SQL injection problem: When splicing SQL, some special keywords of SQL participate in the splicing of strings, which will cause security problems
	 2. Solve the SQL injection problem: use the preparedstatement object to solve
	 3. Pre-compiled SQL: parameter usage'? 'As a placeholder
	 4. Use steps
		  1. Import the driver jar package
 		   2. Register the driver
 		   3. Get the connection object Connection of the database
 		   4. Define SQL
	 		  1. Note: What is the SQL parameter usage? As a placeholder
		      2. For example: select * from user where username =? And password = ?;
		      3. The statement using the Statement object is: select * from user where username = + variable + and +password = + variable
 		   5. Get the PreparedStatement for executing the SQL statement
	 		  1. Call PreparedStatement Connection.preparedStatement(String SQL);
	 		  2. Note: When calling the Statement object, no parameters are passed in immediately
	 	  6. Assign a value to'?':
		 	  1. Method: setXxx (parameter one, parameter two)
		 	  2. Parameter: parameter one: the position of the question mark, parameter two: the value of the question mark, Xxx is the type of parameter two
 		   7. Execute sql and receive the returned result. There is no need to pass the SQL statement, because the SQL statement has been passed when the object to execute the sql statement is obtained.
 		   8. Processing results
 		   9. Free up resources
 	  5. PreparedStatement will be used later to complete all operations of addition, deletion, modification and inspection
	 	 1. Can prevent SQL injection
	 	 2. More efficient
##Extract JDBC tools: JDBCUtils##
1. Purpose: to simplify writing
2. Analysis:
1. Register the driver
2. Extract a method to get the connection object
1. Requirements: Don't want to pass parameters (trouble), but also to ensure the universality of the tool class.
2. Solution: Configuration file
1. Define a configuration file called jdbc.properties by yourself
2. Record in it
1. url = “”;
2. user = “”;
3. password = “”;
4. Specific contents of the file:
1. url = jdbc:mysql:///db3?serverTimezone=GMT%2B8
2. user = root
3. password = mysql
4. driver =com.mysql.cj.jdbc.Driver
3. In the future, just read this configuration file to get the corresponding value
4. Use a static code block to read the value of the configuration file, the code is as follows:
1. /**
* Use static code blocks to read configuration files
* /
static {
try {
//1. Create properties collection class object
Properties pro = new Properties();
//2. Load file
pro.load(new FileReader(“src/jdbc.properties”));
//3. Get attributes and assign values
url = pro.getProperty(“url”);
user = pro.getProperty(“user”);
password = pro.getProperty(“password”);
driver = pro.getProperty(“driver”);
//4. Register the driver
Class.forName(driver);
} catch (IOException e) {
e.printStackTrace();
} catch (ClassNotFoundException e) {
e.printStackTrace();
}
}
2. Code improvements:
1. Add a step to get the configuration file path between the first and second steps of the above code
2. The code is as follows
//2. The way to get the file in the src path ->ClassLoader
ClassLoader classloader = JDBCUtils.class.getClassLoader();
URL res = classloader.getResource("jdbc.properties");//This parameter uses src as a relative path
String path = res.getPath();//path is the physical storage address
5. The code after getting the value is as follows:
1. /*
* Get connection
* @return link object
* */
public static Connection getConnection() throws SQLException {
return DriverManager.getConnection(url,user,password);
}
	3. Extract a method to release resources
		 1. Because the resources used by DML and DQL are different, they are realized by copying, and there are two functions:
			1. (DML) /**
			      * Release resources
			     * @param stmt
			     * @param conn
			     * @return void
			    * */
   			 public static void close(Statement stmt , Connection conn){...}
			2. (DQL)  /**
					      * Release resources
					     * @param rs
					     * @param stmt
					     * @param conn
					     * @return void
					    * */
					public static void close(ResultSet rs , Statement stmt, Connection conn){...}
##JDBCControl Transaction##
1. Transaction: A business operation with multiple steps. If this business operation is managed by a transaction, these multiple steps either succeed at the same time or fail at the same time.
2. Transaction operation:
1. Start transaction
2. Submit the transaction
3. Roll back the transaction
3. Use the Connection object to manage transactions
	 1. Open the transaction: setAutoCommit(Boolean autocommit): Set the parameter to false, that is, start the transaction
	 2. Commit the transaction: commit();
	 3. Roll back the transaction: rollback();
##Database Connection Pool##
1. Definition: A database connection pool is a container (collection) that stores database connections.
2. Working process: After the system is initialized, the container is created, and some connection objects will be applied for in the container. When the user accesses the database, the link object is obtained from the container. After that, the connected object will be returned to the container.
3. Advantages:
1. Save resources
2. User access is efficient
4. Implementation:
1. Standard interface: under DataSource java.sql package
1. Method:
1. Get connection: getConnection();
2. Return the connection: If the connection object Connection is obtained from the connection pool, then call the Connection.Close() method, the connection will not be closed, but the connection will be returned.
2. Generally, we don’t implement getConnection(), it is implemented by database vendors
1. Two implementation technologies of database connection pool:
1. c3p0: Database connection pool technology
2. Druid: Database connection pool implementation technology, provided by Alibaba
5. Learn the implementation techniques of two database connection pools
1. C3p0:
1. Use steps:
1. Import the jar package c3p0-0.9.5.5.jar, mchange-commons-java-0.2.19.jar (the C3p0 package and its dependent jar packages, two in total) and mysql relative Corresponding driver jar package
2. Define the configuration file without hard coding
1. File name: c3p0.properties or c3p0-config.xml
2. Path: Put the file directly in the src directory.
3. c3p0-config.xml (usually use this file format) configuration file code is as follows:
com.mysql.cj.jdbc.Driver
jdbc:mysql://localhost:3306/db3?serverTimezone=GMT%2B8
root
mysql
				        <!-- Connection pool parameters-->
				        <property name="initialPoolSize">5</property>
				        <property name="maxPoolSize">30</property>
				         <!-- Change maxPoolSize from 10 to 30 and not report: A client timed out while waiting to acquire a resource from com.mchange.v2.resourcepool.BasicResourcePool@19bb07ed timeout at awaitAvailable()-->
				        <property name="checkoutTimeout">3000</property>
				    </default-config>

				    <named-config name="otherc3p0">
				         <!--Connection parameters-->
				        <property name="driverClass">com.mysql.cj.jdbc.Driver</property>
				        <property name="jdbcUrl">jdbc:mysql://localhost:3306/db3?serverTimezone=GMT%2B8</property>
				        <property name="user">root</property>
				        <property name="password">mysql</property>

				         <!-- Connection pool parameters-->
				        <property name="initialPoolSize">5</property>
				        <property name="maxPoolSize">8</property>
				        <property name="checkoutTimeout">1000</property>
				    </named-config>
				</c3p0-config>
			 3. Create a core object: the database connection pool object CombopooledDataSource
				 // 1. Create a database connection pool object
   						  DataSource ds = new ComboPooledDataSource();
			 4. Get the default configuration connection: getConnection();
				 // 2. Get the connection object
    					  Connection conn = ds.getConnection();
			 5. If you want to get other configuration connections, use: CombopoolDataSource.getConnection (the corresponding name of the configuration file);
	2. Druid:
		 1. Steps:
			 1. Import the jar package
			 2. Define the configuration file
				 1. In the form of properties
				 2. It can be called by any name and can be placed in any directory
				 3. Note:
					 1. Compared with c3p0: the configuration file of c3p0 must have the specified name and be placed in the specified root directory (ie src), but c3p0 can have two file formats.
				 4. The specific content of the configuration file
					  #Database Drive
					driverClassName=com.mysql.cj.jdbc.Driver
					 #Database connection path, link to the local host can be url=jdbc:mysql:///db3
					url=jdbc:mysql://127.0.0.1:3306/db3?serverTimezone=GMT%2B8
					 #Database user
					username=root
					#Database Password
					password=mysql
					 #Database initial connection number
					initialSize=5
					 #The maximum number of database connections
					maxActive=10
					 #Set connection timeout (maximum waiting time)
					maxWait=3000
			 3. Load the configuration file: Properties
				 1. Specific content
					 Properties pro = new Properties();
				     InputStream is = DruidDemo1.class.getClassLoader().getResourceAsStream("Druid.properties");
				     pro.load(is);
			 4. Obtain the database connection pool object: Obtain through the factory: DruidDataSourceFactory
				 1. Specific content:
					DataSource ds= DruidDataSourceFactory.createDataSource(pro);
			 5. Get connection: getConnection();
				 1. Specific content:
					Connection conn =  ds.getConnection();
		 2. Define Druid Tool Class
			 1. Define a class, the class name: JDBCUtils
			 2. Provide static code blocks to load configuration files and initialize connection pool objects]
				 1. The code is as follows (catch the exception thrown):
					private static DataSource ds = null;
					static{
						 // 1. Load the configuration file
			            Properties pro = new Properties();
			            InputStream is = JDBCUtils.class.getClassLoader().getResourceAsStream("Druid.properties");
			            pro.load(is);
			             // Get DetaSource
			            ds = DruidDataSourceFactory.createDataSource(pro);
					}
			 3. Provide method
				 1. Get connection method: get connection through database connection pool
				 2. Free up resources
				 3. How to get the connection pool
##spring JDBC:JDBC Temp##
1. Simple encapsulation of JDBC provided by spring framework. Provides the development of a JDBCTemplate object
2. Steps:
1. Import the jar package
2. Create a JDBCTemplate object. Depends on the data source DataSource
1. Example: JdbcTemplate template = new Jdbctemplate(new DataSource);
2. Example: JdbcTemplate template = new JdbcTemplate(JDBCUtils.getDataSource); – JDBCUtils class is a tool class defined for Druid
3. Call the method of jdbcTemplate to complete the CRUD operation.
1. updateXXX(): Execute DML statements, that is, add, delete and modify operations
2. queryXXX():
1. queryForMap(): Query the result and encapsulate the result set as a map collection, use the column name as the key, and the value as the value, and encapsulate the record as a map collection.
1. Note: The length of the result set of this method query can only be 1
2. queryForList(): query the result and encapsulate the result set as a list set
1. Note: This method encapsulates each record as a Map collection, and then encapsulates the Map collection in a List collection.
3. query(): query the result and encapsulate the result as a JavaBean object
1. There are two implementation methods:
1. I implemented the RowMapper<> class by myself. It can be seen that although "query all records and encapsulate them in the List collection of Account objects" is implemented, this function does not reduce the amount of code.
/**
* The part of the commented code is the part that implements the RowMapper class and realizes the function
* */
// List list = template.query(“select * from account”, new RowMapper() {
// private Account account = null;
//
// @Override
// public Account mapRow(ResultSet rs, int i) throws SQLException {
// account = new Account();
//
// int id = rs.getInt(“id”);
// String book_name = rs.getString(2);
// int balance = rs.getInt(3);
// account.setId(id);
// account.setBook_name(book_name);
// account.setBalance(balance);
// return account;
// }
// }
// );
// for(Account account:list){
// System.out.print(account.getId()+"");
// System.out.print(account.getBook_name()+"");
// System.out.println(account.getBalance());
// }
// return account;
2. Use the BeanPropertyRowMapper<type> (type.class) class provided by JDBCTemplate to implement, which shows that the amount of code is greatly reduced
List list = template.query(“select * from account”, new BeanPropertyRowMapper(Account.class));
4. queryForObject: query results and encapsulate the results as objects, generally used to query aggregate functions.
1. Example: Long total = template.queryForObject(sql statement, Long.class);
#HTML、CSS、JavaScript#
##HTML:Build a basic webpage##
1. Overview of web concepts
1. JavaWeb
1. Use Java language to develop Internet-based projects
2. Software architecture:
1. C/S: Client/Server Client/Server
1. Definition: There is a client program in the user's local area, and a server program in the remote area
2. Advantages: good user experience
3. Disadvantages: troublesome development, installation, deployment, and maintenance
2. B/S: Browser/Server browser/server side
1. Definition: Only one browser is needed, and users can access different server programs through different URLs
2. Advantages: simple development, installation, deployment and maintenance
3. Disadvantages:
1. If the application is too large, the user experience will be slightly worse
2. The hardware requirements are too high
3. Detailed explanation of B/S architecture
1. Resource classification:
1. Static resources: resources released using static web development technology
1. Features:
1. All users will get the same result. Such as: text, image, HTML, CSS, JavaScript.
2. If the user requests a static resource, the server will directly send the static resource to the browser. The browser has a built-in static resource parsing engine that can display the static resource.
2. Dynamic resources: resources released using dynamic web development technology
1. Specific:
1. Each user may see different results. Such as: jsp/servlet,php,asp...
2. If the user requests a dynamic resource, the server will execute the dynamic resource, convert it to a static resource, and send it to the browser.
3. All, if we want to learn dynamic resources, we must first learn static resources.
4. Static resources we want to learn:
1. HTML: used to build a basic web page and display the content of the page
2. CSS: used to beautify the page, page layout
3. JavaScript: Control the elements of the page to give the page some dynamic effects
2. HTML
1. Concept: the most basic web development language
1. Hyper Text Markup Language Hyper Text Markup Language
1. Hypertext: Hypertext is a web-like text that uses hyperlinks to organize text information in various spaces.
2. Markup language: language composed of tags
1. Note: Markup language is not a programming language
2. Quick start
1. Syntax
1. The suffix of the html document is .html or .htm
2. Label classification:
1. Containment tags: there are start and end tags, such as
2. Self-closing and tags: start tag and end tag together, such as
3. Tags can be nested:
1. Note: The tags must be nested correctly, you cannot be me and you are me.
4. Attributes can be defined in the opening tag. The attribute is composed of key-value pairs, and the value needs to be enclosed in quotation marks (single and double quotation marks are acceptable)
5. html tags are not case sensitive, lowercase is recommended
3. Label learning:
1. File tags: the most basic tags that make up html
1. html: the root tag of the html document
2. head: head tag. Used to specify some attributes of html documents and introduce external resources
3. title: Title tag
4. body: body tag
5. <!DOCTYPE>: The document is defined in html5 as an html document
2. Text tags: tags related to text
1.
To
: Title tag, the font size gradually decreases from 1 to 6
2.
: Paragraph tags
3.
: Wrap
4.
: Show a horizontal line
5. : Bold font
6. : Italic font
7. (Abandoned by h5): font label
8.
3. Picture tag
1.
2. How to set the path under src:
1. Relative path:
1. ./: represents the current directory
2. …/: represents the upper level directory
2. Absolute path: physical path
4. List tag
1. Ordered list:
1.
-
: Define an ordered list
- : Define the items of the list
2. Unordered list:
1.-
: Define an unordered list
- : Define the items of the list
5. Link label
1. :
1. Attributes:
1. href: Specify the URL (Uniform Resource Locator) to access the resource;
2. Target: Specify the way to open the window, the value is "_self" (default value): Open in the current window, the value is: "_blank": Open the page in a new page
6. div and span
1. div: each div occupies a whole line, block-level label
2. span: text messages are displayed on one line, inline tags, inline tags
7. Form label
1.: Definition table
1. Attributes:
1. width: specifies the width of the table
2. border: specifies the width of the table border.
3. cellpadding: specifies the space between the edge of the cell and its content
4. cellspacing: Specify the space between cells.
5. bgcolor: specifies the background color of the table
6. align: specifies the alignment of the table relative to surrounding elements
2.: Definition line
3.: Define the header content in the table.
7. :Define the main content in the form.
8. :Define the content of the table note in the table (footnote)
9. Note: Once the content wrapped by three tags of 678, it will only be displayed in the order of head, body and foot, regardless of the order in which the code is written
8. html comments:
1.
9. Semantic tags: In order to improve the readability of the program, some tags are provided in html5
1.
2.
10. Form tag: used to collect data entered by the user, and then interact with the server
1. Tags used:
1.: Define the HTML form for user input.
1. Attributes (given in the form of key-value pairs):
1. action (URL): specify where to send form data when submitting the form
2. method (get or post, a total of 7 types, these two are commonly used): specify the HTTP method used to send form-data
1. get:
1. The request parameters will be displayed in the address bar and encapsulated in the request line.
2. The length of the request parameter is limited
3. The get request is not safe
2. post:
1. The request parameters will not be displayed in the address bar, but will be encapsulated in the request body. (Explain the meaning when using HTTP protocol)
2. The length of the request parameter is unlimited
3. Post request security
3. Note: To be submitted, the data in the form (form item) must specify its name attribute
2. Form item label:
1.: Define the input control
1. Attributes (key-value pairs):
1. type(button,checkbox,file,hidden,image,password,radio,reset,submit,text): Specifies the type of input element.
1. The meaning of various types:
1. button: Define a clickable button
2. checkbox: Define the check box.
1. The usage is the same as radio
2. The checked attribute, you can specify the default value
3. file: Define the input field and "Browse" button for file upload.
4. hidden: Define hidden input fields.
5. image: Define the submit button in the form of an image
6. password: Define the password field. The characters in this field are masked.
7. radio: define radio buttons
1. To use multiple options to achieve the effect of single selection, the name attribute value of the input must be the same
2. Generally, each radio button will be provided with a value attribute to specify the value submitted after it is selected
3. The checked attribute, you can specify the default value
8. reset: Define the reset button. The reset button will clear all data in the form.
9. submit: Define the submit button. The submit button will send the form data to the server
10. text: Define a single-line input field in which the user can enter text. The default width is 20 characters.
2.: Define the selection list (drop-down list).
1. Child element:
3.: Define a multi-line text input control (text field).
4.: Define cell
1. Attributes used to merge cells:
1. colspan: specifies the number of columns the cell can span
2. rowspan: specifies the number of rows that the cell can span
4.: Define header cell
1. Attributes used to merge cells:
1. colspan: specifies the number of columns the cell can span
2. rowspan: specifies the number of rows that the cell can span
5.: Define table title
6.
2. - : Define the items of the list
2.
##CSS:Used to beautify the page, page layout##
1. Concept: Cascading Style Sheets: Cascading Style Sheets
1. Cascade: Multiple styles can be applied to the same html element and take effect at the same time
2. Benefits:
1. Powerful function
2. Separate content display and style control
1. Reduce coupling and decoupling
2. Make division of labor easier
3. Improve development efficiency
3. Use of CSS: Combination of CSS and HTML
1. Inline style (not recommended because it is not decoupled)
1. Use the style attribute to specify the css code in the tag
2. Internal style
1. Define the style tag inside, and the content of the tag body of the style tag is the css code
3. External style
1. Define css resource file
2. Define the link tag in the head tag in the html file where you want to use a css file, and import external resource files
4. Note:
1. In these three ways of using css files, the scope of css files increases in turn
2. Except for the first one that is not commonly used, the rest are often used
3. css syntax:
1. Format:
selector{
Attribute name 1: Attribute value 1;
…
}
1. The selector is used to filter elements (tags) with similar characteristics
2. Note: Use ";" to separate each pair of attributes, and the last pair of attributes can not add ";".
4. Selector:
1. Basic selector
1. id selector: select elements with specific id attribute values, it is recommended that the id value be unique in an html page
1. Syntax:
#id{}
2. Element selector: select elements with the same tag name
1. Syntax:
tag name{}
2. Note: id selector has higher priority than element selector
3. Class selector: select elements with the same class attribute value
1. .class attribute value{}
4. The three selector priorities: id>class> element
2. Extension selector
1. Select all elements
1. Syntax:{}
2. Union selector
1. Syntax: selector 1, selector 2{}: select all selector 1 elements and all selector 2 elements
3. Sub selector:
1. Syntax: selector 1 selector 2{}: select all selector 2 elements inside selector 1 element
4. Parent selector:
1. Syntax: Selector 1> Selector 2{}: select all selector 2 elements whose parent element is selector 1
5. Attribute selector: select element name, attribute name=attribute value element
1. Syntax: element name [attribute name="attribute value"]{}
6. Pseudo-class: select the state that some elements have
1. Syntax: Element: State{}
2. For example:As an example
1. a:link: select all unvisited links
2. a:visited: select all the links that have been visited
3. a:active: select active link
4. a:hover: select the link on which the mouse pointer is located
5. Attributes:
1. Font, text:
1. font-size: Specifies the font size of the text.
2. color: Set the color of the text.
3. text-align: Specifies the horizontal alignment of the text
4. line-height: Set the line height.
2. Background:
1. background: set all background attributes in one statement
3. Border:
1. border: Set all border attributes and composite attributes in one declaration
4. Dimensions:
1. height: Set the element height.
2. width: Set the width of the element.
5. Box model: control layout
1. margin: set all margin attributes in one statement
2. padding: set all padding attributes in one statement
1. Note: By default, the inner margin will affect the size of the entire box
2. Solution: box-sizing: border-box; set the attributes of the box so that width and height are the size of the final box.
3. float: float
1. left:
2. right:
##JavaScript##
1. Basic javascript:
1. Concept: client-side scripting language
1. Run in the client browser. Every browser has a javascript parsing engine
2. Script language: it can be parsed and executed directly by the browser without compiling
3. Javascript = ECMAScripte + JavaScript(BOM+DOM)
2. Function:
1. It can be used to enhance the interaction process between users and html pages, and can control html elements to give the page some dynamic effects and enhance user experience.
3. ECMAScript: Standard for client scripting language
1. Basic syntax
1. The combination of javascript and html
1. Internal js:
1. Definition
##XML##
1. Concept: Extensible Markup Language Extensible Markup Language
1. Extensible: XML tags are all customizable.
2. Function:
1. Store data:
1. Configuration file
2. Transmission in the network
3. The difference between XML and HTML:
1. XML tags are custom, and HTML tags are predefined
2. XML has strict syntax, but HTML syntax is loose
3. XML is for storing data, and HTML is for displaying data
2. Syntax
1. Quick start:
2. Basic syntax:
1. The suffix of the xml document is ".xml"
2. The first line of xml must be defined as a document declaration
3. There is one and only one root tag in the xml document
4. The attribute value must be enclosed in quotation marks (single and double quotation marks are acceptable)
5. The label must be closed correctly (self-closing label or containment label)
6. xml tag name is case sensitive, html is not case sensitive.
3. Components
1. Document statement
1. Format: <?xml attribute list ?>
2. Attribute list:
1. version(1.0): version number, required attribute
2. encoding: encoding method, tells the parsing engine the character set used by the current document, the default value: ISO-8859-1.
3. standalone: Is it independent
1. Value:
1. yes: do not rely on other files
2. no: rely on other files
2. Instructions (understand): used in conjunction with CSS
1. <?xml=stylesheet type="text/css" href="a.css"?> (introducing external css style)
3. Label: custom label name
1. Label naming rules
1. The name can contain letters, numbers and other characters
2. The name cannot start with a number or punctuation
3. The name cannot start with the characters "xml" (or XML, Xml)
4. The name cannot contain spaces
4. Attributes
1. The id attribute value is unique
5. Text:
1. Writing of special characters:
1. Go to w3c to view the escape character corresponding to the special character
2. Use the CDATA area (the data defined in this area will be displayed as it is)
1. Example:
<![CDATA[DATA]]>
3. Parse XML:
1. Requirements as a user of the framework:
1. Able to introduce constraint documents in xml
2. Able to easily read the constraint file
2. Classification of restraint technologies: stipulate the writing rules of xml documents
1. DTD: A simple constraint technology, the dtd file extension is ".dtd"
1. Import dtd document into xml
1. Internal dtd: define the constraint rules in the xml document
1. Not commonly used.
2. External dtd: define the constraint rules in an external dtd file
1. Local:
2. Network:
2. Disadvantages:
The dtd constraint cannot constrain the text content of the element.
2. Schema: A complex constraint technology, the file extension is ".xsd";
3. Analysis: manipulate the xml document, read the data in the document into the memory
1. There are two ways to manipulate xml documents:
1. Parse (read): read the data in the document into the memory
2. Write: Save the data in the memory to the xml file for persistent storage.
2. Ways to parse xml (two ideas):
1. DOM (server-side use): Load the markup language document into the memory at one time, forming a dom tree in the memory
1. Advantages: easy to operate, all CRUD operations can be performed on the document
2. Disadvantage: memory consumption (occupying memory)
2. SAX (for mobile use): read line by line, based on event-driven
1. Advantages: Does not occupy memory
2. Disadvantages: Can only read the content, cannot add, delete or modify.
3. Common parsers for xml
1. JAXP: The parser provided by sun supports both dom and sax ideas.
2. DOM4J: a very good parser
3. Jsoup:jsoup is a Java HTML parser that can directly parse a URL address and HTML text content. It provides a very labor-saving API, which can retrieve and manipulate data through DOM, CSS and operation methods similar to jQuery, because it is very good and it is also used to parse xml files.
4. PULL: The built-in parser of the Android operating system, sax mode.
4. JSoup:
1. Quick start:
1. Steps:
1. Import the jar package
2. Get the Document object
3. Get the corresponding tag (Element object)
4. Get data
1. Code:
// Get the path of the student.xml file
String path = XMLDemo1.class.getClassLoader().getResource(“Students.xml”).getPath();
// parse the xml document, load the document into memory, and get the dom tree
Document document = Jsoup.parse(new File(path),“utf-8”);
// Get the "name" element object combination
Elements elements = document.getElementsByTag(“name”);
// Get the Element object of the first name
Element element = elements.get(0);
// Get text information and print
String text = element.text();
System.out.println(text);
2. Use of objects:
1. Jsoup: Tool class, which can parse html or xml documents and return Document.
1. org.jsoup.Jsoup
2. Method:
1. static Document parse(File in, String charsetName): parse xml or html files.
2. static Document parse(String html): Parse xml or html string.
3. static Document parse(URL url, int timeoutMillis): Obtain the specified html or xml document object through the network path.
2. Document: Document object, dom tree in memory
1. Method to get Element object
1. public Elements getElementsByTag(String tagName): Get the collection of element objects according to the tag name
2. Elements getElementsByAttribute(String key): Get the collection of element objects according to the attribute name.
3. Elements getElementsByAttributeValue(String key, String value): Obtain a collection of element objects according to the attribute name and corresponding attribute value.
4. Element getElementById(String id): Get the unique element object according to the id attribute value.
3. Elements: A collection of Element objects. Can be used as an ArrayList.
4. Element: Element object
1. Get the child element object
1. public Elements getElementsByTag(String tagName): Get the collection of element objects according to the tag name
2. Elements getElementsByAttribute(String key): Get the collection of element objects according to the attribute name.
3. Elements getElementsByAttributeValue(String key, String value): Obtain a collection of element objects according to the attribute name and corresponding attribute value.
4. Element getElementById(String id): Get the unique element object according to the id attribute value.
2. Get the attribute value:
1. String attr(String attributeKey): Get the attribute value through the attribute name, the attribute name is not case sensitive.
3. Get text content
1. String text(): Get plain text content
2. String html(): Get all the content of the tag body (including the tag and text content of the subtag).
5. Node: node object
1. It is the parent class of Document and Element.
3. Shortcut query method
1. selector: selector
1. Method:
1. Elements select(String cssQuery)
2. Syntax:
1. Refer to Class Selector, org.jsoup.select.Selector in jsoup documentation
2. XPath: XML Path Language (XML Path Language), it is a language used to determine the location of a certain part of an XML document.
1. XPath using Jsoup requires additional import of jar packages.
2. Query the w3c reference manual and use xpath syntax to complete the query.
##Web Development Introduction Knowledge##
0. Review of web related concepts
1. Software architecture:
1. C/S: Client/Server
2. B/S: browser/server
2. Resource classification:
1. Static resources: html, css, javascript
2. Dynamic resources
3. Three elements of network communication
1. ip: the unique identification of the electronic device in the network
2. Port: the unique identification of the software (application) in the electronic device [0,65535]
3. Transmission protocol: the format of data transmission.
1. Basic protocol:
1. tcp: security protocol, three-way handshake, slightly slower.
2. udp: Insecure protocol, slightly faster.
1. Web server software: tomcat
1. Server: a computer with server software installed
2. Server software: able to receive user requests, process requests, and respond.
3. Web server software: able to receive user requests, process requests, and respond.
1. In the web server software, web projects can be deployed, allowing users to access these projects through a browser.
4. Several common java-related web server software
1. webLogic: oracle, a large-scale javaEE server, supports all javaEE specifications, for a fee.
1. javaEE is the sum of the technical specifications used by the java language in enterprise-level development, which stipulates a total of 13 major specifications.
2. webSphere: IBM, a large-scale javaEE server, supports all javaEE specifications, for a fee.
3. JBOSS: JBOSS, a large-scale javaEE server, supports all javaEE specifications and charges.
4. TOMCAT: Apache Foundation, a small and medium-sized JavaEE server, only supports a small number of JavaEE specification servlet/jsp. Open source and free.
5. tomcat: web server software
1. Download
2. Installation: just unzip the compressed package.
1. Note: It is recommended not to have Chinese characters and spaces in the installation directory.
2. The directory structure of tomcat:
1. bin: executable file
2. conf: configuration file
3. lib: dependent jar package
4. logs: log file
5. temp: temporary file
6. webapps: store web projects
7. work: store runtime data
3. Uninstall: delete the decompressed file.
4. Start:
1. Find bin/startup.bat and click to run the file.
2. Access: Enter the domain name and port number in the browser
3. Possible problems:
1. A black window flashes past
1. Reason: JAVA_HOME environment variable is not configured correctly
2. Solution: Configure the environment variable of JAVA_HOME correctly
2. Startup error
1. After starting tomcat, start another tomcat service, an error will be reported.
1. Solution
1. Brute force: find the process occupying the port number and kill it
1. Enter in cmd: netstat -ano to view the occupied port number
2. Gentle: modify the port number you need
1. Find the conf/server.xml file
2. Generally, the port number of tomcat will be changed to 80, 80 is the default port number of http protocol
1. Benefit: There is no need to enter the port number when visiting.
5. Close
1. Normal shutdown:
1. Click to run bin/shutdown.bat
2. Combination key: ctrl+c
2. Forced close: Click the close button of cmd
6. Configuration
1. How to deploy the project
1. Just put the project directly in the webapps directory.
1. Project access path: virtual directory
2. Simplified deployment: Put the project into a war package, place the war package in the webapps directory, and it will be automatically decompressed when it is placed under webapps. After you delete the war package, it will also automatically delete the file it automatically decompressed.
2. Modify conf/server.xml
1. Configure in the tag body
1.
3. Create an xml file with any name in conf\Catalina\localhost, and write in the file:
1. Note: The current virtual directory is: the name of the xml file.
2. Static projects and dynamic projects
1. Directory structure of java dynamic project:
1. The root directory of the project
1. WEB-INF directory
1. web.xml: core configuration file of web project
2. classes directory: the directory where bytecode files are placed.
3. lib directory: place dependent jar packages.
3. Integrate Tomcat into IDEA, create a javaEE project, and deploy the project.
2. Getting started with Servlet
	 1. Concept: server applet, a small program running on the server side.
		 1. Servlet is an interface that defines the rules for java classes to be accessed by the browser (tomcat recognition).
		 2. In the future, we will customize a class to implement the servlet interface and override the method.
	 2. Servlet quick start
		 1. Create a javaEE project
		 2. Define a class to implement the servlet interface
		 3. Implement the abstract method in the interface
		 4. Configure the servlet
			 1. Code implementation:
				<servlet>
			         <servlet-name>Name it yourself</servlet-name>
			         <servlet-class>The path of the servlet class</servlet-class>
			    </servlet>
			    <servlet-mapping>
			         <servlet-name> and name it yourself</servlet-name>
			         <url-pattern>Virtual Directory</url-pattern>
			    </servlet-mapping>
		 5. The execution principle of the servlet class
			 1. When the server receives the request from the client browser, it will parse the request URL path to obtain the resource path of the accessed servlet.
			 2. Look for the web.xml file, and check whether the content of the <url-pattern> tag is the same as the servlet resource path.
			 3. If there is, find the corresponding <servlet-class> full class name.
			 4. Tomcat will load the bytecode file into memory and create its object
			 5. Call its method.
		 6. Methods in servlet (servlet life cycle):
			 1. Created: execute the init method only once
				 1. When is the servlet created: By default, the servlet is created when it is accessed for the first time. We can configure when the servlet is created: in the <servlet> body of the web.xml file.
					 1. Created when first visited:
						 <load-on-startup> body value is negative
					 2. Created when the server starts:
						 <load-on-startup> body value is positive
				 2. The init method of the servlet is executed only once, indicating that a servlet has only one object in the memory, and the servlet is a singleton.
					 1. Because it is a singleton, when multiple users access at the same time, there may be thread safety issues
					 2. The method to solve the thread safety problem: try not to define member variables in the servlet method, even if the member variables are defined, do not modify their values.
			 2. Provide service: execute service method, execute multiple times
				 1. Each time the servlet is accessed, the service method will be called once.
			 3. Destroyed: execute the destroy method only once
				 1. Execute when the servlet is destroyed, and when the server is shut down, the servlet is destroyed.
				 2. The destroy method will be executed when the server is shut down normally.
				 3. The destroy method is executed before the servlet is destroyed, and is generally used to release resources.
	3. servlet3.0:
		 1. Benefits: Support annotation configuration, you don't need to use web.xml file configuration.
		 2. Implementation steps:
			1. Create a javaEE project, choose a servlet version above 3.0, you don’t need to create web.xml
			 2. Define a class to implement the servlet interface
			 3. Copy method
			 4. Use the "@webServlet" annotation on the class for configuration.
	 4. IDEA and tomcat related configuration
		 1. Idea will create a separate configuration file for each tomcat deployed project
			 1. View the log of the console: Using CATALINA_BASE: "C:\Users\john\.IntelliJIdea2019.3\system\tomcat\_XMLDemoJ"
		 2. Workspace project and web project deployed by tomcat
			 1. What tomcat really visits is "tomcat deployed web project", "tomcat deployed web project" corresponds to all resources in the web directory of "workspace project"
			 2. The resources in the WEB-INF directory cannot be directly accessed by the browser
		 3. How to breakpoint debugging in tomcat: just start tomcat in debug mode, the breakpoint method is the same.
###servlet HTTP Protocol Request###
1. servlet (I have learned the first 5 in the previous section, and learn from point 6)
1. Concept
2. Steps
3. Implementation principle
4. Life cycle
5. servlet3.0 annotation configuration
6. Servlet architecture
1. Interface Servlet has two implementation classes (parent)
1. GenericServlet - abstract class (sub)
2. HttpServlet - abstract class (grandchild)
			2. GenericServlet: The other methods in the servlet interface are implemented by default, and only the service() is abstracted;
			 3. HttpServlet: encapsulation of the Http protocol to simplify operation
				 1. Define the class to inherit HttpServlet
				 2. Copy doGet()/doPost();
	 7. Servlet related configuration
		 1. urlpatten: Servlet access path
			 1. A Servlet can define multiple access paths
			 2. Path definition rules
				1. /XXX
				 2. /XXX/XXX: Multi-layer path, directory structure
				 3. *.do: Customized extension "*.*", cannot add / before it
2. http protocol
	 1. Concept: Hyper Text Transfer Protocol
		 1. Transmission protocol: defines the format of the data sent when the client and server communicate.
		 2. Features of http protocol:
			 1. Advanced protocol based on TCP/IP
			 2. The default http port number is: 80
			 3. Based on request/response model: one request corresponds to one response
			 4. http is stateless: each request is independent of each other and cannot exchange data.
		 3. Historical version:
			 1. 1.0: A new connection will be established for each request response
			 2. 1.1: Multiplexing connection
		 4. Request message data format
			 1. Composed of four parts
				 1. Request line
					 1. Request method Request url Request protocol/version
					 2. Example: GET/login.html HTTP/1.1 (visit login.html)
					 3. Request method: There are 7 request methods for HTTP protocol, 2 commonly used:
						1. GET:
							 1. The request parameters are in the request line (after the url).
							 2. The requested URL length is limited.
							 3. Relatively unsafe
						2. POST:
							 1. The request parameters are in the request body.
							 2. The requested URL length is unlimited
							 3. Relatively safe.
				 2. Request header
					 1. Request header name 1: request header value 1, request header value 2...
					 2. The request header is given in key-value pair format
					 3. Common request headers:
						 1. User-Agent: The browser tells the server the information about the browser itself, and the header information can be obtained on the server side to solve the compatibility problem of the browser.
						 2. Accept: Tell the server what file format I can parse
						 3. Accept-Language: Tell the server which language environment I can support.
						 4. Accept Encoding: Tell the server which compression format I can support
						5. Referer:http://localhost/login.html
							 1. Tell the server where I (current request) comes from
							 2. Function:
								 1. Anti-theft chain:
								 2. Statistics:
				 3. Request a blank line
					 1. Blank line (separate the request header and body of the POST request)
				 4. Request body
					 1. The get method has no request body
					 2. Post request body
						 Key 1 = value 1
						 Key 2 = value
						 Key 3 = value 3
					 3. Encapsulate the request parameters of the POST request message.
				 5. String format:
					 <!-- Request line-->
					GET/login.html HTTP/1.1
					 <!-- Request header-->
					Accept:	text/html,application/xhtml+xm…ml;q=0.9,image/webp,*/*;q=0.8
					Accept-Encoding:	gzip, deflate, br
					Accept-Language	:zh-CN,zh;q=0.8,zh-TW;q=0.7,zh-HK;q=0.5,en-US;q=0.3,en;q=0.2
					Cache-Control:	max-age=0
					Connection:	keep-alive
					Cookie:	BAIDUID=8EF4289E886E012FFEB314…_21089_26350; BD_UPN=13314352
					Host:	www.baidu.com
					Upgrade-Insecure-Requests:	1
					User-Agent:	Mozilla/5.0 (Windows NT 6.1; W…) Gecko/20100101 Firefox/72.0
					 <!--Request line-->

					 <!--Request body-->
					 Key 1 = value 1
					 Key 2 = value
					 Key 3 = value 3
		 5. Response message data format
3. request
	 1. The principle of request and response objects
		 1. The request and response are created by the server, we will use them
		 2. The request object is to get the request message, and the response is to set the response message.
	 2. Request object inheritance architecture
		 1. ServletRequest (parent)-interface
			 1. HttpServletRequest (child)-interface
				 1. org.apache.catalina.connector.RequestFacade (grandchild)-class (tomcat implementation)
	 3. Request function:
		 1. Get request message data
			 1. Get request line data
				 1. Method: GET /day14/demo1?name=zhansan HTTP/1.1
					 1. Get request method: GET
						1. String getMethod()。
					 2. Get the virtual directory: /day14
						1. String getContextPath()
					 3. Get the Servlet path: /demo1
						1. String getServletPath()
					 4. Get the request parameters in the get method: name=zhansan
						1. String getQueryString()
					 5. Get the requested URI: /day14/demo1
						 1. String getRequestURI(); return value: /day14/demo1
						 2. StringBuffer getRequestURL(); Return value: http://localhost//day14/demo1
						 3. The difference between the two methods:
							 1. URL: Uniform Resource Locator
							 2. URI: Uniform Resource Identifier
							 3. URI is a collection of a certain type of URL
					6. Get the agreement and version number
						1.   String getProtocol()
					 7. Get the ip address of the client
						1. String getRemoteAddr()
			 2. Get request header data
				 1. Method:
					 1. String getHeader(String name): Get the value of the request header by the name of the request header
					 2. Enumeration<String> getHeaderNames(): Get the names of all request headers.
			 3. Get request body data
				 1. Request body: Only the POST request method has a request body, and the request parameters of the POST request are encapsulated in the request body.
				 2. Steps:
					 1. Get the stream object (because http encapsulates the request body into a stream object)
						 1. BufferedReader getReader(): Get character input stream, only manipulate character data
						 2. ServletInputStream getinputstream(): Obtain byte input stream, can operate all types of data, explain when file upload knowledge points.
					 2. Then the data from the stream object
		 2. Other functions
			 1. Get request method (general method): Whether it is a get or post request method, the following methods can be used to obtain parameters
				 1. String getParameter(String name): Get the parameter value according to the parameter name
				 2. String[] getParameterValues(String name) gets the parameter value array according to the parameter name
				 3. Enumeration<String> getParameterNames(): Get all requested parameter names
				 4. Map<String,String> getParameterMap(): Get the map collection of all parameters
				 5. Frequently encountered problems when obtaining request parameters (Chinese garbled characters):
					 1. Get method: Tomcat8 has solved the garbled problem of get method.
					 2. Post method: garbled
						 1. Solution: request.setCharacterEncoding("encoding method (same as the encoding format on the html page)");
			 2. Request forwarding (forwarding): a way to redirect resources inside the server
				 1. Steps
					 1. Obtain the request forwarder object through the request object: RequestDispatcher getRequestDispatcher(String path), path: the resource path to be accessed
					 2. Use RequestDispatcher object to forward: void forward(ServletRequest request, ServletResponse response)
				 2. Features:
					 1. The path of the browser address bar does not change.
					 2. It can only be forwarded to resources inside the current server, and cannot access external resources.
					 3. Forwarding is a request
			 3. Sharing data
				 1. Domain object: an object with a scope that can share data within the scope.
				 2. Request domain: represents the scope of a request, and is generally used to share data among multiple resources requested for forwarding.
				 3. Methods provided by the request domain:
					 1. void setAttribute(String name ,Object obj): store data
					 2. Object getAttribute(String name): Get the value by key.
					 3. void removeAttribute(String name): Remove key-value pairs by key.
			 4. Get the ServletContext object
				1. ServletContext getServletContext()
		 3. BeanUtils tool class: used to encapsulate JavaBeans and simplify data encapsulation (relevant jar packages need to be imported)
			 1. javaBean: standard java class
				 1. Requirements
					 1. The class must be modified by public
					 2. The constructor of the null parameter must be provided
					 3. Member variables must be decorated with private
					 4. Provide setter() and getter() methods.
				 2. Function: package data
			 2. Concept:
				 1. Member variables:
				 2. Attribute: the product of getter() and setter() interception
					 1. For example: getUsername()->Username->username;
			 3. Method:
				1. setProperty():
				2. getProperty():
				 3. populate(Object obj, Map map): encapsulate the key-value pair information of the map collection into the corresponding JavaBean object.
###HTTP protocol: response message Response object ServletContext object###
1. HTTP protocol: response message
1. HTTP protocol:
1. Request message (described in the previous section): data sent by the client to the server
1. Data format:
1. Request line
2. Request header
3. Request a blank line
4. Request body
2. Response message: data sent by the server to the client
1. Data format:
1. Response line
1. Composition: Protocol/Version Response status code Status code description
1. For example: HTTP/1.1 200 OK
2. Response status code: The server tells the client browser the status of this request and response.
1. Classification: Status codes are all 3 numbers
1. 1xx: The server receives the client message, but the reception is not completed. After waiting for a period of time, it sends a 1xx status code to ask the browser whether there is still data to send.
2. 2xx: This request and response are successful
3. 3xx: Redirect. Represents 302 (redirect), 304 (access to cache).
4. 4xx: Client error. Representative: 404 (the request path has no corresponding path), 405 (the request method (get or post) has no corresponding method (doPost(), deGet())
5. 5xx: server-side error. Representative: 500 (an exception occurred inside the server)
2. Response header
1. Format (key-value pair): header name 1: value 1
2. Common response headers:
1. Content-Type: The server tells the client the data format and encoding format of the response body
2. Content-disposition: The server tells the client to open the response body data in what format
1. Value:
1. in-line: default value, open in the current page
2. attachment;filename-xxx: Open the response body as an attachment and use it in file downloading. Specify the file name by filename.
3. Response to blank line
4. Response body: transmitted data, including html files, image files, etc.
2. String format of response message
//Response line
HTTP/1.1 200 OK
//Response header
Date: Thu, 13 Feb 2020 09:06:46 GMT
Content-Type: text/html;charset=UTF-8
Transfer-Encoding: chunked
Connection: keep-alive
//Respond to a blank line
				// response body
				 HTML files, too many do not copy.

 2. Response object
	 1. Function: Set response message
		 1. Set the response line
			 1. Format: HTTP/1.1 200 OK
			 2. Method:
				 1. Set the status code: void setStatus(int sc)
		 2. Set the response header
			 1. Method: void setHeader(String name, String value)
		 3. Set the response body
			 1. Use steps:
				 1. Get the output stream object
					 1. Character output stream: PrintWriter getWriter()

					 2. Byte output stream: ServletOutputStream getOutputStream()

				 2. Use the output stream to output data to the client browser
	 2. Case
		 1. Complete the redirect
			 1. Redirection is also a way to redirect resources
			 2. Two implementation methods:
				1.
					 1. HttpServletResponse object.setStatus(302);
					 2. HttpServletResponse object.setHeader("location","resource virtual path");
				 2. HttpServletResponse object.sendRedirect("Resource virtual path");
			 3. The characteristics of redirection (redirect)
				 1. The address bar is compiled and issued
				 2. Redirect to access resources of other sites
				 3. Redirect is two requests
			 4. The characteristics of forwarding (forward)
				 1. The path of the forwarding address bar remains unchanged
				 2. Forwarding can only access resources under the current server
				 3. The forwarding is a request to prove that they share the request domain.
			 5. How to write the path
				 1. Classification of paths:
					 1. Relative path: the unique resource cannot be determined by relative path
						 1. Such as: ./index.html: html resources in the current directory
						 2. Paths that do not start with "/" but start with "."
						 3. Rules: Determine the relative positional relationship between the current current resource and the target resource.
					 2. Absolute path: the absolute path can be determined as a resource
						1. Example: http://localhost:8080/Day15/HttpServlet (we use a simplified version of the absolute path in the project, such as: /Day15/HttpServlet (equivalent to omitting the previous part))
						 2. The path starting with "/".
						 3. Rules: to determine who the defined path is for
							 1. For the client browser: need to add a virtual directory (so the redirection needs to add a virtual directory)
							 2. For server use: No need to add a virtual directory (so do not add a virtual directory for redirection)
							 3. Virtual directory: the access path of the project, the upper level of the resource access path, such as: "/Day15" in http://localhost:8080/Day15/HttpServlet is called the virtual directory.
								 1. It is recommended to obtain the virtual directory dynamically: String request.getContextPath();
		 2. The server outputs character data to the browser
			 1. Before obtaining the stream object, set the default encoding (ISO-8859-1) of the server character stream to an encoding format that supports Chinese
				1. response.setCharacterEndoding("GBK");
			 2. Tell the browser the encoding of the message body data sent by the server (the content-type header is for this purpose). This step can both set the server character encoding format and tell the browser to decode the format, so the first step can be omitted.
				1. response.setHeader("content-type","text/html;charset=GBK");
				2. response.setContentType("text/html;charset=GBK");
			 3. Get the character output stream object
				1. PrintWrite pw = response.getWriter();
			 4. Output data
				 1. pw.write("output data");
		 3. The server outputs byte data to the browser (also tell the browser the encoding format)
			 1. Steps:
				 1. Get byte output stream
					1. ServletOutputStream sos = response.getOutputStream()
				 2. Output data
					 1. sos.write("string".getBytes());
		 4. Verification Code
 3. ServletContext object
	 1. Concept: This object represents the entire web application and can communicate with the container (server) of the program
	 2. How to get the object, the following two ways get the same object (singleton).
		 1. Get through the request object
			1. request.getServletContext();
		 2. Get through HttpServlet
			1. this.getServletContext();
	 3. Function:
		 1. Get the MIME type:
			 1. MIME type: A file data type defined in the Internet communication process.
			 2. Format: large type/small type such as: text/html image/jpeg
			 3. Obtain:
				1. String getMimeType(String filename)
		 2. Domain object: shared data
			1. setAttribute(String name ,String value)
			2. getAttribute(String name)
			3. removeAttribute(String name)
			 4. The scope of the domain (ServletContext domain object scope): all users, all requested data (the largest scope)
		 3. Get the real (server) path of the file
			 1. Method: String getRealPath(String path)
			 2. How to write the path:
				 1. "/": stands for web directory
				 2. "/WEB-INF": represents the "WEB-INF" directory under the web directory
				 3. The files in the src directory will be placed in the "classes" directory under the "WEB-INF" directory, and the path of all a.txt files in the src directory is written as: "/WEB-INF/classes/a.txt"
####Case File Download####
1. Requirements:
1. The page displays a hyperlink
2. After clicking the hyperlink, a download prompt box will pop up
3. Complete the image file download
2. Analysis:
1. If the resource pointed to by the hyperlink can be parsed by the browser, it will be displayed in the browser. If it cannot be parsed, a download prompt box will pop up.
2. Any resource must pop up a download prompt box
3. Use the response header to set the resource opening method
1. content-disposition:attachment;filename=xxx
3. Steps:
1. Define the page, edit the hyperlink href attribute, point to the servlet, and pass the resource name filename
2. Define servlet
1. Get the file name
2. Use byte input stream to load file into memory
3. The response header of the facility response is: content-disposition:attachment;filename=xxx
4. Use the response byte output stream to write the file to the html page
3. Code implementation:
// 1. Get the file name
String filename = request.getParameter(“filename”);
// 2. Use byte input stream to load file into memory
ServletContext servletContext = this.getServletContext();
String realPath = servletContext.getRealPath("/img/" + filename);
FileInputStream fis = new FileInputStream(realPath);
// 3. Set the response header
String mimeType = servletContext.getMimeType( filename);
response.setHeader(“content-type”,mimeType);
response.setHeader(“content-disposition”,“attachment;filename=”+filename);
// 4. Use byte output stream to display the file to the page
ServletOutputStream sos = response.getOutputStream();
byte[] b = new byte[1024*8];
int length = 0;
while((length = fis.read(b)) != -1){
sos.write(b,0,length);
}
fis.close();
4. Existing problems:
1. Chinese name file problem
1. Solutions:
1. Get the browser version information used by the client
2. According to different version information, the encoding method of setting filename is different.
### JSP###
1. Conversation technology:
1. Cookie
1. Concept: Client session technology, save data to the client
2. Quick start
1. Use steps:
1. Create Cookie object and bind data
1. Constructor Cookie(String name, String value)
2. Send Cookie Object
1. In the response object: void addCookie(Cookie cookie)
3. Get Cookie
1. In the request object: Cookie[] getCookies()
3. The realization principle of Cookie
1. Based on the response header set-cookie (key-value pair set by response in the first request) and request header cookie (key-value pair returned by the second request)
4. Cookie details
1. Can multiple cookies be sent at one time?
1. Yes, create a few cookie objects and call addCookie() multiple times with response.
2. How long is the cookie stored in the browser?
1. By default, when the browser is closed, the cookie data is destroyed
2. Set the cookie life cycle (persistent storage):
1. setMaxAge(int seconds);
2. Parameters (seconds):
1. Positive number: Write the cookie data to a file on the hard disk and store it persistently, seconds represents the cookie survival time, and 30 represents the data will be destroyed after 30s.
2. Negative number: default value
3. Zero: delete cookie information
3. Can cookies store Chinese data?
1. Before tomcat 8, cookies cannot directly store Chinese data. After tomcat 8, cookies support Chinese data but not special characters.
2. What should I do if the version is before tomcat 8:
1. Chinese data needs to be transcoded: URL encoding is generally used
2. URL encoding:
4. What is the scope of cookie data sharing?
1. Assuming that multiple web projects are deployed in a tomcat server, can cookies be shared among these web projects?
1. By default, cookies cannot be shared between multiple projects (different virtual directories).
2. Cookie.setPath(String path): Set the range of cookie acquisition. By default, the current virtual directory will be the value of the parameter path
2. The problem of cookie sharing between different tomcat servers:
1. Cookie.setDomain(String path), if the first-level domain name is set to be the same, the cookie data between multiple servers can be shared
1. Example: setDomain(".baidu.com") then the cookies in tie.baidu.com and news.baidu.com can be shared
5. The characteristics of cookies
1. Cookies store data in the client browser
2. The browser has a limit on the size of a single cookie (4kb) and the total number of cookies under the same domain name (20).
3. Function:
1. Cookies are generally used to store a small amount of less sensitive data
2. Complete the server's identification of the client's identity without logging in
6. Case: Remember the last visit time
1. Requirements:
1. Visit a Servlet. If it is the first visit, it will prompt: Hello, and welcome your first visit.
2. If it is not the first time to visit, the prompt: Welcome back, the time of your last visit is: display time string
2. Analysis
1. Cookies can be used to complete
2. The Servlet in the server determines whether there is a cookie named LastTime
2. Session
1. Concept: server-side conversation technology, sharing data among multiple requests in a conversation, and storing the data in the server object. HttpSession
2. Quick start
1. Get the Session object
1. HttpSession request.getSession()
1. Use HttpSession object;
1. Object getAttribute(String name)
2. void setAttribute(String name , Object value)
3. void removeAttribute(String name)
3. The principle of Session: Session implementation depends on the JSESSIONID header of Cookie
1. When the user visits the server for the first time, there is no cookie, so the server will create a Session object in memory for only one session, and then the server will set the ID of this object and set a Cookie to send To the browser
2. After the browser receives the cookie sent by the server, if the session is not over, the cookie will be sent to the server during the next request. These two steps are logical Run on repeatedly.
4. Session details:
1. When the client is closed, the server does not close, is the same session obtained twice?
1. Not the same by default.
2. Implementation: When the client is closed, the server is not closed, and the session obtained twice is still the same
1. Make the cookie life cycle of the JSESSIONID header longer
2. Code implementation: cookie.setMaxAge();
2. The client does not close, but the server closes. Is the same session obtained twice?
1. Not the same
2. Even if they are not the same, how to ensure that data is not lost (the two working tomcats have been implemented, but the deployment on ieda cannot reflect these two functions, because the idea is started every time Before the server, the work will be deleted and re-created, and the serialized files are stored in the work directory)
1. Session passivation: Before the server is shut down normally, the session object is serialized to the hard disk.
2. Session activation: Convert session files into session objects in memory.
3. When will the Session be destroyed?
1. The server is shut down
2. The session object calls invalidate().
3. The default expiration time of the session is 30 minutes
1. You can modify the web.xml file to modify the time
30
4. Features of session
1. The session is used to store data between multiple requests of a session, which is stored on the server side
2. The session can store any type and size of data
3. Session: A session contains multiple requests and responses
1. One session: the browser sends a request to the server resource for the first time, and the session is established until one party disconnects.
2. Function: share data between multiple requests within a session
3. Method:
1. Client session technology: Cookie
2. Server-side session technology: Session
4. The difference between session and cookie:
1. The session is stored on the server side, and the cookie is stored on the client side
2. There is no data size limit for session, cookie has
3. Session data is relatively secure, cookie data is relatively insecure
2. JSP: Getting started
1. Concept
1. java server pages: java server pages
1. It can be understood as: a special page in which both html tags and java code can be defined directly
2. Used to simplify writing
2. Principle of JSP
1. jsp is essentially a servlet
3. JSP script: The way JSP defines java code
1. <% code %>: the defined Java code, in the service method, what can be defined in the service method, and what can be defined in the script
2. <%! Code %>: the defined java code, in the member position (member variable or member method) of the java class after jsp conversion;
3. <%= code %>: The defined java code will be output on the page, and it can define what the output statement can define.
4. JSP built-in objects: Objects that can be used directly without obtaining and creating in the jsp page.
1. There are 9 built-in objects in jsp
2. I only learn 3 today:
1. request
2. response
3. out: Character output stream object, which can output data to the page.
1. The difference between out.print() or out.write() and response.getWriter()
1. The output of response.getWriter() is always in front of out, regardless of the location of the code in the file.
###Case verification code###
1. Requirements:
1. Visit the login page login.jsp with verification code
2. The user enters the user name, password and verification code.
* If the username and password are entered incorrectly, jump to the login page, prompting: username or password is wrong
* If the verification code is entered incorrectly, jump to the login page and prompt: verification code error
* If all the entries are correct, then jump to the home page success.jsp, display: username, welcome
##JSPAdvanced MVC Development Mode##
1. JSP
1. Instructions
1. Function: Used to configure JSP pages and import resource files
2. Format:
1. <%@ command name attribute name 1=attribute value 1 attribute name 2=attribute value 2… %>
3. Classification of instructions
1. include: the resource files included in the page and imported into the page
2. page: configure the JSP page
1. Included attributes
1. contenttype: equivalent to the role of response.setContenttype();
1. Set the mime type and character set of the response body
2. Set the encoding of the current JSP page, replacing another attribute PageEncoding (only in advanced development tools is equivalent to PageEncoding attribute)
2. language: only supports one language, Java, but you still have to write it (maybe to hide your shame).
3. buffer: buffer size
4. import: import package
5. errorPage: After the current page is abnormal, it will automatically jump to the specified error page (errorPage=500.jsp)
6. isErrorPage: Identifies whether the current page is an error page. Only when the standard current page is an error page (isErrorPage=true, the default value is false) can you use exceptin.getMessage() to obtain the error message of the page before the jump.
3. taglib: import resources
1. Attributes:
1. prefix: prefix, custom (some tags have custom prefixes, it is recommended to use those prefixes to use the tag library)
2. Comments
1. html comment (): only html code fragments can be commented
2. jsp comment (<%-- -->): all code snippets can be commented, recommended
3. Built-in objects: objects that do not need to be created in the JSP page, and are used directly
1. There are 9 built-in JSP objects:
Variable name Real type Function
1. pageContext PageContext current page sharing data, it can also be used to obtain other 8 built-in objects
2. request HttpServletRequest Multiple resources accessed at one request (forwarding)
3. Session HttpSession Sharing data between multiple requests in a session
4. application ServletContext sharing data among all users
5. response HttpServletReponse response object
6. page Object, point to the current page (Servlet) object of the current page this
7. out JspWriter pageContext.getOut(); Output object, output data to the page
8. config ServletConfig Sevlet configuration object
9. exception: It can only be used in the page with isErrorpage=true. Throwable exception object
2. MVC: Development Mode
1. M:Model model: business logic operation (JavaBean)
2. V:View view: display data operations (JSP, try not to show java code, if there is java code, you can use EL expressions and JSTL tags, these two technologies to replace java Code)
3. C: Controller controller, call the model, perform business operations. (Servlet)
1. Get input from the client
2. Call the model
3. Give the data to the view for display
4. Advantages and disadvantages of MVC:
1. Advantages:
1. Low coupling, easy to maintain, and conducive to division of labor and collaboration
2. High reusability
2. Disadvantages:
1. Yes, the project structure has become complicated and requires high developers
3. EL expression, used to replace java code in JSP
1. Concept: Expression language
2. Function: Replace and simplify the writing of java code in jsp pages
3. Syntax: ${Expression}
4. Note:
1. jsp supports EL expressions by default
2. There are two ways to ignore EL expressions
1. ${expression}: ignore the current EL expression
2. Set :isELIgnored = "true" in the page instruction in jsp (default is false, that is, EL expressions cannot be ignored), ignoring all EL expressions in the current page.
5. Function:
1. Calculation:
1. Operators supported by EL expressions:
1. Arithmetic operator: +-* /(div) %(mod)
2. Comparison operator:> >= <<= == !=
3. Logical operator: &&(and) ||(or) !(not)
4. Empty operator: empty
1. Function: Used to judge whether the string, collection, array object is "null" or the length is "0"
2. Example:
1. not empty: used to determine whether the string, collection, array object is not "null" and the length is not "0"
2. Get the value:
1. Note:
1. EL expressions can only get values from JSP domain objects
2. Syntax:
1. ${domain name.key name}: get the value of the specified key from the specified domain
1. Domain name (the domain range is arranged from small to large)
1. pageScope: Get the value from the pageContext field
2. requestScope: get the value from the request field
3. sessionScope: get the value from the session field
4. applicationScope: get the value from the aplication field
2.
{Domain name. key name. attribute name}
2. Note:
1. The property name refers to the set and get methods in the object after removing the set and get, and changing the letter to lowercase. For example, the property of getName() is name, use to change the property Equivalent to calling getName();
2. For an object, the key name is a reference to the object.
2. List collection
1. Syntax: ${domain name.key name[index]}
2. If the index is out of range, no error will be reported, only an empty string will be printed
3. Map collection
1. Syntax:
1. ${domain name.key name.key name}
2. KaTeX parse error: Expected'EOF', got'#' at position 1512: …4. Test 5. Deployment operation and maintenance #̲#Integration Exercise## 1. Simple skills...The obtained object. Essentially, JQuery objects are also js objects, but there are some differences between objects obtained with JQuery and objects obtained with js (because of JQuery encapsulation)
2. js object: an object obtained with native js.
3. Conversion of JQuery object and js object:
1. Note:
1. JQuery objects are more convenient to operate
2. JQuery object and js object methods are not universal
2. Convert between the two
1. Convert jquery to js:jquery object[index] or jquery object.get(index)
2. Convert js to jquery:
("Html tag name"): get all elements matching the tag name
2. id selector
1. Syntax:KaTeX parse error: Expected'EOF', got'#' at position 3: ("#̲id's attribute value"): get the specified id...(".class attribute value"): get the element matching the specified class attribute value
4. Union selector
1. Syntax:
("A B"): Select all B elements in A element
2. Sub-selector
1. Syntax:
("A[attribute name]"): Element A contains the selector of the specified attribute
2. Attribute selector
1. Syntax:
("A[attribute name=‘attribute value’][]"): A selector containing multiple attribute conditions in element A
4. Note:
1.
(function(){});
2. The difference between the two:
1. window.onload() can only bind one function object (function), if multiple function objects are bound, the later definition will overwrite the first defined function (ie window .onload points to the space of another object).
2. $(function(){}) can be defined multiple times without overwriting.
3. Style control
5. DOM operation
1. Content operation
1. html(): Get/set the tag body content of the elementcontent> content
2. text(): Get/set the plain text content of the element’s tag bodycontent> Content
3. val(): Get/set the value attribute value of the element
2. Attribute operation
1. General attribute operations
1. attr(): Get/set the attributes of the element
2. removeAttr: Remove attribute
3. prop: get/set the attributes of the element
4. removeProp: delete property
5. The difference between attr method and prop method:
1. If you are manipulating the inherent attributes of the element (attributes defined by the HTML specification), it is recommended to use the prop method
2. If you are operating a custom attribute of an element, it is recommended to use the attr method
2. Operate the class attribute
1. addClass(): add class attribute value
2. removeClass(): delete the class attribute value
3. toggleClass(): switch class attribute
1. toggleClass("one"): Determine whether there is class="one" on the element object, if there is, delete the attribute value "one", if not, add the attribute value "one"
3. CRUD operation
1. append(): The parent element appends the child element to the end
1. Object 1.append (object 2): add object 2 to the inside of object 1, and at the end
2. prepend(): The parent element appends the child element to the beginning
1. Object 1. prepend (object 2): add object 2 to the inside of object 1, and at the beginning
3. appendTo(content):
1. Object 1.appendTo (object 2): add object 1 to the inside of object 2, and at the end
4. prependTo(content):
1. Object 1. prependTo (Object 2): Add object 1 to the inside of object 2, and at the beginning
5. after(content|fn):
1. Object 1.after (object 2): add object 2 to the back of object 1, and the relationship between the elements is brother
6. before(content|fn):
1. Object 1.before (object 2): add object 2 to the front of object 1, and the elements are siblings
7. insertAfter(content):
1. Object 1.insertAfter (Object 2): Add object 1 to the back of object 2, and the elements are siblings
8. insertBefore(content):
1. Object 1.insertBefore (Object 2): Add object 1 to the front of object 2, and the elements are siblings
9. remove(): remove the element
1. Object.remove(): delete the object
10. empty(): Empty the descendant elements of the element
1. Object.empty(): Clear all descendant elements of the object, but retain the current object and its attribute nodes
6. Case
1. Interlace color change
2. Select all and unselect all
3. QQ emoji selection
4. Multi-select drop-down list to move left and right
2. Advanced JQuery
1. Animation
1. Three ways to show and hide elements ()
1. Default display and hide method
1. show([speed , [easing],[fn]])
1. Parameters
1. speed: the speed of the animation. Three predefined values ("slow", "normal", or "fast") or milliseconds representing the duration of the animation (eg: 1000)
						2. easing: Used to specify the switching effect, the default is "swing", the available parameter is "linear"
							 1. Swing: When the animation is executed, the effect is slow first, middle block, and finally slow
							 2. Linear: The animation is executed at a constant speed
						 3. fn: A function to be executed when the animation is completed, executed once for each element.
				2. hide([speed,[easing],[fn]])
				3. toggle([speed] , [easing] , [fn])
			 2. Slide to show and hide (the effect is the same as the above one)
				1. slideDown([speed] , [easing] , [fn])
				2. slideUp([speed] , [easing] , [fn])
				3. slideToggle([speed] , [easing] , [fn])
			 3. Fade in and fade out display and hide methods (the effect is the same as the above one)
				1. fadeIn([speed] , [easing] , [fn])
				2. fadeOut([speed] , [easing] , [fn])
				3. fadeToggle([speed] , [easing] , [fn])
	 2. Traverse
		 1. The traversal method of js:
			 1. for (initialization value; loop end condition; step size)
		 2. The traversal method of jquery
			 1. jquery object.each(callback)
				 1. Callback callback function, so just pass a function object.
			 2. jQuery ("$" can be used instead of JQuery).each(object, [callback])
			 3. for..of (only available in jquery3.xxx)
	 3. Event binding
		 1. jQuery standard binding method
			 1. jquery object. event method (callback function);
			 2. Note:
				 1. Chain programming:
					 1. jquery object. Event method 1 (callback function 1). Event method 2 (callback function 2)...: equivalent to defining multiple response events at once.
				 2. If you do not write a callback function, the browser default method will be used
		 2. "on" binding event / "off" release event
			 1. jquery object.on("event name", callback function)
			 2. jquery object.off("event name")
			 3. Note:
				 1. jquery object.off(): If the event name is not passed, all bound events of the jquery object will be deleted.
		 3. Event switching: toggle
			 1. jquery object.toggle(fn1,fn2,...): Click the first time to execute fn1, and the second time to execute fn2... (click times%n(number of fn))
			 2. Note:
				 1. Version 1.9. The .toggle() method is deleted, and the jQuery Migrate plugin can restore this function.
	 4. Case
	 5. Plug-in: enhance the function of jquery
		 1. Implementation method:
			 1. jQuery ("$" can be used instead).fn.extend(object)
				 1. Enhance the function of objects obtained through jquery, object-level plug-ins such as: $("#id")
				 2. Code example
					1. $.fn.extend({
				           check:function () {
				            $(this).prop("checked",true)
				           },
				           unchecked:function () {
				               $(this).prop("checked",false)
				           }
				       });
				 3. The syntax of these two methods is the same
			 2. jQuery ("$" can be used instead).extend(object)
				 1. Enhance the function of jquery object itself, global level plug-in such as: $/jquery object
				 2. Syntax:
					1. $.extend({
						 Custom method name 1: function (){
								 Logic
						},
						 Custom method name 2: function(){
								 Logic
						}
					 });
AJAX JSON##
1. AJAX
	 1. Concept: Asynchronous JavaScript And XML Asynchronous JavaScript and XML
		1. Asynchronous and synchronous: based on the communication between the client and the server
			 1. Synchronization: The client must wait for the response from the server, and the client cannot do other operations while waiting.
			 2. Asynchronous: The client does not need to wait for the response from the server, and the client can do other operations during the server response
	 2. Technical advantages: Ajax can enable asynchronous updates of web pages through a small amount of data exchange with the server in the background. This means that certain parts of the web page can be updated without reloading the entire web page to improve user experience. In traditional web pages (that is, without AJAX technology), the entire page needs to be reloaded.
	 2. Implementation method:
		 1. Native js implementation (understand)
		 2. JQuery implementation
			1. $.ajax()
				 1. Syntax: jQuery($).ajax(url,[settings])
				 2. Actual writing:
					1. $.ajax({
						 url:"url path"//access path
						 type:"(default: "GET") request method ("POST" or "GET")"//request method
						 data:"username=aaa&age=23"//Request parameters
						 data: {"username":"aaa","age":23}//Request parameters, choose one of the above
						 success: function(){}//Callback function after successful response
					 })
				 3. Code example:
					1.       $.ajax({
						                url:"../AJAXDemo1Servlet",
						                 data:{"username":" ","age":23},
						                success:function (username) {
						                    alert(username)
						                }
						            });
			 2. $.get(): Send a get request
				 1. Syntax: jQuery($).get(url, [data], [callback], [type])
					 1. Parameters:
						 1. url: request path
						 2. data: request parameters
						 3. callback: callback function
						 4. type: the type of response result
			 3. $.post(): send post request
				 1. Syntax: jQuery($).post(url, [data], [callback], [type])
2. JSON
	 1. Concept: JavaScript Object Notation javascript object notation
		 1. json is now mostly used to store and exchange text information.
		 2. json is used for data transmission which is smaller, faster and easier to parse than XML.
	 2. Grammar
		 1. Basic rules
			 1. The data is in name/value pairs: json data consists of key-value pairs
				 1. Enclose the key in quotation marks (single or double quotation is acceptable), or not
				 2. Worth type:
					 1. Number (integer or floating point)
					 2. String (in double quotes)
					 3. Logical value (true or false)
					 4. Array (in square brackets)
					 5. Object (in curly braces)
					6. null
			 2. Data is separated by commas: multiple key-value pairs are separated by commas
			 3. Curly braces to save the object: use {} to define the json format
			 4. Square brackets save the array: []
		 2. Get data
			 1. json object. key name
			 2. json object ["key name"]
			 3. Array Object [Index]
			 4. Traversal of json
				 1. for(var key in js object name){
					 //Use js object.key (js object name.key name) to get here, because the type of key here is String type
					 js object name [key];
				}
 3. Mutual conversion between JSON data and Java objects
	 1. Convert JSON to Java Object
		 1. Import jackson related jar package
		 2. Create a Jackson core object: ObjectMapper
		 3. Call the related methods of ObjectMapper to convert
			 1. Conversion method:
				 1. reanValue (json string data, Class type (what type of json string is converted to))
	 2. Convert Java objects to JSON strings
		 1. JSON parser
			 1. Common parsers: Jsonlib, Gson, fastjson, jackson (we learn this)
			 2. How to use jackson
				 1. Import jackson related jar package
				 2. Create Jackson core object: ObjectMapper
				 3. Call the related methods of ObjectMapper to convert
					 1. Conversion method:
						 1. writeValue(parameter 1, obj):
							 1. Parameter 1:
								1. File: Convert the obj object into a json string and save it to the specified file
								 2. Writer: convert the obj object into a json string, and fill the json data into the character output stream
								 3. OutPutStream converts the obj object into a json string, and fills the json data into the byte output stream
						 2. writeValueAsString(obj): Convert obj object to json string
					 2. Notes:
						 1. @JsonIgnore: Exclude attributes.
						 2. @JsonFormat: Formatting of attribute values.
					 3. Complex java object conversion
						1. List
						2. Map
 3. Case: Check whether the user name exists
	 1. Note:
		 1. The data responded by the server should be used as json data format when used on the client
			 1. Client settings: the type attribute of $.get()/$.post() is specified as "json"
			 2. Server-side settings: set the response data format to json
				1. response.setContentType("application/json;charset=utf-8");
##redis: Mainly used for caching##
1. Concept: redis is a high-performance NOSQL series non-relational database
1. The relational database and the NOSQL database are not opposite but complementary. That is, the relational database is usually used, and the NOSQL database is used when it is suitable to use NOSQL, so that the NOSQL database is related Make up for the shortcomings of the type database.
2. Summary: Generally, the data will be stored in a relational database, and the data of the relational database will be backed up and stored in the nosql database.
2. Download and install
1. URL:
1. Official website: https://redis.io/
2. Chinese website: https://www.redis.net.cn/
2. Decompression can be used directly
1. redis.windows.conf: configuration file
2. redis-cli.exe: redis client
3. redis-server.exe: server side of redis
3. Command operation
1. Data structure
1. Redis stores data in key and value format, where keys are all strings, and value has 5 different data structures
1. Data structure of value:
1. String type: String
2. Hash type: hash (map format)
3. List type: list(linkedlist)
4. Set type: set
5. Sorted set type: sortedset
2. Use the command line to manipulate these 5 data types
1. String type String:
1. Storage: set key value
2. Get: get key
3. Delete: del key
2. Hash type hash (map format):
1. Storage: hset key field value
2. Obtain:
1. hget key field: Get the value of the specified field name
2. hgetall key: get all field and value
3. Delete: hdel key field
3. List type list (linkedlist format): You can add an element to the head (left) or tail (right) of the list.
1. Store:
1. lpush (head) key value: add the element to the left of the list
2. rpush (tail) key value: add the element to the right of the list
2. Obtain:
1. lrange key start end: range acquisition
3. Delete:
1. lpop key: delete the element on the left of the list and return the element
2. rpop key: delete the element on the right side of the list and return the element
4. Collection type set): Repeated elements are not allowed
1. Storage: sadd key value
2. Get: smembers key: Get all elements in the set collection
3. Delete: srem key value: delete an element in the set collection
5. Sortedset type: do not allow duplicate elements, and ensure that the elements are in order (ordered means that the order of storage and removal is the same, sorted according to the "score" parameter)
1. Storage: zadd key score value
2. Get: zrange key start end
3. Delete: zrem key value
2. General commands
1. keys *: Query all keys
2. type key: Get the type of value corresponding to the key
3. del key: delete the specified key value
4. Persistence operation
1. Concept: Redis is a memory database. When the redis server restarts or the computer restarts, data will be lost. We can persist the data in redis memory to files on the hard disk.
2. Redis persistence mechanism
1. RDB: default method
1. At a certain interval, detect the change of the key, and then persist the data
2. Use steps:
1. Change the relevant configuration of the redis.windows.conf file as required
1. Original content:
# In the example below the behaviour will be to save:
# after 900 sec (15 min) if at least 1 key changed
save 900 1
# after 300 sec (5 min) if at least 10 keys changed
save 300 10
# after 60 sec if at least 10000 keys changed
save 60 10000
2. Restart the redis server and specify the configuration file name (cmd startup method: execute in the decompression directory of redis: redis-server redis.windows.conf)
2. AOF: The log record method can record the operation of each command. Data can be persisted after each command operation
1. Configure redis.windows.conf file
1. Change "appendonly no" to "appendonly yes", this method is turned off by default, and yes is turned on.
2. The default is to persist every second
# appendfsync always: persistence for every operation
appendfsync everysec: Persistence every second
# appendfsync no: no persistence
5. Use Java client to operate redis: Jedis
1. jedis: a tool for java operating redis database
2. Use steps:
1. Download the jar package of jedis
2. Use
3. Code example:
1. Jedis jedis = new Jedis("localhost",6379);//If it is an empty parameter constructor, the default host is: localhost, and the default port number is: 6379
jedis.set("name","Zhang San");
jedis.close();
3. jedis operates the data structure in redis (the method in jedis has the same name as the command in redis)
1. String type: String
1. Note:
1. jedis object.setex("activecode",20,"hehe");//Save the activecode:hehe key-value pair in redis, and automatically delete the key-value pair after 20s .
2. redis command:
1. Get get
2. Store set
2. Hash type: hash (map format)
1. redis command
1. Get hget
2. Save hset
3. Get all hgetAll
3. List type: list(linkedlist)
1. redis command
1. Store lpush/rpush
2. Get lpop/rpop, rang start end (range acquisition)
4. Set type: set
1. redis command:
1. Store sadd
2. Get smembers: get all elements
5. Sorted set type: sortedset
1. redis command
1. Save zadd
6. jedis connection pool: JedisPool
1. Use steps:
1. Create JedisPool connection pool object
2. Call method getResource(); Get Jedis connection
2. Code example:
1. JedisPool jedisPool = new JedisPool();
Jedis resource = jedisPool.getResource();
resource.set(“name”,“zhangsan”);
resource.close();
7. Case
1. Requirements:
1. Provide an index.html page with a drop-down list of provinces
2. When the page is loaded, send an ajax request to load all provinces
3. Use redis cache
4. Note: Use redis to cache some data that does not change frequently, because once the data in the database changes, the cache needs to be updated, that is, when the database performs addition, deletion, and modification operations, redis needs to be added The cached data is cleared and stored again.
Intelligent Recommendation
Android custom control follows finger movement and view event distribution mechanism
We all know the custom control flow onmeasure(), onlayout(), ondraw(), then all the custom methods have to rewrite these three methods, certainly not, onmeasure() just measures the size of the control...
mysql study notes
mysql study notes Enter mysql Show all databases Create database Delete database Connect to the database View the current database Table in the current database Build a table id int(4) not null primar...
Strongest lineup
Holding a new hero card, Xiao Li is full of preparation and classmates PK. Their gaming rules It is very simple, the two sides wrapped their own cards into a circle, then specified a starting point, s...
Mandatory type conversion
Let's see this question first: The answer is: -127 explain: This question is inspected by two knowledge points: 1. Forced conversion (mainly involving a few bytes of various types, here I only say the...
More Recommendation
windows network programming Visual Studio console programming getservbyport()
【Purpose】 Master the basic methods of Visual Studio console application programming Master the initialization and release methods of Windows Sockets DLL Master the general steps of Windows Sockets API...
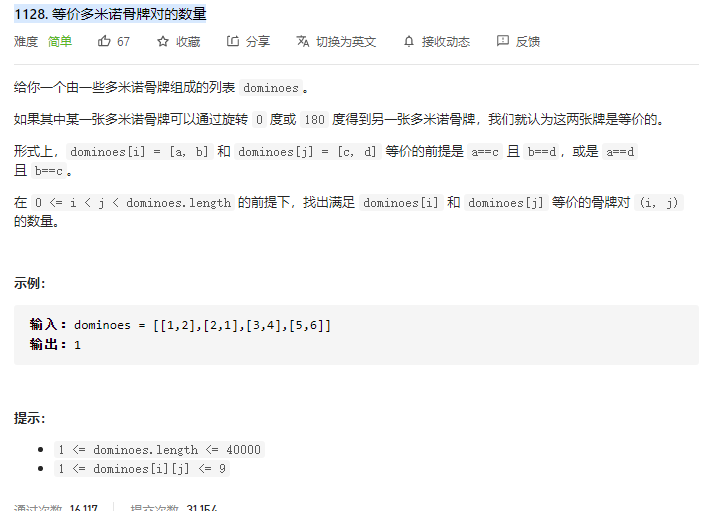
Leetcode- Array Simulation Hashset-1128. The number of equivalent dominoes pairs
topic: answer: FOR cycle nested judgment will exceed time limit Set RES = 0 first The numbers on the topic of the statement do not exceed 10, you can use the two-digit representation of i * 10 + j; So...

Control articles - MDI desktop framework
Use Flex to implement desktop effects like Windos, including toolbars, forms, and more. The advantage of using the desktop as a container is that it can load various subsystems and applications withou...

Cholesky (Python, numerical integration)
Fourth lesson Josaki CHOLESKY First of all, you must clear the secondary and correct matrix. "Secondary" can be defined as a secondary expression of n variables If the value of all variables...