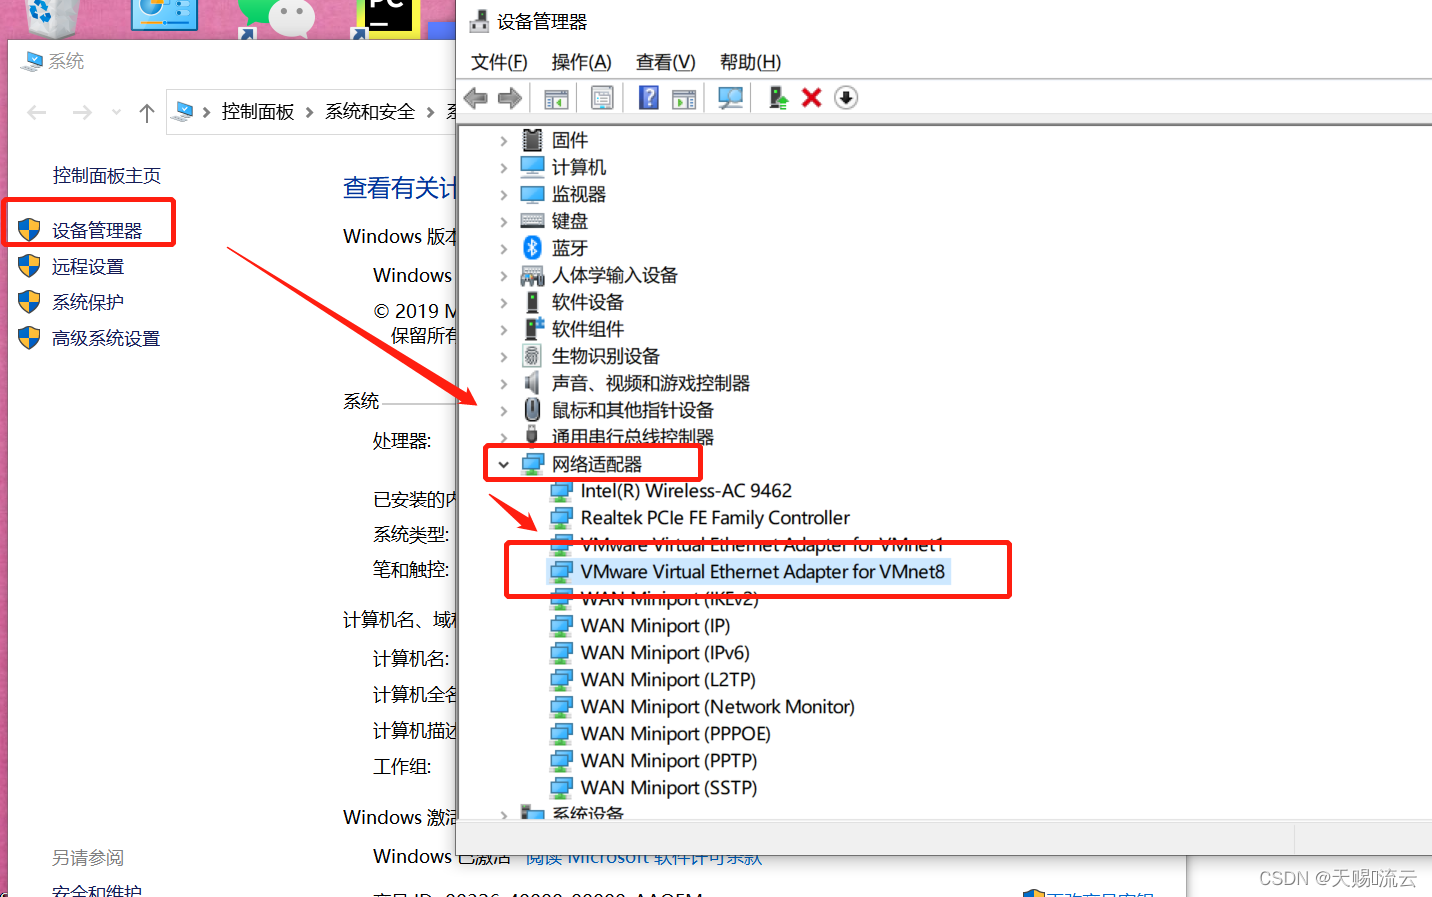
First, set the static IP of Linux
Modify the desktop icon to modify, or modify the configuration file to modify
1, first execute ifconfig, get the name of the network device eth0
2, edit the /etc/sysconfig/network-scripts/ifcfg-eth0 file
Set static ip, dns, ip address, subnet mask, gateway and other information
3. Restart the network card: service network restart
Finally, execute the ifconfig command to check whether the modification is successful.
In this step, ensure that Linux in the virtual machine can be pinged on the same network segment as the client.
Second, modify the host name
Modify the current session host name (current session is in effect): hostname hostname
Modify the configuration file hostname (permanent): vi /etc/sysconfig/network
Restart the machine to see if the modification is successful:
Hadoop is the host name
Third, bind hostname and ip
Modify the hosts file: vi /etc/hosts file, add a line
192.168.1.214 hadoop
Verify: ping hadoop
Fourth, turn off the firewall: service iptables stop
1, view the firewall status: service iptables status
2, turn off the firewall: service iptables stop
3. Turn off the self-running of the firewall:
a) View self-running status: chkconfig --list | grep 'iptables'
[root@hadoop sysconfig]# chkconfig --list | grep 'iptables'
Iptables 0: off 1: off 2: enabled 3: enabled 4: enabled 5: enabled 6: off
b) Close: chkconfig iptables off
[root@hadoop sysconfig]# chkconfig iptables off
c) View the self-running status again: chkconfig --list | grep 'iptables'
[root@ hadoop sysconfig]# chkconfig --list | grep 'iptables'
Iptables 0: off 1: off 2: off 3: off 4: off 5: off 6: off
This will not open the firewall the next time you turn it on.
Five, ssh password-free login
1, generate a secret key file
Go to the ~/.ssh folder
cd ~
cd .ssh
note:
If you don't have the .ssh folder, log in once using the ssh protocol.
If you still don't have the .ssh folder, create one yourself. Modify the .ssh folder permissions to 700
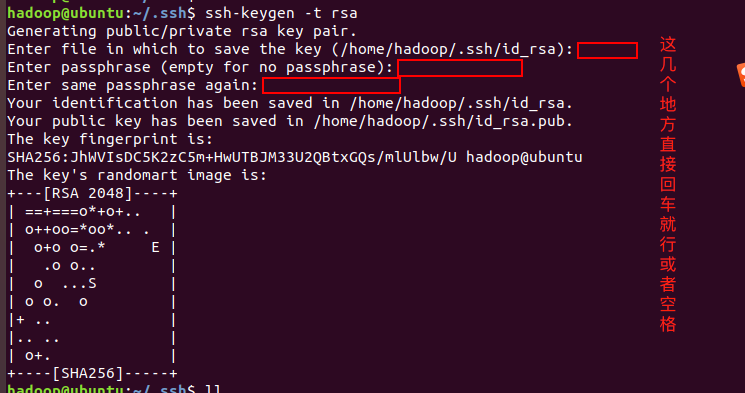
Generate key: ssh-keygen -t rsa
Check out the two files id_rsa and id_rsa.pub in the .ssh folder.
[root@hadoop .ssh]# ls
id_rsa id_rsa.pub
2. Check if the key file is generated successfully.
Look at the key file in id_rsa.pub, I can't read it anyway.
3. Put the contents of the id_rsa.pub file into authorized_keys.
[root@hadoop .ssh]# cp id_rsa.pub authorized_keys
[root@hadoop .ssh]# ls
authorized_keys id_rsa id_rsa.pub
Why do you want to copy an authorized_keys file?
A: Because SSH will read the authorized_keys file when it is running.
4, verify whether password-free login: ssh localhost
Use localhost, do not lose password login: ssh localhost
[root@hadoop .ssh]# ssh localhost
The authenticity of host 'localhost (127.0.0.1)' can't be established.
RSA key fingerprint is 8c:f4:bf:b5:c4:95:30:7b:1c:d7:cc:f8:69:15:e1:ab.
Are you sure you want to continue connecting (yes/no)? yes
Warning: Permanently added 'localhost' (RSA) to the list of known hosts.
Last login: Sun Apr 5 17:45:25 2015
Verify: Exit Login
[root@hadoop ~]#exit
[root@hadoop ~]#exit
When you enter exit again, you will exit the terminal.
Sixth, install JDK
Need to download jdk-6u24-linux-i586.bin file, and cp to usr/local directory
1. Grant execution permission:
chmod u+x jdk-6u24-linux-i586.bin
2, decompress: ./jdk-6u24-linux-i586.bin
[root@hadoop local]# ./jdk-6u24-linux-i586.bin
3, enter, view the jdk1.6.0.24 folder
4. Rename jdk1.6.0_24 to jdk:mv jdk1.6.0_24/ jdk
5, configure the environment variables: edit the /etc/profile file, add the following code
export JAVA_HOME=/usr/local/jdk
export PATH=.:$JAVA_HOME/bin:$PATH 
6, make the settings take effect immediately: source /etc/profile
You can already see the java version when you type java –version.
Seven, pseudo distribution installation hadoop
Need to download hadoop-1.1.2.tar.gz file, and cp to usr/local directory
1. Unzip hadoop-1.1.2.tar.gz: tar –zxvf hadoop-1.1.2.tar.gz
For convenience, rename it to hadoop:mv hadoop-1.1.2 hadoop
2, added to the environment variable
Edit the /etc/profile file and add the red font file
export JAVA_HOME=/usr/local/jdk
export HADOOP_HOME=/usr/local/hadoop
export PATH=.:$HADOOP_HOME/bin:$JAVA_HOME/bin:$PATH
3, make the settings take effect immediately: source /etc/profile
4, modify the configuration file of hadoop: configuration file in the $HADOOP_HOME/conf directory
Modify the following 4 profiles
hadoop-env.sh
core-site.xml
hdfs-site.xml
mapred-site.xml
Each configuration file is modified as follows:
The modified contents of hadoop-env.sh are as follows:
Cancel the comment in the following line:Note the installation path of jdk
export JAVA_HOME=/usr/local/jdk/
The following three configuration files need to replace the contents of <configuration>
The core-site.xml changes are as follows:Note: hadoop is the host name
<configuration>
    <property>
        <name>fs.default.name</name>
        <value>hdfs://hadoop:9000</value>
        <description>change your own hostname</description>
    </property>
    <property>
        <name>hadoop.tmp.dir</name>
        <value>/usr/local/hadoop/tmp</value>
    </property>
</configuration>
The hdfs-site.xml changes are as follows:
<configuration>
    <property>
        <name>dfs.replication</name>
        <value>1</value>
    </property>
    <property>
        <name>dfs.permissions</name>
        <value>false</value>
    </property>
</configuration>
The mapred-site.xml changes are as follows:Also need to pay attention to modify the host name: hadoop
<configuration>
    <property>
        <name>mapred.job.tracker</name>
        <value>hadoop:9001</value>
        <description>change your own hostname</description>
    </property>
</configuration>
5, format the hadoop
Command: hadoop namenode -format
If an error occurs during formatting, delete the hadoop/tmp folder. Reformat
6, start hadoop
Start: start-all.sh
Stop: stop-all.sh
Start a total of 5 java processes
7. Eliminate the warning message when start-all.sh

The reason for the above warning message is: the following code in the hadoop-config.sh file

Mainly: $HADOOP_HOME_WARN_SUPPRESS variable content is empty
The solution is to set the variable to be empty!
Modify the /etc/profile file and add the following code
export HADOOP_HOME_WARN_SUPPRESS=1

Finally make the settings take effect: source /etc/profile
8, verify whether to start hadoop:
a) Verify whether there are 5 java processes through jps: jps command also exists in windows
b) Verify via browser port
Note: If you want to access under Windows by hostname. Need to modify the windows/system32/dirves/etc/host file
Add the following mapping
192.168.1.214 hadoop
Browser address input: http://hadoop:50070/ or: http://hadoop:50030/verification
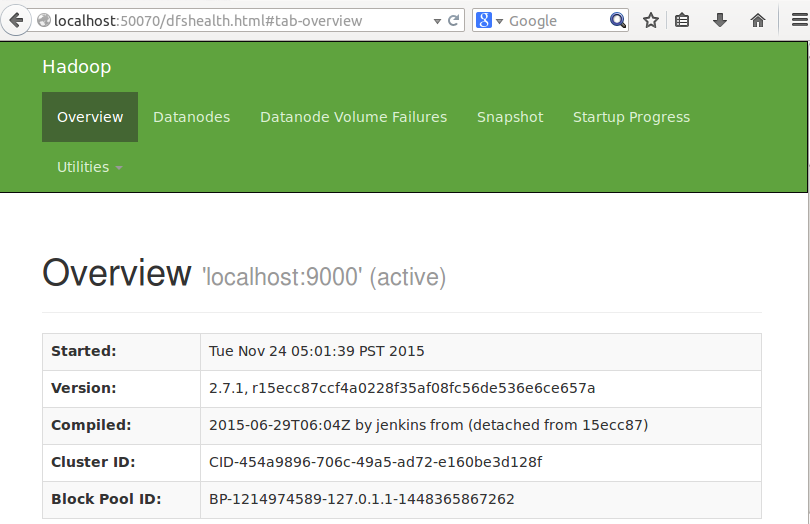
The following interface appears. Hadoop's NameNode is running and the startup is successful.
Enter: http://hadoop:50030/
The following interface appears, indicating that Hadoop's Map/Reduce is running and the startup is successful.

PS:
At this point, the fake distribution of hadoop installation is complete. As for the above [root@hadoop ~]#, [root@fangzheng ~]# the host name is inconsistent, because the middle has been changed. Ensure that the host names are the same during the installation process.
Note: When changing the host name, you need to change the host name in the two configuration files of hadoop.