Hadoop study notes (1)-Hadoop installation and use in Ubuntu
Since I have a course in this semester that I need to learn hadoop, I need to build a Hadoop environment under ubuntu's linux system. I encountered some problems in this process. Write this blog to record this process and share it with everyone.
How to install Hadoop
- Stand-alone mode: The default mode of Hadoop is non-distributed mode (local mode), and it can run without other configuration. Non-distributed or single Java process for easy debugging
- Pseudo-distributed mode: Hadoop can run in a pseudo-distributed manner on a single node. The Hadoop process runs as a separate Java process. The node acts as both a NameNode and a DataNode. At the same time, it reads files in HDFS.
- Distributed mode: Use multiple nodes to form a cluster environment to run Hadoop
Create Hadoop user (optional)
If you are not using the "hadoop" user when installing Ubuntu, you need to add a user named hadoop. First press to open a terminal window and enter the following command to create a new user:
sudo useradd –m hadoop –s /bin/bashThe above command creates a hadoop user who can log in, and uses /bin/bash as the shell. Then use the following command to set the password, which can be simply set to hadoop, and enter the password twice as prompted:
sudo passwd hadoopYou can add administrator permissions for hadoop users to facilitate deployment and avoid some permissions problems that are tricky for novices:
sudo adduser hadoop sudoSSH login permission setting
What is SSH?
SSH is the abbreviation of Secure Shell and is a security protocol based on the application layer and the transport layer. SSH is currently a more reliable protocol designed to provide security for remote login sessions and other network services. The use of SSH protocol can effectively prevent information leakage during remote management. SSH was originally a program on UNIX systems, and then quickly expanded to other operating platforms. SSH is composed of client and server software. The server is a daemon, which runs in the background and responds to connection requests from the client. The client includes ssh programs and programs like scp (remote copy) and slogin (remote login). ), sftp (secure file transfer) and other applications.
Reasons to configure SSH
The Hadoop name node (NameNode) needs to start the Hadoop daemons of all machines in the cluster, and this process needs to be implemented through SSH login. Hadoop does not provide SSH to enter a password login form. Therefore, in order to log in to each machine smoothly, all machines need to be configured as name nodes to log in to them without a password.
Configure SSH passwordless login
Install openssh-server (usually Linux system will install openssh client software openssh-client by default), so you need to install the server yourself.
sudo apt-get install openssh-serverEnter the cd .ssh directory, if there is no .ssh file, enter ssh localhost to generate.
cd ~/.ssh/Generate secret key
ssh-keygen -t rsa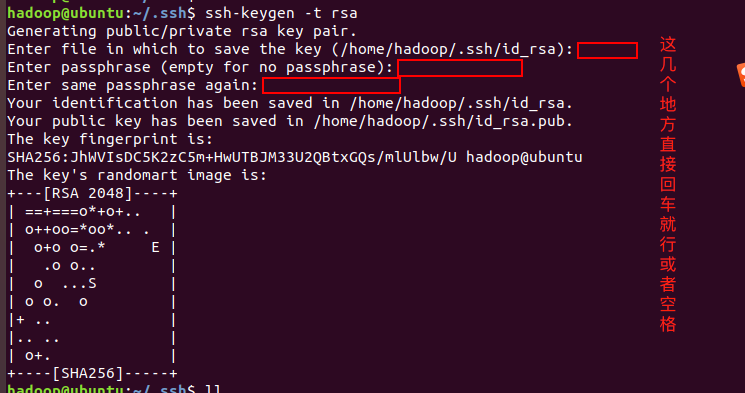
Add the key generated in the Master to authorization (authorized_keys)
cat id_rsa.pub # View the generated public key
cat id_rsa.pub >> authorized_keys # Add authorization
 chmod 600 authorized_keys # Modify the file permissions, if you don’t modify the file permissions, then other users can view the authorization
After completion, directly type "ssh localhost" and log in without a password.
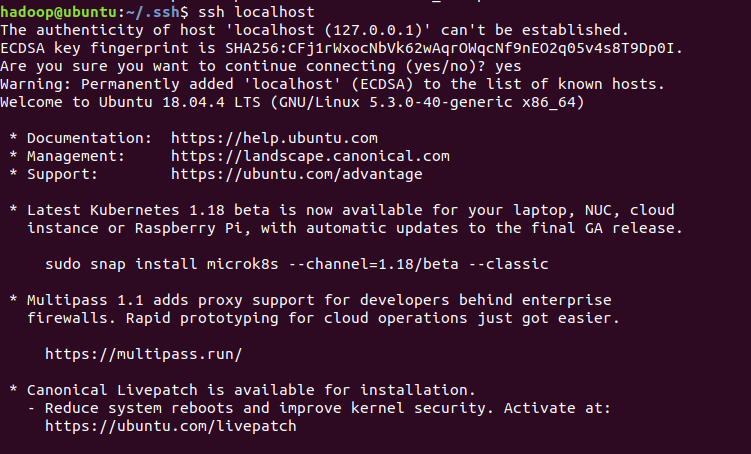
Type "exit" to exit, and the SSH passwordless login configuration is successful.
Install the Java environment
scp command to transfer files from Mac to ubuntu
Because the teacher gave us the java jdk installation package, thinking that we don’t need to go to ubuntu to download again, so I thought of using the scp command to transfer Mac files to ubuntu. The prerequisite for using this command is that the SSH server is installed on Ubuntu. We already have This step is performed.
Use ifconfig to view the local area network IP address of the ubuntu server
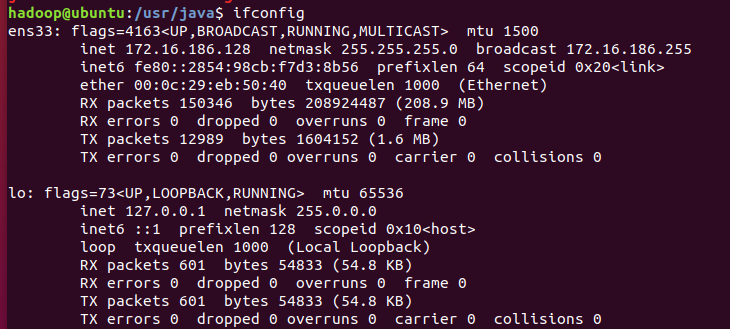
The following is the basic format of using scp command to transfer files: 1. Transfer local files to the server
| Transfer files from local to server | Transfer folders from local to server |
|---|---|
| scp[local file path] [server user name]@[server address]:[server file path] | scp -r[local file path] [server user name]@[server address]:[server file path] |
| scp /Users/mac/Desktop/test.txt [email protected]:/root | scp -r /Users/mac/Desktop/test [email protected]:/root |
2. Server file transfer to local | Transfer the files on the server to the local | Transfer the folders on the server to the local | |--|--| | scp [server user name]@[server address]:[the path where the file is stored on the server] [path to the local file] | scp -r [server user name]@[server address]:[ The path of the file on the server] [The path of the local file] | | scp[email protected]:/root/default/test.txt /Users/mac/Desktop | scp -r [email protected]:/root/default/test /Users/mac/Desktop |
Mac client executes transfer commands
When selecting the storage file address of the Linux server, due to permission reasons, the default is to have permission in /tmp, you can first put the file in the tmp file directory, and then proceed to mv or scp to other directories.
scp /Users/xjh/Desktop/jdk-8u221-linux-x64.tar.gz [email protected]:/tmpThe transmission speed is quite fast, as shown below: 
In Ubuntu, move jdk to our newly created java directory (create a new one if it is not built), then the file transfer is successful, and you can start to configure the Java environment.
sudo mv /tmp/jdk-8u221-linux-x64.tar.gz usr/javaIn the java directory, use the sudo tar command to decompress the jdk file;
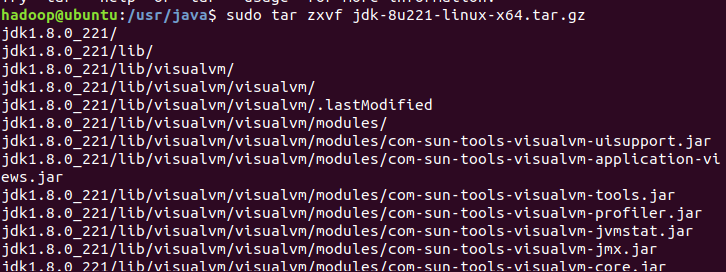
After the decompression is successful, there will be a corresponding directory file in the java directory
Configure the Java environment
Use the command "sudo gedit ~/.bashrc" to open the configuration file, add the following lines of text at the end, pay attention to your jdk version number.
#set java env
export JAVA_HOME=/usr/lib/jdk/jdk1.8.0_221
export JRE_HOME=${JAVA_HOME}/jre
export CLASSPATH=.:${JAVA_HOME}/lib:${JRE_HOME}/lib
export PATH=${JAVA_HOME}/bin:$PATH
Use the command "source ~/.bashrc" to make the environment variable effective.
source ~/.bashrcConfigure the soft connection. The soft connection is equivalent to the shortcut key in the windows system. Some software may search for Java from the /usr/bin directory, so add this soft connection to prevent other software from finding it.
sudo update-alternatives --install /usr/bin/java java /usr/java/jdk1.8.0_221/bin/java 300sudo update-alternatives --install /usr/bin/javac javac /usr/java/jdk1.8.0_221/bin/javac 300
Test whether java is installed successfully

Hadoop stand-alone installation and configuration
Unzip the Hadoop we downloaded to /usr/local/
sudo tar zxvf tmp/hadoop-3.2.1.tar.gz -C /usr/localUse the cd /usr/local/ command to switch the operating space and change the folder name to hadoop
sudo mv ./hadoop-3.2.1/ ./hadoop
Modify file permissions
sudo chown -R hadoop:hadoop ./hadoopAfter Hadoop is decompressed, add the following Java environment information to the etc/hadoop/hadoop-env.sh file in the Hadoop directory.
export JAVA_HOME=/usr/java/jdk1.8.0_221
Then, save the hadoop-env.sh file to complete the basic installation of Hadoop in stand-alone mode. To test whether Hadoop is installed successfully, if the version information shown in the figure below appears, you can.
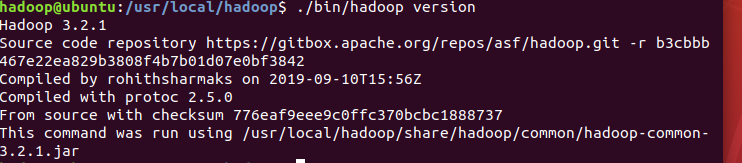
By default, Hadoop in stand-alone mode runs as a Java process. You can run the following commands in sequence for further testing.
sudo mkdir input
sudo cp etc/hadoop/*.xml input
Execute the following commands to run the MapReduce program to complete the test calculation.
bin/hadoop jar share/hadoop/mapreduce/hadoop-mapreduce-examples-3.2.1.jar grep input output 'dfs[a-z.]+'Execute the following commands to view the calculation results.
cat output/*
In the Hadoop directory, there will be two newly-created files, input and output. The output contains the calculation results of the above programs. The Hadoop stand-alone installation and configuration are successful.
Hadoop pseudo-distributed installation and configuration
- Hadoop can run in a pseudo-distributed manner on a single node. The Hadoop process runs as a separate Java process. The node acts as both a NameNode and a DataNode. At the same time, it reads files in HDFS.
- The Hadoop configuration file is located in /usr/local/hadoop/etc/hadoop/. For pseudo-distribution, two configuration files need to be modified, core-site.xml and hdfs-site.xml
- The Hadoop configuration file is in xml format, and each configuration is realized by declaring the name and value of the property. hadoop directory recognition
Directory under hadoop
Before modifying the configuration file, take a look at the directory under hadoop:
- bin: The directory where the most basic management scripts and scripts of Hadoop are located. These scripts are the basic implementation of the management scripts in the sbin directory. Users can directly use these scripts to manage and use Hadoop.
- etc: The directory where configuration files are stored, including core-site.xml, hdfs-site.xml, mapred-site.xml and other configuration files inherited from hadoop1.x and yarn-site.xml and other new ones in hadoop2.x Configuration file
- include: the header files of the programming library provided to the outside world (the specific dynamic library and static library are in the lib directory, these header files are defined in C++ military, usually used for c++ programs to access hdfs or write mapreduce programs)
- Lib: This directory contains the dynamic library and static library provided by hadoop externally, and is used in combination with the header files in the include directory
- libexec: The directory where the shell configuration file corresponding to each service is located, which can be used to configure the log output directory, startup parameters and other information
- sbin: The directory where the hadoop management script is located, which mainly contains the startup and shutdown scripts of various services in hdfs and yarn
- share: The directory where the jar package compiled by each module of Hadoop is located.
Modify the configuration file core-site.xml
<configuration> <property> <name>hadoop.tmp.dir</name> <value>file:/usr/local/hadoop/tmp</value> <description>Abase for other temporary directories.</description> </property> <property> <name>fs.defaultFS</name> <value>hdfs://localhost:9000</value> </property> </configuration> - hadoop.tmp.dir represents the directory for storing temporary data, including NameNode data and DataNode data. The path is arbitrarily specified, as long as the folder actually exists
- name is the value of fs.defaultFS, which represents the logical name of the hdfs path
Modify the configuration file hdfs-site.xml
<configuration>
   <property>
       <name>dfs.replication</name>
       <value>1</value>
   </property>
   <property>
       <name>dfs.namenode.name.dir</name>
       <value>file:/usr/local/hadoop/tmp/dfs/name</value>
    </property>
   <property>
       <name>dfs.datanode.data.dir</name>
       <value>file:/usr/local/hadoop/tmp/dfs/data</value>
   </property>
</configuration>- dfs.replication represents the number of replicas, and pseudo-distribution should be set to 1
- dfs.namenode.name.dir represents the local disk directory, where the fsimage file is stored
- dfs.datanode.data.dir represents the local disk directory, where the HDFS data is stored in the block
| file name | format | description |
|---|---|---|
| hadoop-env.sh | Bash script | Record the environment variables needed to configure Hadoop to run to run Hadoop |
| core-site.xml | Hadoop configuration XML | Hadoop core configuration items, such as HDFS and MapReduce commonly used I/O settings, etc. |
| hdfs-site.xml | Hadoop configuration XML | Configuration items of the Hadoop daemon, including NameNode, SecondaryNameNode and DataNode, etc. |
| mapred-site.xml | Hadoop configuration XML | Configuration items of the MapReduce daemon, including JobTracker and TaskTracker |
| masters | Plain Text | List of machines running SecondaryNameNode (one per line) |
| slaves | Plain Text | |
| hadoop- metrics.properties | Java properties | Attributes that control how metrics are published on Hadoop |
At this point, the configuration is complete, but it cannot be started yet, and the hdfs must be formatted first. Similar to the previous floppy disk, format it before use and execute the command:
sudo ./bin/hdfs namenode -formatSee the log information: the formatting is successful.
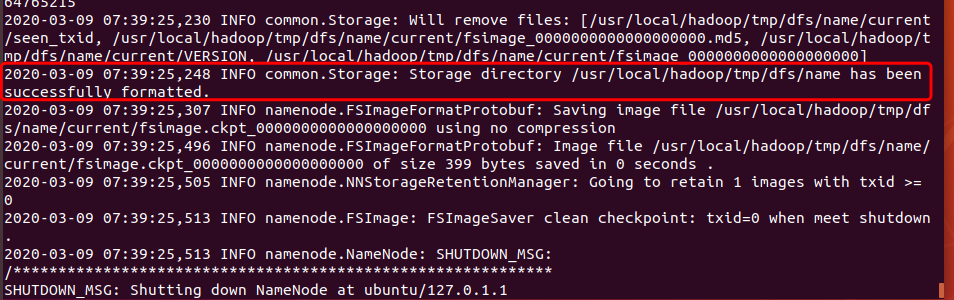
An image file (fsimage) will also appear in our name directory (this directory is specified when we configure it ourselves), which is used to persist data.

Start Hadoop
Enter the following command to start Hadoop:
sbin/start-dfs.sh
Install jps
sudo apt install openjdk-11-jdk-headlessAfter installation, jps checks if there are multiple roles, and it starts successfully.

Browser visit localhost:9870
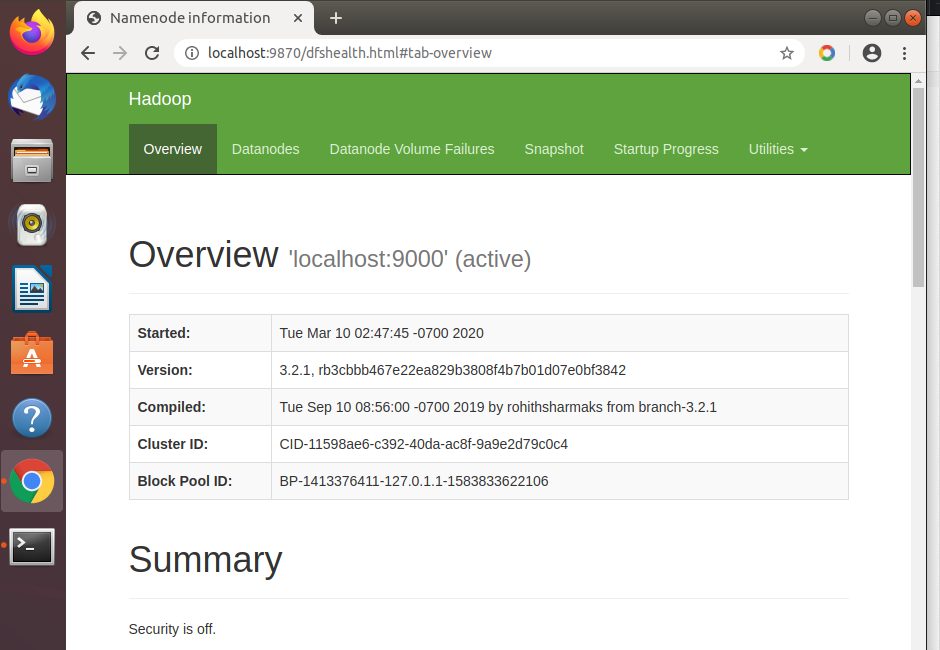
This is the end of the content shared with you this time. I think it's not bad to like and support the editor. Yours is definitely the driving force for the editor to move forward. In addition, if you want to learn more about computer professional knowledge and skills, I offer my personal blogBei Liao, And for children’s shoes that require various information, you can follow my WeChat public accountBei Liao, Free PPT templates, all kinds of materials are waiting for you. 
Intelligent Recommendation
Hadoop notes (a) installation and use
1, must bind the host name and IP, otherwise the remote will not connect vi /etc/hosts 2, set ssh free login (1) ssh-keygen, always enter (2)ssh-copy-id localhost 3, install Java (1) Install jdk1.8: (...
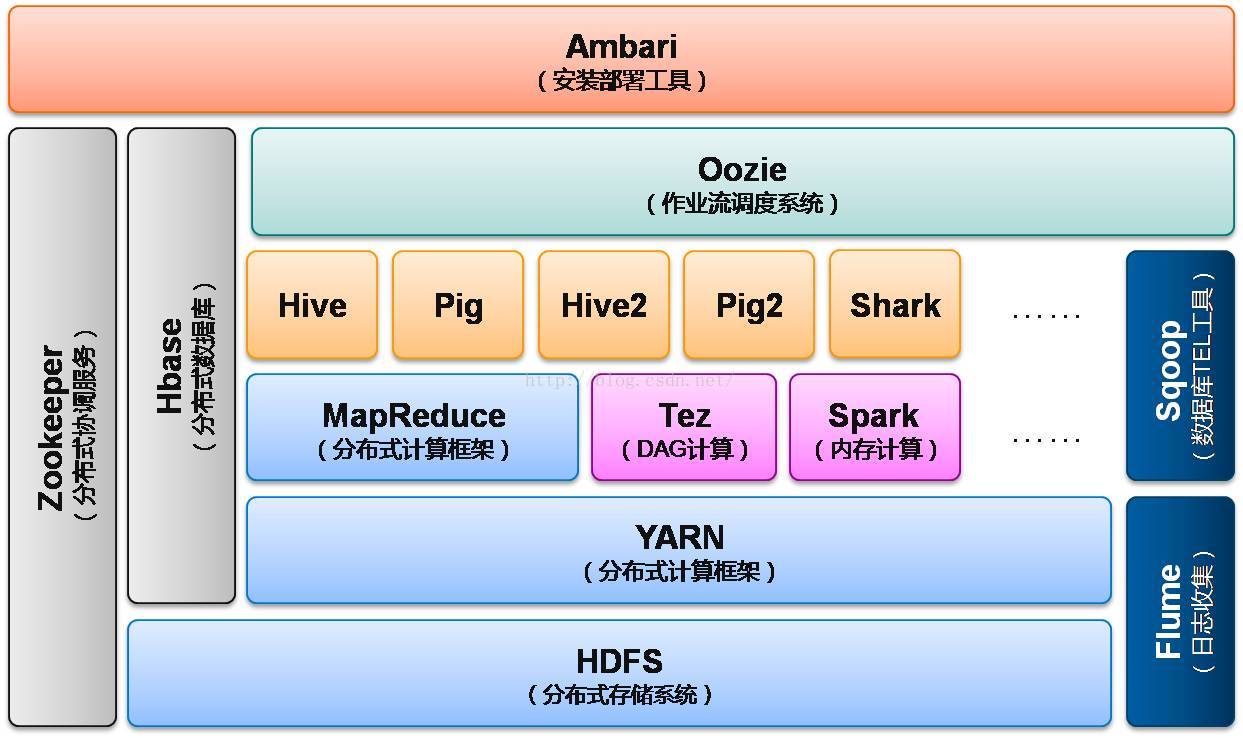
Hadoop study notes: (1) Hadoop system introduced
Hadoop is a software framework for distributed processing can be performed on large amounts of data. Such developers without knowing the details of the underlying distributed, developmen...

Hadoop study notes (1)-Hadoop cluster construction
1 Introduction to Hadoop HADOOP is an open source software platform under Apache Functions provided by HADOOP: Use server clusters to perform distributed processing of massive data based on user-defin...
Simple use of Hadoop on IDEA - Hadoop study notes
Integrated IDEA First configure environment variables, create a new Maven project. Add POM dependencies, pay attention to the corresponding Hadoop version You can also configure a log attribute log4j....
Hadoop series (1) installation and preliminary use of hadoop
The so-called big data refers to the large amount of data, and the complex and changeable data. In order to deal with these problems, new technologies have emerged. Hadoop is mainly used to solve the ...
More Recommendation
Hadoop study notes Hive installation
operating system Hadoop cluster version MySQL version CentOS 7 Hadoop-2.7.7 MySQL5.7 Hadoop study notes Hive installation 1 Install and configure MySQL 1.1 Purify the MySQL environment 1.1.1 Check if ...
Hadoop study notes - single installation
Environmental parameters project parameter Remark operating system CentOS7 1908 JDK 1.8.0_212 hadoop 3.1.3 Preparation CentOS 1908 single installation 1) Configure IP, etc. 2) Install EPEL-RELEASE Not...
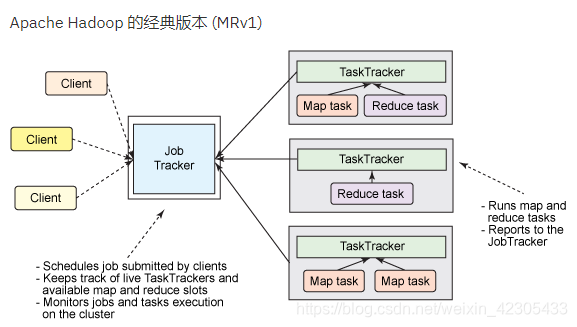
Hadoop Yarn study notes (1)
Yarn's basic role concept There are several problems with the native Hadoop MapReduce process: 1. JobTracker manages resources and tasks at the same time, and the load is high, which causes the cluste...

Hadoop study notes (1) overview
Write before the study notes: The winter vacation has started for a few days. It seems that according to the current time, it will be a New Year. In the past few days at home, the busy ones are almost...

Hadoop study notes (1) (transfer)
Hadoop study notes (1) - Getting started with rookie What is Hadoop? Let me ask Baidu first: [Baidu Encyclopedia] A distributed system infrastructure developed by the Apache Foundation. Users can deve...