Jenkins continues to integrate deployment tools
tags: linux
content
-
- 1 continuous integration
- 2 Jenkins installation configuration
- xxl-job, triggerpool max size
1 continuous integration
1.1 Software Development Life Cycle
The software development life cycle is called SDLC (Software Development Life Cycle), which is a collection of planning, development, testing, and deployment processes. As shown below :
[Outer chain picture failure, the source station may have an anti-theft chain mechanism, it is recommended to save the picture directly upload (IMG-ZW8PQ71T-1618144640027) (IMG / Image-20201119201008692.png)]
- demand analysis
This is the first stage of life cycle, according to project requirements, team executive analysis of a feasibility plan. Project demand may be the company's internal or customer proposed. This phase is mainly collected for information, and it is also possible to improve and re-a new project for existing projects. Also analyze how long the project is budget, which is the benefit and layout, which is also the goal created by the project.
- design
The second stage is the design phase, system architecture and satisfactory state (what is going to do, what functions), and create a project plan. Planning can be rendered using chart, layout design, or text.
- accomplish
The third stage is the implementation phase, the project manager creates and distributes work to the beaker, developers develop code based on the task and the target defined in the design phase. It can be done in accordance with the size and complexity of the project.
- test
Test staff conduct code testing, including functional testing, code testing, pressure testing, etc.
- evolution
In the final stage, it is the continuous improvement and maintenance stage of the product. According to the user's usage, it may be necessary to modify a function, bug fix, and function increase.
1.2 Software Development Waterfall Model
The waterfall model is the most famous and most commonly used software development model. The waterfall model is a series of software development processes. It is proneted by the manufacturing industry. A highly scheduled structure flow flows in one direction, a bit like a production line. At the beginning of the waterfall model, there is no other development model, there are a lot of things to rely on developers to guess and develop. Such a model is only applicable to those simple software development, but it is not suitable for development.
The figure below shows a software development model.
[Outer chain picture "failed, the source station may have an anti-theft chain mechanism, it is recommended to save the picture directly upload (IMG-SJX3R2O3-1618144640029) (IMG / IMAGE-2020119201022969.png)]
| Advantage | Disadvantage |
|---|---|
| Easy to use and understand | The division of each stage is completely fixed, and a large number of documents is generated between the phases, which greatly increases the workload. |
| You only need to pay attention to the follow-up phase after the current phase is completed. | Since the development model is linear, the user can only see the development of the development, which has increased the development risk. |
| Provide projects with inspection nodes in phases | The highlight of the waterfall model is not to adapt to the changes in user needs. |
1.3 software agility development
- What is agile development?
The core of agile development is an iterative development and incremental development (Incremental Development).
- What is iterative development?
For large software projects, traditional development methods are developed with a large period (such as one year), the whole process is "big development"; iterative development is different, it will be split into multiple small cycles That is, "big development" becomes "small development", each small development is the same process, so it seems that it seems to be repeated in the same step.
For example, Spacex wants to create a big thrust rocket to send human beings to Mars. However, it is not a big rocket at the beginning, but it is the most simple rocket Falcon 1. As a result, the first launch exploded, until the fourth time is transmitted, the track is successfully entered. Then, the medium rocket Falcon 9 was developed, 70 times in nine years. Finally, the Falcon heavy rocket was developed. If Spacex does not develop iteration, it may not be on the day until now.
- What is incremental development?
Each version of the software will add a user who can sense full features. That is, it is divided according to the new function.
For example, real estate companies develop a 10 building cell. If you use incremental development mode, the first iteration of the company is to deliver a first floor, the second iteration delivery 2, ... Each iteration is completed a complete building. Instead, the first iteration drunk the foundation of 10 buildings, the second iteration builds the skeleton of each building, the third iteration has the roof ...
- How to generate agility?
Although agile development divides software development into multiple iterations, it also requires that each iteration is a complete software development cycle, and a formal process management must be performed according to the methodology of software engineering.
[Outer chain picture "failed, the source station may have an anti-theft chain mechanism, it is recommended to save the picture directly upload (IMG-Biepuksz-1618144640032) (IMG / IMAGE-20201119193700488.PNG)]
-
What is the benefits of agile development?
-
Early delivery
The first benefit of agile development is early delivery, which greatly reduces costs. Still the real estate company in the above section as an example, if in accordance with the traditional "waterfall development model", first dig 10 buildings, then cover the skeleton, then set the roof, each stage is waiting until the beginning of the previous stage, may need Two years can deliver 10 buildings at one time. That is, if pre-sale is not considered, the project must wait two years later. Agile development is six months later, and it will be delivered every two months later. Therefore, it can be rewarded by 10% for half a year, and there will be cash flow every month, and the funds are greatly reduced.
-
reduce risk
The second benefit of agile development is that timely understanding market demand, reducing the risk of product not applicable. Please think about it, which is a small loss: 10 buildings have been made, and they will find that they can not sell, or they have made the first building, they will find that they can not sell, thus improving or suspending 9 buildings. ?
1.4 What is continuous integration
Continuous Integration, CI) refers to, frequent (one day) integrate code to the backbone
[Outer chain picture is not failed, the source station may have an anti-theft chain mechanism, it is recommended to save the picture directly (IMG-NDHZMPTK-1618144640036) (IMG / IMAGE-20201119201046492.png)]
Continuous integration of components
An automatic build process, from detecting code, compiling construction, run test, result record, test statistics, etc., no need to manually intervene.
A code repository that requires version control software to ensure the maintenanceability of the code, as a material library of the build process, usually using SVN or GIT.
A continuous integration server, Jenkins is a continuous integration server that configures simple and easy to use.
[Outer chain picture "failed, the source station may have an anti-theft chain mechanism, it is recommended to save the picture directly (IMG-70DDNMR7-16181444640039) (IMG / IMAGE-20201119193728562.png)]
1.5 Continuous Integration Benefits
1. Reduce the risk, due to continuous integration constantly build, compile and test, you can find problems very early, so the cost of repair is less;
2. Continue inspection of system health and reduce the issuance of issuance of risks;
3, reduce repetitive work;
4, continuous deployment, provide deployment unit packages;
5, continuous delivery of available versions;
6, enhance team confidence;
2 Jenkins installation configuration
2.1 Jenkins Introduction
[Outer chain picture "failed, the source station may have an anti-theft chain mechanism, it is recommended to save the picture directly upload (IMG-CNM14XE5-16181444640040) (IMG / image-20201119193834140.png)]
Jenkins is a popular open source continuous integration tool, which is widely used in project development, automated construction, testing, and deployment. Official website: http://jenkins-ci.org/.
Jenkins characteristics:
- Open source Java language development continuous integration tools support continuous integration, continuous deployment.
- Easy to install the deployment configuration: You can easily configure the Web interface configuration through YUM installation, or download the WAR package and quickly implement the installation deployment through the Docker container.
- Message Notification and Test Report: Integrated RSS / E-mail Generates JUnit / Testng Test Reports by e-mail through the E-mail notification by e-mail through the RSS release building.
- Distributed Build: Support Jenkins can build / test multiple computers.
- Document recognition: Jenkins can track which JAR, which is built, which is built, which version of JAR, etc.
- Rich plug-in support: Support extended plugins, you can develop tools that are suitable for your team, such as Git, SVN, Maven, Docker, etc.
Jenkins installation and continuous integrated environment configuration
[Outer chain picture "failed, the source station may have an anti-theft chain mechanism, it is recommended to save the picture directly (IMG-WOUNQPKO-16181444640042) (IMG / IMAGE-20201119193819838.png)]
1) First, the developer is submitted every day, submitted to the Git warehouse
2), then Jenkins as a continuous integration tool, use the Git tool to the Git warehouse to pull the code to the integrated server, then with JDK, Maven software to complete code compilation, code test and review, test, packaging and other work, during this process One step error, re-execute the entire process again.
3) Finally, Jenkins sends the generated JAR or WAR package to the test server or the manufacture of servers, testers or users can access applications.
2.2 Jenkins environment building
2.2.1 Jenkins installation configuration
Mirria in the information can be imported:
Server Username: root Password: ITCAST

 Jenkins User Name: ITCAST Password: ITCAST
1 installation with YUM
Join Jenkins installation source:
sudo wget -O /etc/yum.repos.d/jenkins.repo https://pkg.jenkins.io/redhat-stable/jenkins.repo –no-check-certificate

sudo rpm –import https://pkg.jenkins.io/redhat-stable/jenkins.io.key
Execute the yum command to install:
yum -y install jenkins
2 use rpm installation package mode
Jenkins installation package download address
wget https://pkg.jenkins.io/redhat-stable/jenkins-2.190.1-1.1.noarch.rpm
Perform the installation:
rpm -ivh jenkins-2.190.1-1.1.noarch.rpm
Configuration:
Modify the configuration file:
vi /etc/sysconfig/jenkins
Modify content:
      # Modify to the corresponding target user, use root
   $JENKINS_USER="root"
       #
   JENKINS_PORT="16060"
Directory permission:
   chown -R root:root /var/lib/jenkins
   chown -R root:root /var/cache/jenkins
   chown -R root:root /var/log/jenkins
Restart:
systemctl restart jenkins
If the startup fails with the error message:
Starting Jenkins bash: /usr/bin/java: No such file or directory
JAVA environment to create a soft link:
ln -s /usr/local/jdk/bin/java /usr/bin/java
- Management background initialization settings
http://192.168.200.100:16060/
Management need to enter a password to view at the following location:
cat /var/lib/jenkins/secrets/initialAdminPassword
[Image dump the chain fails, the source station may have security chain mechanism, it is recommended to save the picture down uploaded directly (img-OXrXbcPa-1618144640043) (img / image-20201119201115569.png)]
By default settings, the recommended plug-ins are installed on
[Image dump the chain fails, the source station may have security chain mechanism, it is recommended to save the picture down uploaded directly (img-CuhkO57s-1618144640044) (img / image-20201119201131638.png)]
This step is to wait for a long time, after the installation is complete, create an administrator user:
[Image dump the chain fails, the source station may have security chain mechanism, it is recommended to save the picture down uploaded directly (img-G3mWwB2p-1618144640045) (img / image-20201119201156951.png)]
Configure access Address:
[Image dump the chain fails, the source station may have security chain mechanism, it is recommended to save the picture down uploaded directly (img-oUzMA4sl-1618144640046) (img / image-20201119201225031.png)]
After configuration is complete, it will restart, after management background you can see:
[Image dump the chain fails, the source station may have security chain mechanism, it is recommended to save the picture down uploaded directly (img-Zzj2Zmc0-1618144640048) (img / image-20201119201253635.png)]
2.2.2 Jenkins plugin installation
Before you implement continuous integration, the need to ensure a successful installation the following plug-ins.
- Maven Integration plugin: Maven integration management plug-ins.
- Docker plugin: Docker integrated plug-ins.
- GitLab Plugin: GitLab integrated plug-ins.
- Publish Over SSH: remote file publishing plug-ins.
- SSH: remote script execution plug-ins.
installation method:
- Enter the [System Management] - [Plug-in Manager]
- Click the tab [optional plug]
In the search box plug-in filter Name
[Image dump the chain fails, the source station may have security chain mechanism, it is recommended to save the picture down uploaded directly (img-oH4YoQCT-1618144640049) (img / image-20201119201330382.png)]
3. Check the plug-in, click on can be installed directly.
Note that if the button is not installed, you need to change the configuration
In the Advanced Configuration plug-in installation, upgrade the site to modify the connection: http: //updates.jenkins.io/update-center.json save
[Image dump the chain fails, the source station may have security chain mechanism, it is recommended to save the picture down uploaded directly (img-ESq8rnzP-1618144640050) (img / image-20201119201357651.png)]
2.2.3 Git installation configuration
- yum installation
yum -y install git
- Source Package installed using
-
Installation dependencies
yum -y install curl-devel expat-devel gettext-devel openssl-devel zlib-devel
yum -y install gcc perl-ExtUtils-MakeMaker
- If there is an old version installed before, do uninstall, no installation is ignored
yum remove git
Download source package
cd /usr/local
wget https://mirrors.edge.kernel.org/pub/software/scm/git/git-1.8.3.1.tar.gz
tar -xvf git-1.8.3.1.tar.gz
 You can also install additional versions, address: https://mirrors.edge.kernel.org/pub/software/scm/git/git/git/git/

 - Compilation and installation
cd git-1.8.3.1
make prefix=/usr/local/git all
make prefix=/usr/local/git install
echo “export PATH=$PATH:/usr/local/git/bin” >> /etc/bashrc
source /etc/bashrc
1. Check the git version
[root@localhost jenkins]# git version
git version 1.8.3.1
 #### 2.2.4 Maven installation configuration

 Download the installation package

 Download address: https://maven.apache.org/download.cgi

 Unzip the installation package
cd /usr/local
unzip -o apache-maven-3.3.9.zip
 Configure

 Environment variable configuration
vi /etc/profile
Increase:
export MAVEN_HOME=/usr/local/maven/apache-maven-3.3.9
export PATH= P A T H : PATH: PATH:MAVEN_HOME/bin
If permissions are not enough, you need to add permissions for the current directory.
chmod 777 /usr/local/maven/apache-maven-3.3.9/bin/mvn
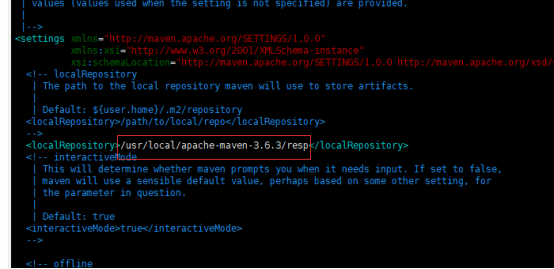
Modify the mirror warehouse configuration:
vi /usr/local/maven/apache-maven-3.3.9/conf/settings.xml
Need to package this unit's warehouse to the server (not going to download it automatically)
Then specify the warehouse configuration after the upload

#### 2.2.5 Docker installation configuration
Update package version
yum -y update
Uninstall old version
yum -y remove docker docker-common docker-selinux docker-engine
Install software dependencies
yum install -y yum-utils device-mapper-persistent-data lvm2
Set Yum source to Alibaba Cloud
sudo yum-config-manager --add-repo http://mirrors.aliyun.com/docker-ce/linux/centos/docker-ce.repo
View Docker version after installation
docker -v
 start up

 Set the boot start:
systemctl enable docker
Start Docker
systemctl start docker
 #### 2.2.6 Docker Registry private warehouse installation configuration

 For the configuration of the continuous integrated environment, Jenkins will release a large number of micro-services, interact with multiple machines, can use the save and export function of the Docker image to achieve SSH implementation, but this interaction is cumbersome, the stability is poor, and it is inconvenient to manage, here we Implemented by building Docker's private repository, this is a bit similar to the Git warehouse, centrally unified management resources, draws or updates by the client.

 1 Download the latest registry image
docker pull registry:latest
2 Start Registry image service
docker run -d -p 5000:5000 --name registry -v /usr/local/docker/registry:/var/lib/registry registry:latest
 Map 5000 port; -V is to associate the mirror data volume in the Registry and the local files, easy to manage and maintain data within the Registry.

 3 View Warehouse Resources

 Access address: http://192.168.200.100: 5000 / v2 / _catalog

 4 Start normal, you can see the return:
{“repositories”:[]}
There is currently no upload mirror, showing empty data.
5 If the upload is successful, you can see the data:

6 Configure the Docker client
Use in the normal production environment, to configure HTTPS services, ensure security, internal development, or test integrated local area network environment, can be used in a simple way, not safe control.
7 First make sure the machine continuously integrated environment has installed the Docker client, then do the following modifications:
vi /lib/systemd/system/docker.service
8 Modified content:
ExecStart=/usr/bin/dockerd --insecure-registry 192.168.200.100:5000
 Point to the service IP and port installed in the installation of Registry.

 Restart to take effect:
systemctl daemon-reolad
systemctl restart docker.service
## 3 Continuous Integrated Production Practice Configuration
### 3.1 Jenkins Tool Configuration
1. Enter [System Management] -> [Global Tool Configuration]

2.MAVEN configuration global settings

3. Specify JDK configuration

4. Specify the maven directory

5. Specify a docker directory

If you don't know the Docker's installation directory, you can use the `whereis docker` command to view the Docker installation directory
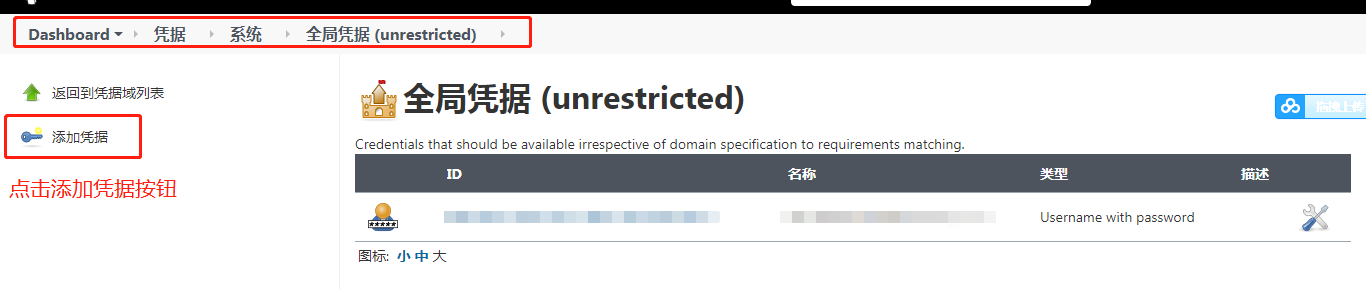
1. Set a remote application service host
Add credentials:

Add a credential, enter the username and password save

Enter [System Management] - [System Settings]

Enter the host name and login information, click [Check Connections] to verify, if success, "Successful Connection" will be displayed.

### 3.2 Environment Preparation
#### 3.2.1 mysql deployment
You can deploy mysql to 192.168.200.130 on this server
Pull the mirror:
docker pull mysql:5.7
Create a container
docker run -di --name=mysql -p 3306:3306 -e MYSQL_ROOT_PASSWORD=root mysql:5.7
Use the local tool test to import the SQL scripts in the first chapter, import the SQL scripts required for XXL-JOB

 #### 3.2.2 XXL-JOB-Admin Deployment

 (1) Modify the Application.properties file in XXL-Job-Admin, modify the port number 8888, the database connection points to 130 this server
web
server.port=8888
server.servlet.context-path=/xxl-job-admin
actuator
management.server.servlet.context-path=/actuator
management.health.mail.enabled=false
resources
spring.mvc.servlet.load-on-startup=0
spring.mvc.static-path-pattern=/static/**
spring.resources.static-locations=classpath:/static/
freemarker
spring.freemarker.templateLoaderPath=classpath:/templates/
spring.freemarker.suffix=.ftl
spring.freemarker.charset=UTF-8
spring.freemarker.request-context-attribute=request
spring.freemarker.settings.number_format=0.##########
mybatis
mybatis.mapper-locations=classpath:/mybatis-mapper/*Mapper.xml
#mybatis.type-aliases-package=com.xxl.job.admin.core.model
xxl-job, datasource
spring.datasource.url=jdbc:mysql://192.168.200.130:3306/xxl_job?Unicode=true&characterEncoding=UTF-8
spring.datasource.username=root
spring.datasource.password=root
spring.datasource.driver-class-name=com.mysql.cj.jdbc.Driver
datasource-pool
spring.datasource.type=com.zaxxer.hikari.HikariDataSource
spring.datasource.hikari.minimum-idle=10
spring.datasource.hikari.maximum-pool-size=30
spring.datasource.hikari.auto-commit=true
spring.datasource.hikari.idle-timeout=30000
spring.datasource.hikari.pool-name=HikariCP
spring.datasource.hikari.max-lifetime=900000
spring.datasource.hikari.connection-timeout=10000
spring.datasource.hikari.connection-test-query=SELECT 1
xxl-job, email
spring.mail.host=smtp.qq.com
spring.mail.port=25
[email protected]
spring.mail.password=xxx
spring.mail.properties.mail.smtp.auth=true
spring.mail.properties.mail.smtp.starttls.enable=true
spring.mail.properties.mail.smtp.starttls.required=true
spring.mail.properties.mail.smtp.socketFactory.class=javax.net.ssl.SSLSocketFactory
xxl-job, access token
xxl.job.accessToken=
xxl-job, i18n (default is zh_CN, and you can choose “zh_CN”, “zh_TC” and “en”)
xxl.job.i18n=zh_CN
xxl-job, triggerpool max size
xxl.job.triggerpool.fast.max=200
xxl.job.triggerpool.slow.max=100
xxl-job, log retention days
xxl.job.logretentiondays=30
(2) Execute the package command, upload the generated JAR file to the 130 server, placed in the XXL-JOB directory of the root directory (not created)

(3) Create a dockerfile file in the XXL-Job directory, the content is as follows
FROM java:8u111
COPY xxl-job-admin-2.2.0-SNAPSHOT.jar /app.jar
CMD java -jar /app.jar
EXPOSE 8888
Execute the build mirror command:
docker build -t xxl-job-admin:2.2.0 .

(4) Creating a container
docker run -di --name=xxl-job-admin -p 8888:8888 xxl-job-admin:2.2.0
(5) Access

#### 3.2.3 SEATA deployment
(1) Take the mirror
docker pull seataio/seata-server:1.3.0
(2) Creating a container
docker run --name seata --restart=always -p 8091:8091 -e SEATA_IP=192.168.200.130 -e SEATA_PORT=8091 -d seataio/seata-server:1.3.0
 ### 3.3 Multi-environment switching

 (1) Modify the POM file of the Heima-Leadnews parent project, modify the Profiles section
- profiles label for the profile ID. Here we set up three environments, dev, test and pord. By activeByDefault label, it is activated by default dev environment
- Which labels
seata.addressCustom, referring to the seata service address, to make a variable for different environments
At the same time the need for changes to the seata engineering, modification file.conf files, connect seata address is:${seata.address}
The following code:
[Image dump the chain fails, the source station may have security chain mechanism, it is recommended to save the picture down uploaded directly (img-wkZb7qYI-1618144640052) (img / image-20201119194424452.png)]
(2) add configuration properties file to heima-leadnews-admin project as an example
Modify maven_dev.properties development environment
profiles.name=dev

 # kafka address
kafka.servers=192.168.200.130:9092
 #nacos address
nacos.server=192.168.200.130:8848

 # Database connection configuration information
datasource.url=jdbc:mysql://192.168.200.130:3306/leadnews_admin?useUnicode=true&characterEncoding=UTF-8&serverTimezone=UTC
datasource.username=root
datasource.password=root

 #es Configuration Information
elasticsearch.host=192.168.200.130
elasticsearch.port=9200

 # Image Access IP
fdfs.url: http://192.168.200.130/

 #xxljob connection configuration information
xxljob.admin.addresses=http://192.168.200.130:8888/xxl-job-admin
xxljob.admin.appname=leadnews-admin-executor
xxljob.admin.port=9999
Modify maven_prod.properties Build Environment
profiles.name=prod

 # kafka address
kafka.servers=192.168.200.130:9092
 #nacos address
nacos.server=192.168.200.130:8848

 # Database connection configuration information
datasource.url=jdbc:mysql://52.82.20.5:33066/leadnews_admin?useUnicode=true&characterEncoding=UTF-8&serverTimezone=UTC
datasource.username=root
datasource.password=qwe123zxcasd

 #es Configuration Information
elasticsearch.host=192.168.200.130
elasticsearch.port=9200

 # Image Access IP
fdfs.url: http://192.168.200.130/

 #xxljob connection configuration information
xxljob.admin.addresses=http://192.168.200.130:8888/xxl-job-admin
xxljob.admin.appname=leadnews-admin-executor
xxljob.admin.port=9999
Modify application.yml following documents, the address of the variable to a variable, read from the properties file
server:
  port: 9001
spring:
  application:
    name: leadnews-admin
  kafka:
    bootstrap-servers: ${kafka.servers}
    consumer:
      group-id: ${spring.application.name}-kafka-group
      key-deserializer: org.apache.kafka.common.serialization.StringDeserializer
      value-deserializer: org.apache.kafka.common.serialization.StringDeserializer
  cloud:
    nacos:
      discovery:
        server-addr: ${nacos.server}
    alibaba:
      seata:
        tx-service-group: ${spring.application.name}_tx_group
  datasource:
    driver-class-name: com.mysql.jdbc.Driver
    url: ${datasource.url}
    username: ${datasource.username}
    password: ${datasource.password}
 # Set the XML file location corresponding to the Mapper interface, if you have a custom method in the Mapper interface, you need to make this configuration
mybatis-plus:
  mapper-locations: classpath*:mapper/*.xml
     # Set the alias package scanpath, can give the class registration alias through this property
  type-aliases-package: com.heima.model.admin.pojos

 # Image Access IP
fdfs.url: ${fdfs.url}
xxljob:
  admin:
    addresses: ${xxljob.admin.addresses}
  executor:
    appname: ${xxljob.admin.appname}
    port: ${xxljob.admin.port}
 # Cancel the health checkup of ElastSearch
management:
  health:
    elasticsearch:
      enabled: false
 # Custom ElasticSearch connection configuration
elasticsearch:
  host: ${elasticsearch.host}
  port: ${elasticsearch.port}
Other micro-service configuration information, please refer to the contents of a folder, one by one modification
[Image dump the chain fails, the source station may have security chain mechanism, it is recommended to save the picture down uploaded directly (img-ywEnXYGT-1618144640053) (img / image-20201119201932805.png)]
After all environment configured, you can use the command maven package
If you usemvn packageDev environment is loaded by default, you can usemvn package -P prod Specified environment package
3.4 Service Integration Docker Configuration
After dockerfile way to create a container for each service used to build micro mirror, you need to add docker relevant configuration in each micro-services
(1) ModifyEach micro-servicesThe pom file, add plug-ins dockerfile
<properties>
    <docker.image>docker_storage</docker.image>
</properties>
<build>
    <finalName>heima-leadnews-admin</finalName>
    <plugins>
        <plugin>
            <groupId>org.springframework.boot</groupId>
            <artifactId>spring-boot-maven-plugin</artifactId>
            <executions>
                <execution>
                    <goals>
                        <goal>repackage</goal>
                    </goals>
                </execution>
            </executions>
        </plugin>
        <plugin>
            <groupId>org.apache.maven.plugins</groupId>
            <artifactId>maven-compiler-plugin</artifactId>
            <version>3.7.0</version>
            <configuration>
                <source>${java.version}</source>
                <target>${java.version}</target>
            </configuration>
        </plugin>
        <plugin>
            <groupId>com.spotify</groupId>
            <artifactId>dockerfile-maven-plugin</artifactId>
            <version>1.3.6</version>
            <configuration>
                <repository>${docker.image}/${project.artifactId}</repository>
                <buildArgs>
                    <JAR_FILE>target/${project.build.finalName}.jar</JAR_FILE>
                </buildArgs>
            </configuration>
        </plugin>
    </plugins>
</build>
(2) create Dockerfile file in the root directory of each micro-services, as follows:
# Set the Java version
FROM java:8
 # Specify the storage volume, any information written to / TMP writes will not be recorded to the container storage layer
VOLUME /tmp
 #     j JAR package
ARG JAR_FILE
COPY ${JAR_FILE} app.jar
 # Set the JVM running parameters, here is limited to memory size, reduce overhead
ENV JAVA_OPTS="\
-server \
-Xms256m \
-Xmx512m \
-XX:MetaspaceSize=256m \
-XX:MaxMetaspaceSize=512m"
 #    , execute the Java run command
ENTRYPOINT java ${JAVA_OPTS}  -jar /app.jar
[Outer chain picture failure, the source station may have an anti-theft chain mechanism, it is recommended to save the picture directly (IMG-xyzdy6GX-1618144640054) (IMG / image-20201119194506411.png)]
3.5 Foundation Dependent Package Configuration
You need to go to Install on the local repository before the microcontroller is running, so the first step should be pulled from git to pull the code and install the foundation dependency part into the warehouse.
(1) New creation of Item, named Heima-Leadnews
[Outer chain picture is not failed, the source station may have an anti-theft chain mechanism, it is recommended to save the picture directly upload (IMG-K4PENYIL-16181444640054) (IMG / IMAGE-20201119194559462.png)]
[Outer chain picture "failed, the source station may have an anti-theft chain mechanism, it is recommended to save the picture directly upload (IMG-6DXP2CD1-1618144640055) (IMG / IMAGE-2020111919460670.png)]
(2) Configure the current heima-leadnews
- Description item
[Outer chain picture is not failed, the source station may have an anti-theft chain mechanism, it is recommended to save the picture directly upload (IMG-Mozjfgc-1618144640056) (IMG / IMAGE-20201119194645150.png)]
- Source management:
Select Git, enter the git warehouse address (prerequisites, you need to upload the code to the Gitee warehouse), and finally enter the GetEe username and password.
If you do not configure Credentials, you can choose to add, then enter your username password.
[Outer chain picture is not failed, the source station may have an anti-theft chain mechanism, it is recommended to save the picture directly upload (IMG-IFOWYX3G-1618144640057) (IMG / IMAGE-20201119194706088.png)]
- In whichTriggerandBuild environmentNot set yet
- set upConstructConfigure
chooseInvoke top-level Maven targets
[Outer chain picture "failed, the source station may have an anti-theft chain mechanism, it is recommended to save the picture directly upload (IMG-WEQ4PNN4-1618144640058) (IMG / IMAGE-20201119194733089.png)]
Maven version: Maven configured in Jenkins
Target: Enter maven commandclean install -Dmaven.test.skip=true Skip test installation
[Outer chain picture "failed, the source station may have an anti-theft chain mechanism, it is recommended to save the picture directly upload (IMG-1FMJWXY3-1618144640059) (IMG / image-20201119194807205.png)]
(3) Start the project
You can see this item on the home page after the creation is complete.
[Outer chain picture "failed, the source station may have an anti-theft chain mechanism, it is recommended to save the picture directly (IMG-9JV0AOQS-1618144640060) (IMG / IMAGE-20201119194823966.png)]
Startup Project: Click the project you just created, then build now
[Outer chain picture "fail, the source station may have an anti-theft chain mechanism, it is recommended to save the picture directly upload (IMG-hj7dbght-1618144640061) (IMG / IMAGE-20201119194840691.png)]
You can view the scheduled progress on the left side:
[Outer chain picture is not failed, the source station may have an anti-theft chain mechanism, it is recommended to save the picture directly upload (IMG-IJXNWA6O-1618144640062) (IMG / image-20201119194853920.png)]
After entering, you can view the build log information.
In the process of constructing, you will continue to enter log information. If the error will also prompt the error message
[Outer chain picture "failed, the source station may have an anti-theft chain mechanism, it is recommended to save the picture directly upload (IMG-AQDKQBAM-1618144640063) (IMG / IMAGE-20201119194911227.png)]
Jenkins will pull the code from the git repository, then execute the maven's install command, install the code to the local warehouse.
In the end, if it is Success, it is successful.
[Outer chain picture "failed, the source station may have an anti-theft chain mechanism, it is recommended to save the picture directly upload (IMG-USAJ58DL-16181444640064) (IMG / IMAGE-20201119194927428.png)]
3.6 micro service packaging configuration
(1) New Item, take heima-leadnews-admin micro-service as an example
[Outer chain picture "failed, the source station may have an anti-theft chain mechanism, it is recommended to save the picture directly to directly upload (IMG-QXNZSFXW-1618144640065) (IMG / IMAGE-20201119194942159.png)]
(2) Configuration
-
Overview
[Outer chain picture "failed, the source station may have an anti-theft chain mechanism, it is recommended to save the picture directly (IMG-KGS200IU-1618144640066) (IMG / IMAGE-20201119194958438.png)]
-
Source management
[Outer chain picture "failed, the source station may have an anti-theft chain mechanism, it is recommended to save the picture directly upload (IMG-8nJRR3CX-1618144640067) (IMG / IMAGE-20201119195019462.png)]
-
Construct
Configure Maven
Execute the maven command:clean install -Dmaven.test.skip=true -P prod dockerfile:build -f heima-leadnews-admin/pom.xml
-Dmaven.test.skip = true skip test
-P Prod Specifies the environment to generate an environment
Dockerfile: Build Starts the Dockerfile Plugin Build Container
-f heima-leadnews-admin / pom.xml Specifies the file that needs to be built (must be a POM)
[Outer chain picture "failed, the source station may have an anti-theft chain mechanism, it is recommended to save the picture directly to upload (IMG-BDEHJ4PE-1618144640067) (IMG / IMAGE-20201119195134956.png)]
Execute the shell command
[Outer chain picture is not failed, the source station may have an anti-theft chain mechanism, it is recommended to save the picture directly upload (IMG-RCY6CIW9-16181444640068) (IMG / IMAGE-20201119195151593.png)]
[Outer chain picture is not failed, the source station may have an anti-theft chain mechanism, it is recommended to save the picture directly upload (IMG-vefjpqzs-1618144640069) (IMG / image-20201119195200830.png)]
if [ -n  "$(docker ps -a -f  name=heima-$JOB_NAME  --format '{{.ID}}' )" ]
 then
   #
 docker rm -f $(docker ps -a -f  name=heima-$JOB_NAME  --format '{{.ID}}' )
fi
   #
docker image prune -f
   #   docker service
docker run -d --net=host  --name heima-$JOB_NAME docker_storage/heima-$JOB_NAME
It is not only a simple start service, we have to consider that each construction will generate a mirror, so try to clean it first, then start the service.
Docker has five network connection modes, because we are not all services that use Docker build, and the middleware service is deployed on the host machine. Here we use Host mode, such a Docker container and host services are interoperability.
- Bridge mode
Use commands: -net = bridge, this is the default setting of the Dokcer network, creates a separate network namespace for the container, and the container has a separate network stack such as a separate NIC, which is the default mode.
- Host mode
Use the command: -net = host, directly using the network namespace of the container host, that is, there is no separate network environment. It uses the IP and port of the host.
- NONE mode
Command: -net = none, create a standalone network namespace for the container, in which DOKCER does not make any network configuration for the container. We need to add a network card to the container, configure IP.
- Container mode
Command: -net = container: name_or_id, similar to the Host mode, this mode is to specify an existing container to share the IP and port of the container.
- Custom mode
The new features after the Docker 1.9 version allows containers to use third-party networks to implement or create a separate Bridge network, providing network isolation capabilities.
If it is over, it's configured, save it.
(3) Start the project build Now
- First pull the code from git
- Compile package
- Mirror
- Create a container
- Delete excess mirror
Can be viewed from the server
[Outer chain picture "failed, the source station may have an anti-theft chain mechanism, it is recommended to save the picture directly upload (IMG-ZOC9G7EP-1618144640070) (IMG / IMAGE-20201119195217373.png)]
The container has also been created
[Outer chain picture "failed, the source station may have an anti-theft chain mechanism, it is recommended to save the picture directly upload (IMG-mktrk2t2-16181444640071) (IMG / IMAGE-20201119195227672.png)]
You can test the service interface using the Postman test
3.7 Build other micro services
You can refer to the Admin microcate to create additional micro-services, each project may have different Maven build commands, please configure according to actual requirements
- Heima-Leadnews-Admin-Gateway Microser Configuration:
Maven command: clean install -dmaven.test.skip = true dockerfile: build -f heima-leadnews-admin-gateway / pom.xml
[Outer chain picture failure, the source station may have an anti-theft chain mechanism, it is recommended to save the picture directly upload (IMG-o0ynkti0-1618144640072) (IMG / IMAGE-20201119195322925.png)]
- HeiMA-Leadnews-User Micro Services Configuration:
Maven command: clean install -dmaven.test.skip = true dockerfile: build -f heima-leadnews-user / pom.xml
[Outer chain picture is not failed, the source station may have an anti-theft chain mechanism, it is recommended to save the picture directly upload (IMG-YDAO8PTN-1618144640072) (IMG / Image-20201119195338533.png)]
After all project build completed, started the ADMIN front-end project locally, modify the gateway address in Configs:192.168.200.100, Effect test
3.8 Deploying Front End Project
(1) Install nginx
The official website downloads nginx: http://nginx.org/, you can also use the installation package in the information. Version: nginx-1.18.0
Installation dependence
- Need to install GCC environment
yum install gcc-c++
-
Third-party development kit.
-
PCRE (Perl Compatible Regular Expressions) is a Perl library, including Perl compatible regular expressions. Nginx's HTTP module uses PCRE to resolve regular expressions, so you need to install the PCRe library on Linux.
yum install -y pcre pcre-develNote: PCRE-Devel is a secondary development library developed using PCRE. Nginx also needs this library.
-
The Zlib library provides many ways to compress and decompress, NGINX uses ZLIB to Gzip's content of the HTTP package, so you need to install the ZLIB library on Linux.
yum install -y zlib zlib-devel -
OpenSSL is a powerful secure sleeve layer cryptocatical library, including primary password algorithms, commonly used keys and certificate package management functions and SSL protocols, and provides a wealth of applications for testing or other purposes. Nginx
Not only supports the HTTP protocol, but also supports HTTPS (ie, transmitting HTTP on the SSL protocol), so you need to install the OpenSSL library in Linux.yum install -y openssl openssl-devel
Nginx installation
Step 1: Upload NGINX source package nginx-1.18.0.tar.gz to Linux system
Step 2: Unzip
tar zxvf nginx-1.18.0.tar.gz
Step 3: Enter the nginx-1.18.0 directory Use the configure command to create a Makefile file.
./configure \
--prefix=/usr/local/nginx \
--pid-path=/var/run/nginx/nginx.pid \
--lock-path=/var/lock/nginx.lock \
--error-log-path=/var/log/nginx/error.log \
--http-log-path=/var/log/nginx/access.log \
--with-http_gzip_static_module \
--http-client-body-temp-path=/var/temp/nginx/client \
--http-proxy-temp-path=/var/temp/nginx/proxy \
--http-fastcgi-temp-path=/var/temp/nginx/fastcgi \
--http-uwsgi-temp-path=/var/temp/nginx/uwsgi \
--http-scgi-temp-path=/var/temp/nginx/scgi
You can see the Makefile file after execution
Step 4: Compilation
make
Step 5: Installation
make install
Step 6: Start
Note: Before starting NGINX, the temporary file directory is specified as / var / temp / nginx / client, you need to create this under / VAR
content
mkdir /var/temp/nginx/client -p
Enter the sbin directory under the NGINX directory
cd /usr/local/ngiux/sbin
Enter the command to start Nginx
./nginx
View the process after startup
ps aux|grep nginx
(2) Upload NGINX front-end project
Modify configuring config \ index.js, gateway address pointing to 100 servers
[Outer chain picture "failed, the source station may have an anti-theft chain mechanism, it is recommended to save the picture directly upload (IMG-6QTGHHCU-1618144640074) (IMG / Image-20201119195400741.png)]
Packaging admin front end
[Outer chain picture "fail, the source station may have an anti-theft chain mechanism, it is recommended to save the picture directly upload (IMG-F0BXCNVG-1618144640074) (IMG / IMAGE-20201119195536776.png)]
Find the root of the project, generate a Dist folder, then compress
Upload the DIST compression package after the compression to the server, copy to the Linux root directory to create Workspace / Admin (centered)
Unzip the current compression package
unzip -o dist.zip
[Outer chain picture "failed, the source station may have an anti-theft chain mechanism, it is recommended to save the picture directly upload (IMG-HSRPFGNP-1618144640075) (IMG / IMAGE-20201119195557739.png)]
(3) Configure Nginx
Open Linux directory: / usr / local / nginx / conf
Edit the nginx.conf file, replace it as follows:
user  root;
worker_processes  1;

events {
    worker_connections  1024;
}

http {
    include       mime.types;
    default_type  application/octet-stream;


    upstream  heima-admin-gateway{
        server localhost:6001;
    }

    server {
	listen 80;
	server_name localhost;

	location / {
	    alias /root/workspace/admin/dist/;
	    index index.html ;
	    allow all;
	}
	location ~/service_6001/(.*) {
	    proxy_pass http://heima-admin-gateway/$1;
	    proxy_set_header HOST $host;
	    proxy_pass_request_body on;
	    proxy_pass_request_headers on;
	    proxy_set_header X-Real-IP $remote_addr;
	    proxy_set_header X-Forwarded-For $proxy_add_x_forwarded_for;
	}

     }

}
Restart Nginx
Go to / usr / local / nginx / sbin directory, execute command
./nginx -s reload
(4) Effect
Enter: http://192.168.200.100/ accessible system
[Outer chain picture "failed, the source station may have an anti-theft chain mechanism, it is recommended to save the picture directly upload (IMG-VR9JOCSV-1618144640076) (IMG / IMAGE-20201119195658553.png)]
3.9 Deployment Services to Remote Servers
Released by remote deployment, you need to use Docker's Registry Warehouse Service.
(1) Create Item
There is no difference before before
(2) Configuration
-
Select Parameterization:
[Outer chain picture "failed, the source station may have an anti-theft chain mechanism, it is recommended to save the picture directly upload (IMG-QLZVQVMP-1618144640077) (IMG / IMAGE-20201119200507442.png)]
Set the address and port of private warehouse: 192.168.200.100: 5000
[Outer chain picture "failed, the source station may have an anti-theft chain mechanism, it is recommended to save the picture directly upload (IMG-SFCRBNJF-1618144440078) (IMG / IMAGE-20201119200524420.png)] Source management is the same
[Outer chain picture is not failed, the source station may have an anti-theft chain mechanism, it is recommended to save the picture directly upload (IMG-Kockpwki-1618144640079) (IMG / IMAGE-20201119200608048.png)]
-
Construct
[Outer chain picture is not failed, the source station may have an anti-theft chain mechanism, it is recommended to save the picture directly (IMG-VP0AVZWU-1618144640080) (IMG / IMAGE-20201119200629747.png)]
Execute Execute Shell
[Outer chain picture is not failed, the source station may have an anti-theft chain mechanism, it is recommended to save the picture directly (IMG-EH37TJSG-1618144640081) (IMG / IMAGE-20201119200649412.png)]
image_tag=$docker_registry/docker_storage/heima-$JOB_NAME
 echo '================ Docker image cleaning =================
if [ -n  "$(docker ps -a -f  name=heima-$JOB_NAME  --format '{{.ID}}' )" ]
 then
   #
 docker rm -f $(docker ps -a -f  name=heima-$JOB_NAME  --format '{{.ID}}' )
fi
   #
docker image prune -f

 # Create TAG
docker tag docker_storage/heima-$JOB_NAME $image_tag
 echo '================ Docker mirror push =================
 # Push mirror
docker push $image_tag
# Delete Tag
docker rmi $image_tag
 echo '================ Docker tag cleaning =================
Perform scripts on remote servers
[Outer chain picture "failed, the source station may have an anti-theft chain mechanism, it is recommended to save the picture directly (IMG-BRB5QFCN-1618144640082) (IMG / IMAGE-20201119200737923.png)]
Echo '================       = =================
docker pull $docker_registry/docker_storage/heima-$JOB_NAME

 Echo '================ Delete Cleanup container mirror =================
if [ -n  "$(docker ps -a -f  name=heima-$JOB_NAME  --format '{{.ID}}' )" ]
 then
   #
 docker rm -f $(docker ps -a -f  name=heima-$JOB_NAME  --format '{{.ID}}' )
fi
   #
docker image prune -f

 echo '=============== Start container =================
docker run -d   --net=host --name heima-$JOB_NAME $docker_registry/docker_storage/heima-$JOB_NAME
(3) Construction
Use parameter build, select the previous parameters
[Outer chain picture is not failed, the source station may have an anti-theft chain mechanism, it is recommended to save the picture directly (IMG-H7LXDYHU-1618144640083) (IMG / IMAGE-20201119200756945.png)]
If you can't PULL mirror on the remote server, you need to set it on the remote server, configure Docker trust private warehouse address.
Modify daemon.json
vi /etc/docker/daemon.json
Add the following, save exit.
{"insecure-registries":["192.168.200.100:5000"]}
[Outer chain picture is not failed, the source station may have an anti-theft chain mechanism, it is recommended to save the picture directly upload (IMG-CWPWDUQD-1618144640084) (IMG / IMAGE-20201119200823941.png)]
Restart the Docker effective
systemctl restart docker
rebuild
3.10 Build trigger configuration
- Trigger remote build
- Trigger after other projects (BuildAther Projects Are Build)
- Timerby Build Periodically
- Polling SCM (Poll SCM)
[Outer chain picture is not failed, the source station may have an anti-theft chain mechanism, it is recommended to save the picture directly upload (IMG-SJTAGXHC-1618144640085) (IMG / IMAGE-20201119200850132.png)]
(1) Trigger remote construction
[Outer chain picture "failed, the source station may have an anti-theft chain mechanism, it is recommended to save the picture directly upload (IMG-6ZEM64V8-1618144640085) (IMG / Image-20201119200903343.png)]
Trigger build URL: http://192.168.200.100:16060/job/leadnews-admin/build?token=88888888
(2) Configure the project that needs to trigger
[Outer chain picture failure, the source station may have an anti-theft chain mechanism, it is recommended to save the picture directly upload (IMG-PZGSAK9i-1618144640086) (IMG / IMAGE-20201119200924549.png)]
(3) Build Periodically
[Outer chain picture "failed, the source station may have an anti-theft chain mechanism, it is recommended to save the picture directly upload (IMG-3RUMGQFC-1618144640087) (IMG / IMAGE-2020119200937549.png)]
Timed strings from left to right, respectively: minute day and month
Example of a timed expression
Built once every 30 minutes: h represents H / 30 * * * * 10:02 10:32
Built once every 2 hours: h h / 2 * * *
3 times a day, 12 o'clock, one day, 3 times: (Separated in the middle of multiple points) 0 8, 12, 22 * * *
Built once at 12 o'clock every day, H 12 * * *
Built once a day at 18 o'clock in the afternoon, h 18 * * *
Every 10 minutes H (0-29) / 10 * * * * in the first half hour of each hour
Every two hours, 9:00 am to 5 pm every working day (maybe it is 10:38 am, at 12:38 pm, 2:38 pm, afternoon
4:38) H H(9-16)/2 * * 1-5
(4) Polling SCM (Poll SCM)
Polling SCM is a change in code when scanning the local code warehouse is changed, and if the code is changed, it triggers project build.
[Outer chain picture "failed, the source station may have an anti-theft chain mechanism, it is recommended to save the picture directly (IMG-8zjbnrwc-1618144640088) (IMG / IMAGE-20201119200951663.png)]
Jenkins will schedule the code of the entire project, increase the overhead of the system, not recommended.
Intelligent Recommendation
CentOS + Jenkins + Gitlab + Maven continues to integrate, continuous delivery, and continuous deployment
Jenkins is developed by Java and needs to be based on JDK and MAVEN. Linux installation JDK 1. Check the JDK version in the system: . 2, check the JDK self-installation package: 3, if there is an comi...
Jenkins continues to integrate (1) Multi-branch rapid deployment
Foreword In response to multi-environment, multi-service, multi-branch service deployment and automation interface test, select Jenkins + Maven + Git to make a one-click specified branch package relea...
Ali Cloud server continues to integrate continuous deployment Jenkins installation
Check the JDK version number java -version If you don't have a Java environment, you can refer to this. In short, it is Download JDK installation package from the official website Then move on the ser...
Readapi continues to integrate jenkins on linux
1.readyapi installation operating environment IP:10.200.200.200 table of Contents Installation path /usr/local/readyapi2.3.0 Project path /home/readyapi/project Jar package path /home/readyapi/ext Scr...
Jenkins continues to integrate python projects
Jenkins installation See detailsInstalling JenkinsOne thing to mention is that Jenkins is more memory intensive. It will eat more than 300 M without running any build tasks, and it will take up more w...
More Recommendation

Jenkins continues to integrate Go projects
After stepping on the pit for a day, I was able to use the jenkins to implement the push code in other places, and the effect of the automatic build in the server was recorded. Server System: Windows ...
Jenkins + Github + Selenium continues to integrate
Jenkins + Github + Selenium continues to integrate Configure SSH (1) Set user mailbox Git config - Global User.email "Email Address" (2) Generate public keys and keys SH-keygen -t t t c &quo...

JMeter + Maven + Jenkins continues to integrate
Jenkins continues to integrate 1. Install configuration jenkins 1.1 Welcome interface, directly click Next. 1.2 Select the installation directory, click Next 1.3 Setting the login credentials f...
Jenkins continues to integrate from 0
1, prepare a virtual machine: here is not described here Jenkins attachment: 2, install JDK Configure the Java environment in / etc / profile 3, install SVN (note Linux firewall intercept port) Corres...

Jenkins automation test continues to integrate
1.Jenkins download 2. JDR environment download: 3. Continue console input command: 5. Because Jenkins's WAR package comes from the Jetty server, after the start is successful, open the browser operati...