Centos7 install rabbitmq detailed tutorial
First, RabbitMQ brief introduction
RabbitMQ is one of the most popular messaging middlewares. RabbitMQ is an open source AMQP implementation. The server is written in Erlang and supports a variety of clients, such as Python, Ruby, .NET, Java, JMS, C, PHP, ActionScript, XMPP, STOMP, etc., supporting AJAX. It is used to store and forward messages in a distributed system and performs well in terms of ease of use, scalability, and high availability.
In the current distributed environment, it becomes a very common message queue. The following details how to install and deploy rabbitmq on centos7, and enumerate simple maintenance, which is convenient for operation and maintenance students to better maintain the normal operation of rabbitmq. Due to the general production environment, neither erlang nor rabbitmq can be upgraded freely. Every upgrade is cautious, so it is recommended to use source installation here, so the version is fixed, and it will not be installed through yum. The upgraded version caused problems such as service failures. Of course, yum installation will be simpler, here is not to introduce, interested in the reference to the official documentation.
Second, install rabbitmq under Centos7
Rabbitmq is written in erlang language. Before installing rabbitmq, you need to install erlang first. Here, use erlang source code to install, erlang installation package official website download address:http://erlang.org/download/
wget http://erlang.org/download/otp_src_21.1.tar.gz
tar -zxvf otp_src_21.1.tar.gz
cd otp_src_21.1
 # Here to create a new erlang folder, because erlang compiler installation is installed in the bin and lib under /usr/local, here we will install it to /usr/local/erlang, easy to find and use.
mkdir -p /usr/local/erlang

 # The following dependencies must be installed before compiling
yum install -y make gcc gcc-c++ m4 openssl openssl-devel ncurses-devel unixODBC unixODBC-devel java java-devel

./configure --prefix=/usr/local/erlang
The erlang compiler needs to use the java environment. If it is not installed, it will report the error as follows.

The following two: APPLICATIONS INFORMATION, DOCUMENTATION INFORMATION is normal, does not affect the normal compilation.
Then, directly execute make && makeinstall to compile and install
make && make install
After installation, it will appear in /usr/local/erlang as follows:

Then add the /usr/local/erlang/bin folder to the environment variable and load the following to use it directly.
vim /etc/profile
######### Add the following content ###############
PATH=$PATH:/usr/local/erlang/bin
########################################

source /etc/profile
At this point, after the installation is complete, enter erl directly, and the following figure is successfully installed.

OK, after installing erlang, install rabbitmq below. Before installation, you need to go to the official website to check the support of rabbitmq version to erlang version. Official website address:http://www.rabbitmq.com/which-erlang.html

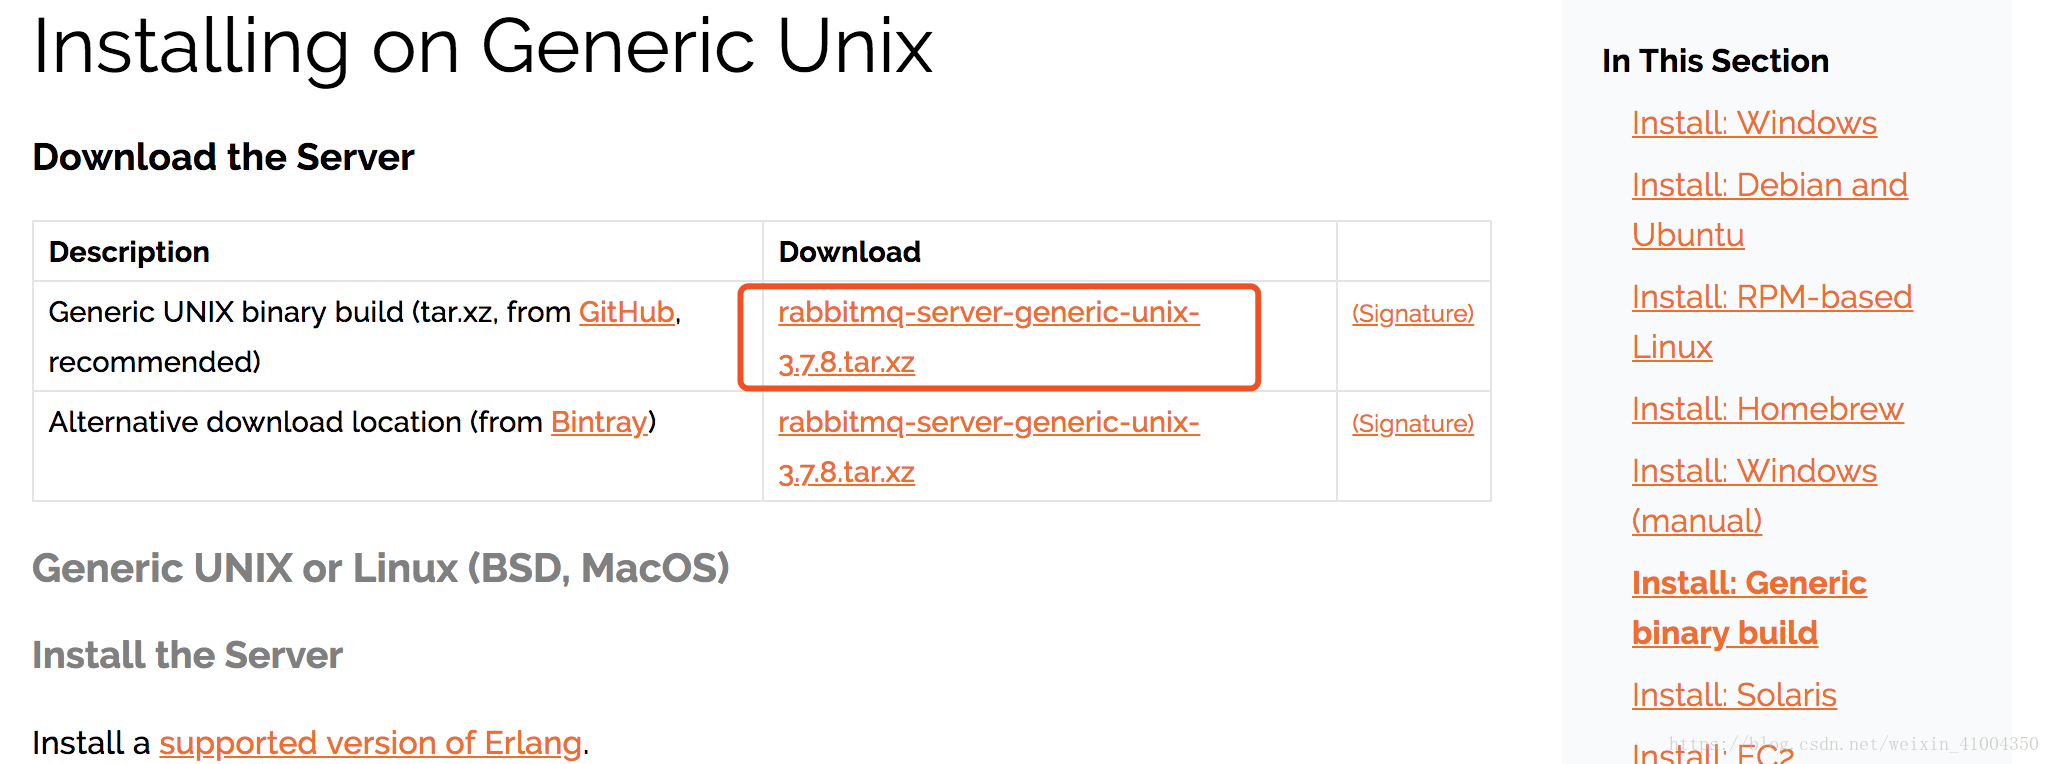
Here, the erlang we installed is the latest version 21, so rabbitmq also installs the latest 3.7.7, 3.7.8. Then on the official website, directly download the version of the installation package, in order to facilitate the installation, it is best to use the compiled binary package directly, ready to use, without complicated yum configuration. For details, please refer to the official document:http://www.rabbitmq.com/install-generic-unix.html
#
wget https://github.com/rabbitmq/rabbitmq-server/releases/download/v3.7.8/rabbitmq-server-generic-unix-3.7.8.tar.xz
#
tar -xvf rabbitmq-server-generic-unix-3.7.8.tar.xz -C /usr/local/
# Add environment variables
vim /etc/profile
------ Add the following content ------
PATH=$PATH:/usr/local/rabbitmq_server-3.7.8/sbin
# overload the environment variable
source /etc/profile
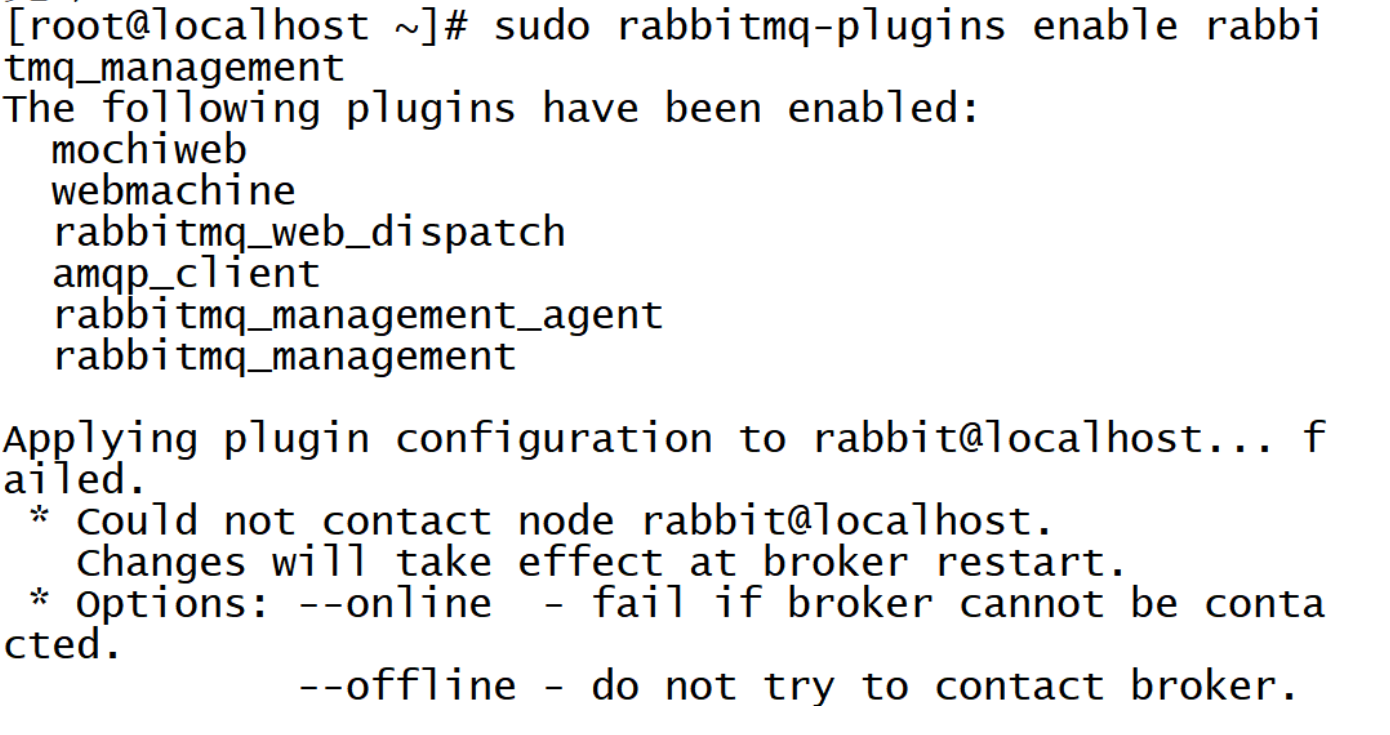
# Add web management plugin
rabbitmq-plugins enable rabbitmq_management
The default rabbitmq is no configuration file. You need to go to the official github and copy a configuration file template. The latest version 3.7.0 or higher can use the new key-value configuration file rabbitmq.conf, and the original erlang format advanced. The .config combination solves the configuration that is not well defined by the key-value form. Github address:https://github.com/rabbitmq/rabbitmq-server/tree/master/docs
Since I installed the latest 3.7.8 here. So use the new configuration file and copy the configuration file to /usr/local/rabbitmq_server-3.7.8/etc/rabbitmq/. Such as:

Ok, then you can start the rabbitmq service, in fact, there is no configuration file can start the service.
# Background start rabbitmq service
rabbitmq-server -detached
Above, the management plug-in for rabbitmq is enabled, there will be a web management interface, the default listening port 15672, open this port on the firewall, you can access the web interface:
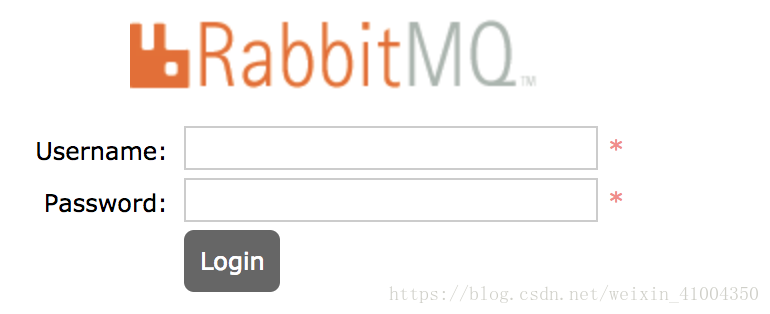
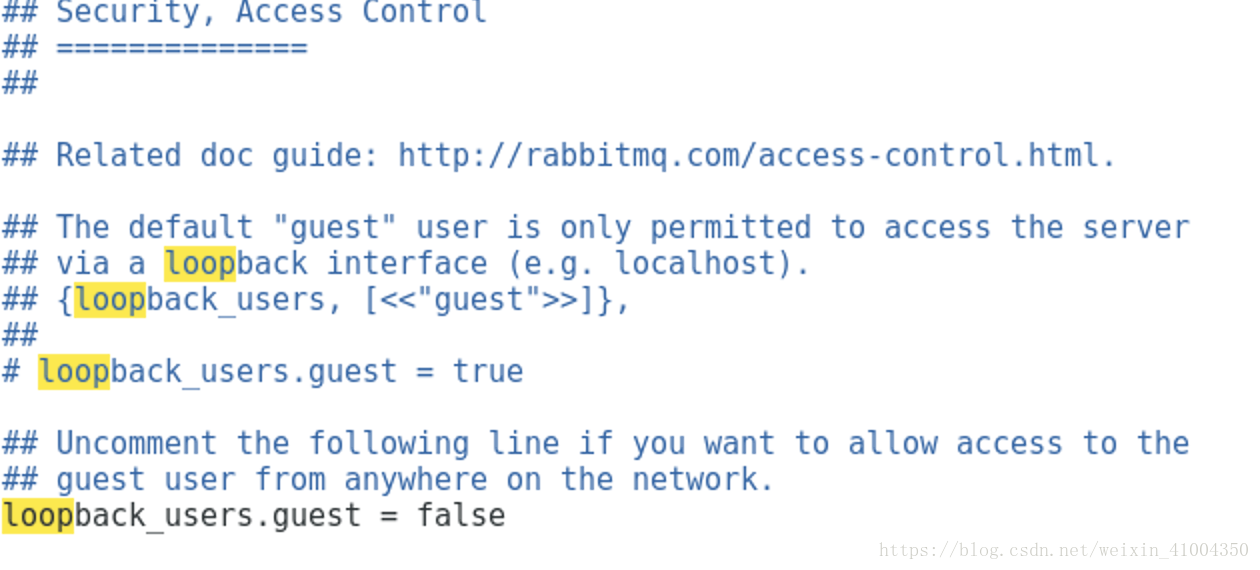
If you log in using the default user guest / guest (this is also the administrator user), you will find that you cannot log in. Error: User can only log in via localhost. That is because the default is to limit the guest users can only log in locally, that is, only localhost: 15672. You can cancel this restriction by modifying the configuration file rabbitmq.conf: The loopback_users entry is used to control access. If you just cancel the guest user, you only need loopback_users.guest = false.
note:
{loopback_users, [<<"guest">>]}
This is the original configuration of the erlang format, followed by a list that can be customized to add multiple users.
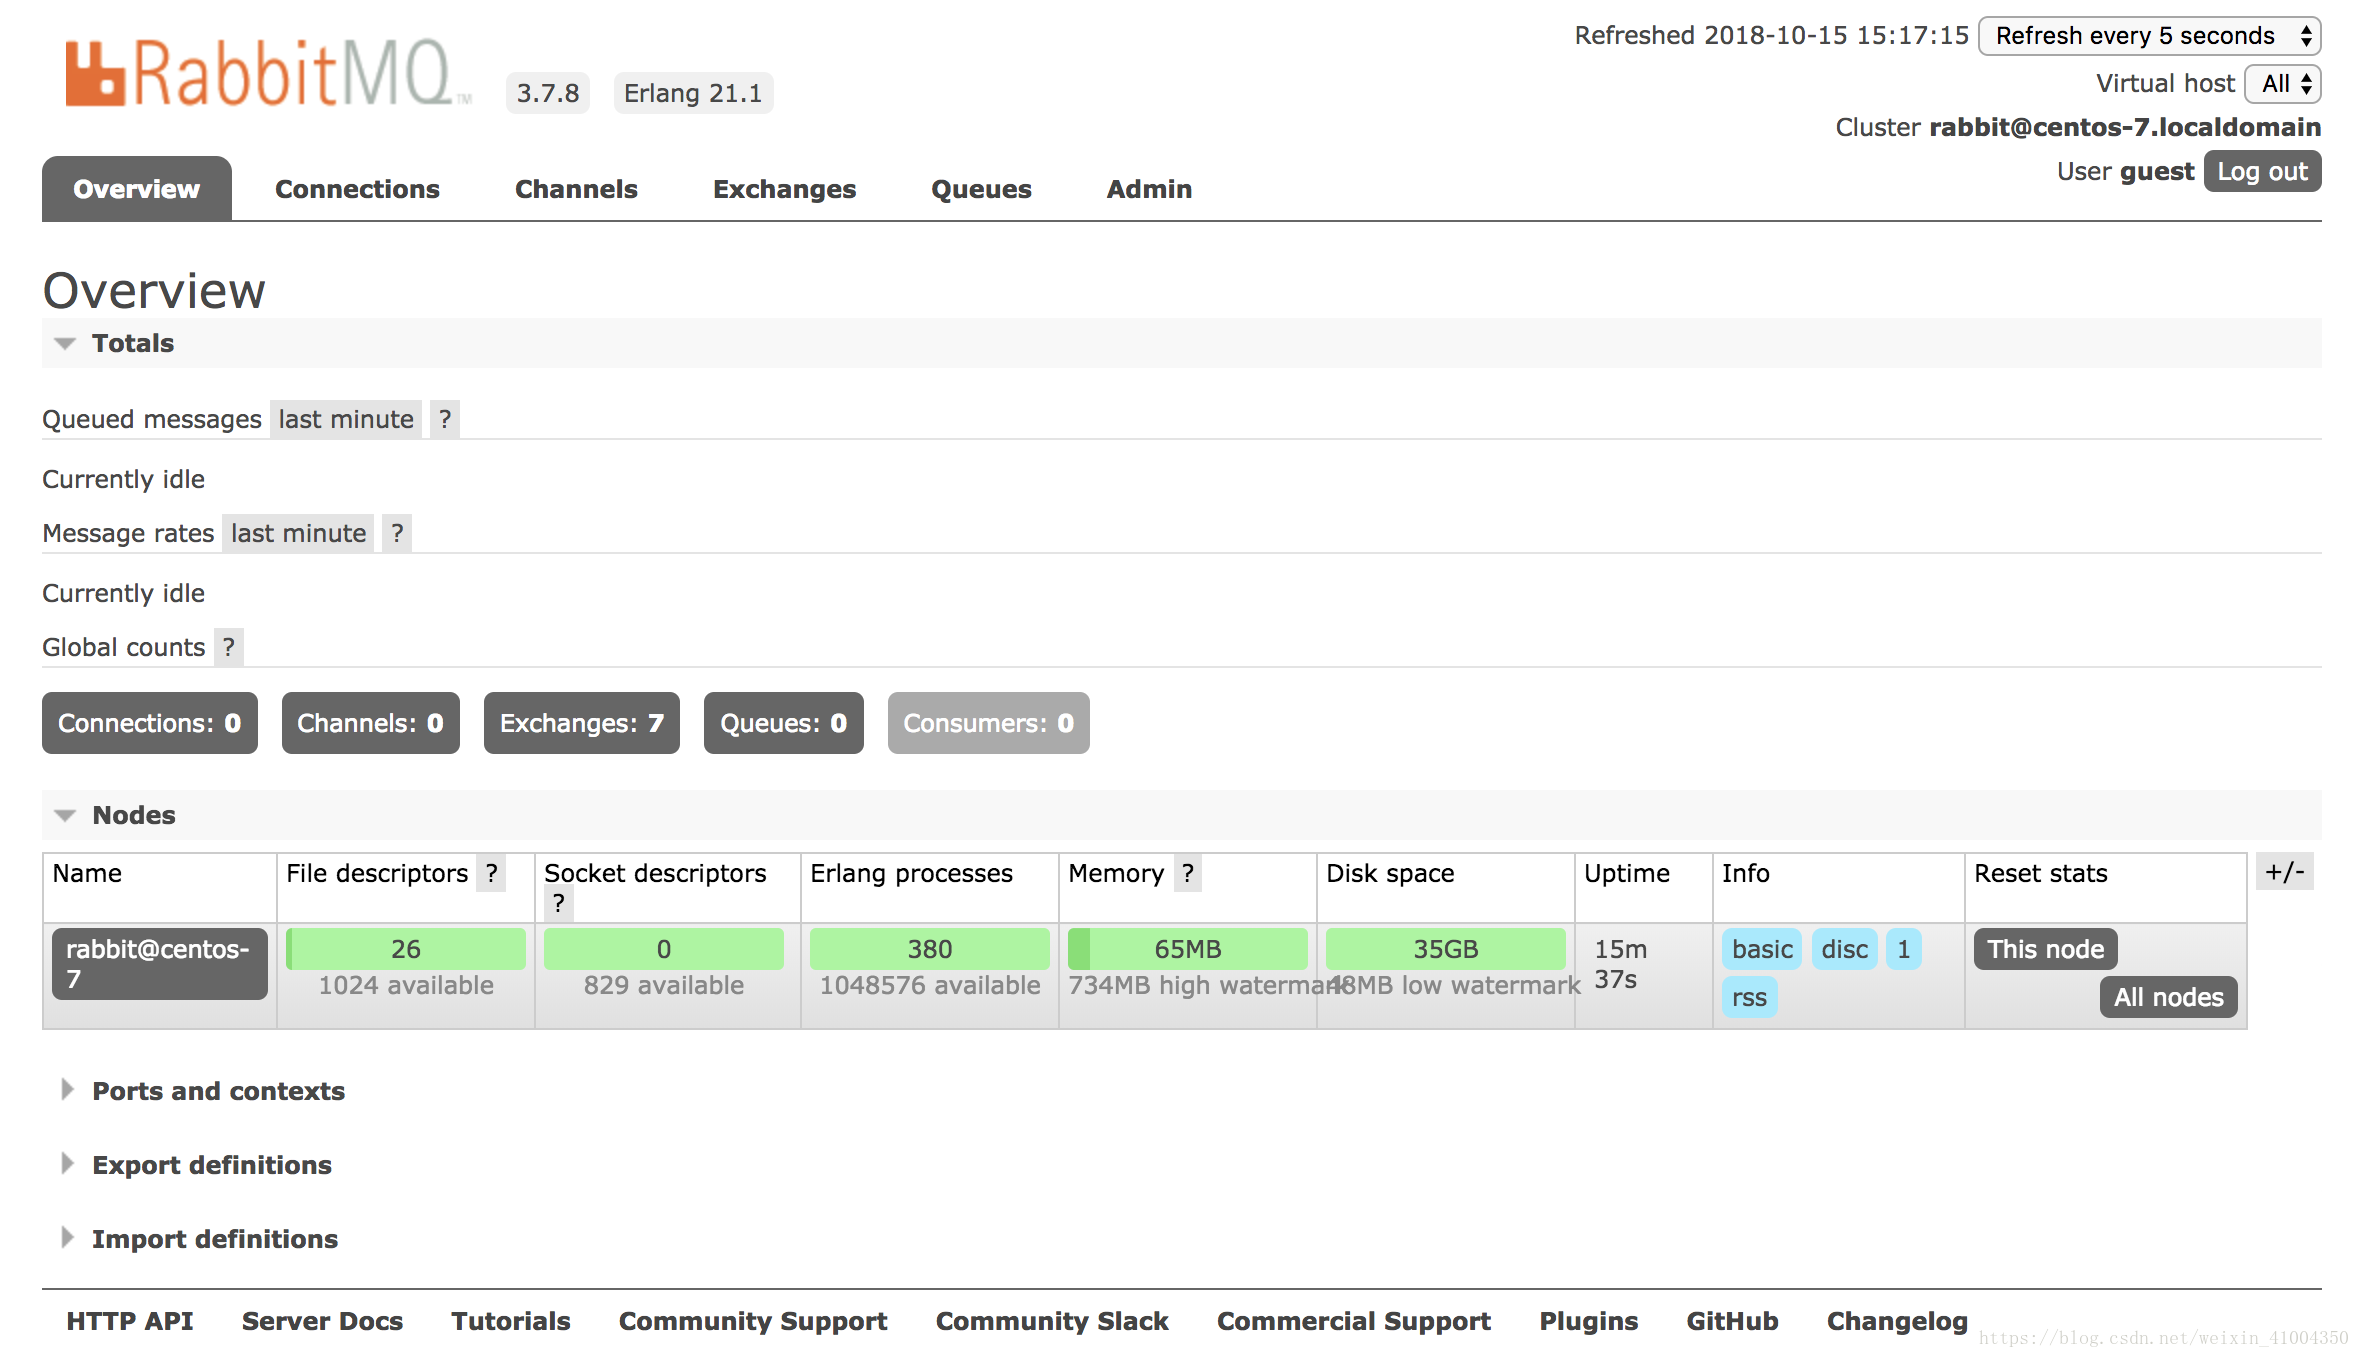
Then you can log in to the web control interface:
OK, even if rabbitmq is installed, here are some common operations:
The service starts to stop:
Start: rabbitmq-server -detached
Stop: rabbitmqctl stop
Plugin management:
List of plugins: rabbitmq-plugins list
Start the plugin: rabbitmq-plugins enable XXX (XXX is the plugin name)
Disable plugin: rabbitmq-plugins disable XXX
User Management:
Add user: rabbitmqctl add_user username password
Delete user: rabbitmqctl delete_user username
Change password: rabbitmqctl change_password username newpassword
Set the user role: rabbitmqctl set_user_tags username tag
List users: rabbitmqctl list_users
authority management:
List all user permissions: rabbitmqctl list_permissions
View the user rights: rabbitmqctl list_user_permissions username
Clear user permissions: rabbitmqctl clear_permissions [-p vhostpath] username
Set user permissions: rabbitmqctl set_permissions [-p vhostpath] username conf write read
Conf: a regular match which resources can be accessed by the user
Write: a regular match which resources can be written by the user
Read: a regular match which resources can be read by the user
OK, I will introduce it here today. This is just a single node for a single machine to install rabbitmq. The rabbitmq itself is the intermediate component of the common language distributed architecture, so the cluster building of rabbitmq is more important, this time next time.
Intelligent Recommendation
Install rabbitMQ detailed tutorial in linux
Since RabbitMQ relies on Erlang, you need to install Erlang first. Install RabbitMQ, delete the guest, add new users: We’b page visit: Your current Alibaba Cloud Ip+ port just opened, the accoun...

[Windows Install Rabbitmq Detailed Tutorial]
Windows Install Rabbitmq Detailed Tutorial Foreword First, what is Rabbitmq? Second, the installation step 1. Install preparation work 2. Start installation 3. End the installation Summarize Foreword ...

Linux install RabbitMQ detailed tutorial
content First, prepare the environment to prepare 1, RabbitMQ version and version compatibility relationships Erlang 2, the official installation package Download 3, installation package instructions,...

Rabbitmq-Centos7 Install the Rabbitmq tutorial and PHP to open Rabbitmq extension!
If you are interested, WeChat search "I am Amu"Focus on me this a bit nerve but optimistic programmer. I hope that the friends learn from Amu, and the amount of knowledge storage can have a ...
Alibaba Cloud Centos7 install RabbitMQ tutorial
Alibaba Cloud Centos7 install RabbitMQ tutorial 1.1 Install Erlang 1.2 Install rabbitmq-server 1.3 Open rabbitmq plugin management 1.4 List RabbitMQ user list 1.5 Configuration supports remote access ...
More Recommendation
CENTOS7 Install Rabbitmq Simple and Practical Tutorial
First of all, the JDK environment is required to install Rabbitmq. If the virtual machine does not have JDK1.8 friends to search for a tutorial by themselves, soon, we will enter today's topic. Becaus...
Detailed tutorial on installing and configuring rabbitMQ under CentOS7
Detailed tutorial on installing and configuring rabbitMQ under linux Environmental preparation: contOS7 Install Erlang Because RabbitMQ depends on Erlang, Erlang needs to be installed first. There are...
Install CentOS7 detailed tutorial in VMware14
VMware Workstation14 install CentOS7.0 details tutorial Preparation work a) Download VMware workstation14 b) Download CentOS7http://isoredirect.centos.org/centos/7/isos/x86_64/CentOS-7-x86_64-DVD-1804...
Centos7 install mpich detailed tutorial
The emmmm recent course requires some minor issues during the mpi installation process. The commands are best under root. First check the list that can be installed yum list mpich* Then look at the li...
Centos7 install redis detailed tutorial
First check if gcc dependencies are installed: gcc -v No install compile dependencies: yum install gcc First download redis: https://redis.io/ Download the stable version: upload to the server Unzip: ...