Use 30 yuan development board UNO D1 R32 to build an IoT development environment
tags: C++ Embed UNO D1 R32 Internet of Things
This article introduces the method of using UNO D1 R32 (ESP32) development board to build an embedded development environment.
What is ESP32?
In the words of the manufacturer, ESP32 is made with 40 nm process, which has the best power performance, radio frequency performance, stability, versatility and reliability, and is suitable for various application scenarios and different power consumption requirements. The following are the main parameters of ESP32:
| project | Value |
|---|---|
| Number of cores | 2 |
| Architecture | 32bit |
| Wifi | Yes |
| Bluetooth | Yes |
| RAM | 512K |
| Flash memory | 16M |
| GPIO | 36 |
| Protocol | SPI, IIC, I2S, UART, CAN |
| ADC (Analog to Digital Converter) | 18 channels 12 bits |
| DAC (Digital to Analog Converter) | 2 channels 8 bits |
| Memory card interface | 1 |
| Temperature Sensor | 1 |
It can be seen from the chip parameters of ESP32 that its function is very powerful; the other is also very important: it is very cheap. These two elements determine: it is very suitable for the current popular Internet of Things development, but also very suitable for learning embedded development.
Prepare the hardware
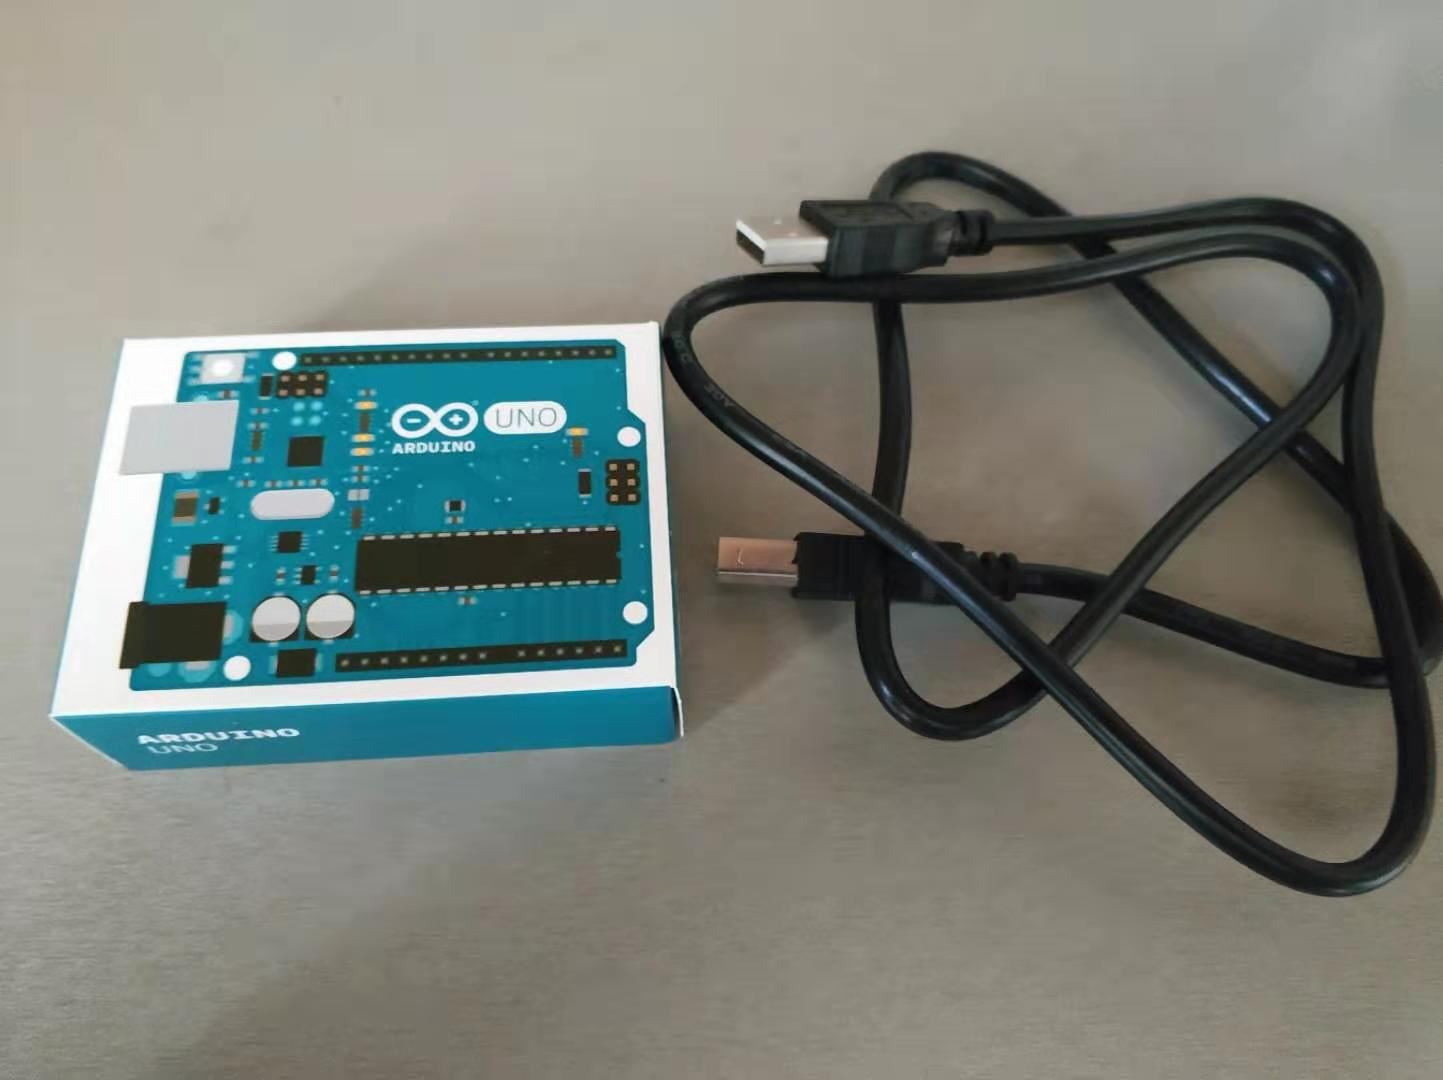
Since it is embedded development, it will inevitably involve input. There are generally two ways to choose the simplest ESP32 development board, but this requires us to prepare input and output expansion ourselves. Although it is not too difficult, it is always troublesome. We choose another way: UNO D1 R32 development board following the Ardino specification:
By comparing with a dollar coin, we can know that UNO D1 R32 is still very small.
Install Arduino
The description of Arduino in Baidu Encyclopedia is as follows:
Arduino is a convenient, flexible, and easy to use open source electronic prototype platform. Contains hardware (various types of Arduino boards) and software (ArduinoIDE). It was developed by a European development team in the winter of 2005. Its members include Massimo Banzi, David Cuartielles, Tom Igoe, Gianluca Martino, David Mellis and Nicholas Zambetti. It is built on the open source simple I/O interface version, and has a Processing/Wiring development environment similar to Java and C language. It mainly includes two parts: the hardware part is the Arduino circuit board that can be used for circuit connection; the other is the Arduino IDE, the program development environment in your computer. You only need to write the program code in the IDE, upload the program to the Arduino board, and the program will tell the Arduino board what to do.
What to do is actually very simple: go to the following webpage to download and install the ArduinoIDE software.
https://www.arduino.cc/en/Main/Software
You can also download directly using the link below.
Window Installer
Install ESP32 Development Kit
There are several ways to install ESP32 in ArduinoIDE. The last one is the reference document (the one with twists and turns) that is the closest to success, but the process of downloading the installation package is still twists and turns. The main problem is that the file download is too difficult. Therefore, the author first collected these files and modified the installation steps as follows:
1. Create the espressif/esp32 directory in the hardware directory under the Arduino installation
2. Download the arduino-esp32 support package from github:
3. Unzip the downloaded Zip file to the esp32 directory created in the first step.
4. Enter the espressif/esp32/tools directory and execute get.ext in the directory.
5. Automatic installation. But at the time of the third file, it could not be completed.
You can find the following webpage by searching directly on the Internet: https://github.com/igrr/mkspiffs/releases/tag/0.2.3
You can directly choose to download mkspiffs-0.2.3-arduino-esp32-win32.zip or click the following link to download: https://github.com/igrr/mkspiffs/releases/download/0.2.3/mkspiffs-0.2.3 -arduino-esp32-win32.zip
If you still cannot download, you can use the author's backup file.
6. Enter the espressif/esp32/tools/dist directory:
7. Copy the downloaded mkspiffs-0.2.3-arduino-esp32-win32.zip to the dist directory and execute get.exe again. This time it will end soon.
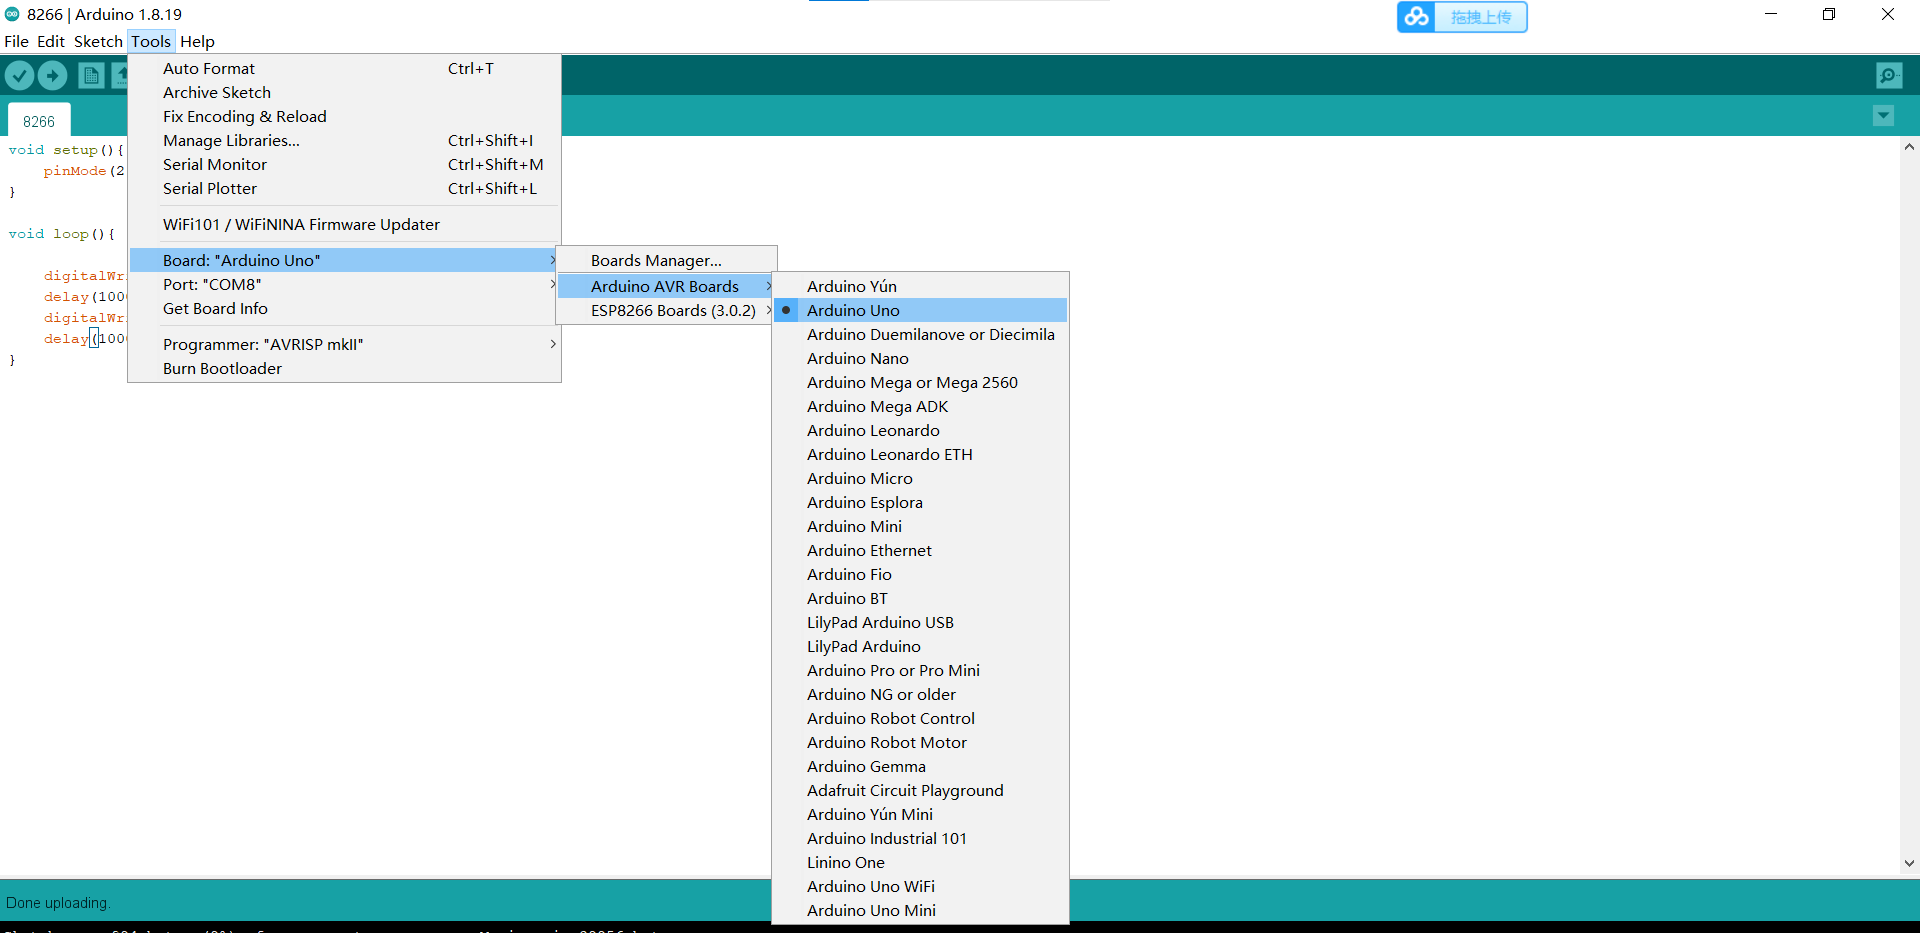
Choose a development board
Start Arduino and enter the Tools menu, and select ESP32 Dev Module as shown below.
Action confirmation
Start Arduino and enter the verification program:
void setup() {
  pinMode(2, OUTPUT); //Set pin 2 to output mode
}

void loop() {
     digitalWrite(2, HIGH); // turn on the LED
     delay(500); // wait for 500ms
     digitalWrite(2, LOW); // Turn off the LED
     delay(500); // wait for 500ms
}
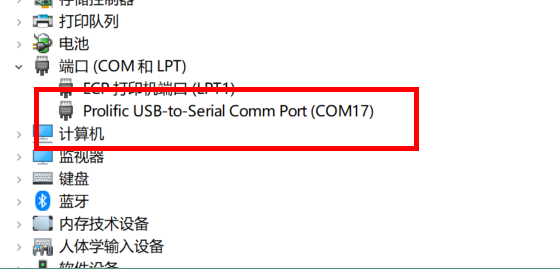
Use the MicroUSB cable to connect the computer and UNO D1 R32 development board, and select the port:
There are two points to note here:
1. The port number of the reader's computer may be different. If the port number is gray, you need to install the CH340 driver in the reference information. 2. Use the port on the back of the computer. The author used the USB port on the front panel for a long time but couldn't download the program stably.
Upload the program to UNO D1 R32.
You can also use the upload button [->] in the toolbar to upload the program.
After completion, you can see that the blue LED on the development board starts to flash!
Reference Information
Twists and turns, share my esp32 compilation environment to build arduino
https://www.arduino.cn/thread-91658-1-1.html
Install ESP32 on Arduino IDE
https://www.yiboard.com/thread-1218-1-1.html
Installing the ESP32 Board in Arduino IDE (Windows, Mac OS X, Linux)
https://randomnerdtutorials.com/installing-the-esp32-board-in-arduino-ide-windows-instructions/
How to Set Up and Use WeMos TTgo ESP32 Uno D1 R32
https://www.instructables.com/id/How-to-Set-Up-WeMos-TTgo-ESP32-Uno-D1-R32/
CH340 driver
http://www.wch.cn/download/CH341SER_EXE.html
WeMos R1 R32 ESP32
https://www.fambach.net/wemos-d1-r32-esp32/
Original link:
https://github.com/xueweiguo/EmbeddedCpp/blob/master/Arduino/ESP32/Startup/ESP32Startup.md
Find this article helpful? Welcome to like and share with more people.
Read more updated articles, please follow WeChat public account
Intelligent Recommendation
wemos D1 arduino IoT development board application note 6-STA mode to connect to the network
Preface In this section, we will learn to use WeMos D1 to connect to the Internet. Here I use a mobile phone to open WIFI hotspot, SSID is sand, passwd is 12345678, and the module needs to be set to S...
wemos D1 arduino IoT development board application note 9-HTTP Client programming
Preface In this section, we start to learn the HTTP Client programming of wemos D1 and realize the function of obtaining weather information through HTTP GET. 1. Basic knowledge 1. Introduction to HTT...
Wemos D1 arduino IoT development board application notes 8-STA mode TCP Server programming
Preface This article studies how WeMos D1 communicates with TCP Server in STA mode. The module directly connects to AP (mobile hotspot or router), enters the local area network to communicate with oth...
Wemos D1 arduino IoT development board application note 7-TCP Client communication in STA mode
Preface This article studies how WeMos D1 performs TCP Client communication in STA mode. The module directly connects to AP (mobile hotspot or router), enters the LAN to communicate with other wireles...
Creation of arduino UNO development environment
Select as Arduino UNO 2. Select a port 3. Click to tick the program 4. Click the arrow to burn the program Problem: The serial port cannot be detected Solution: 1. Plug and unplug the interface multip...
More Recommendation
Build QT + OpenCV development environment on the development board
3.1.1 Qtopia2.2.0Making and programming of file system MakezImage,ramdisk-uboot.img,system.img 3.1.2 UbuntuonOpenCv,qtEnvironment construction Choose the default compiler to compileopencv2.4.13Source ...
Arm development board development environment to build
Arm development board development environment to build 1. XShell connection development board Second, ubuntu configuration cross compiler Three, cross compilation Four, ubuntu build nfs server 5. Moun...

Installation of STM32 development board to build a development environment
1. Environment The operating environment of this experiment is Win10. The hardware is a development board based on SCM STM32F407 and 4G module EC20. 2. Prepare the software installation package STM32 ...
Arduino UNO Development Board out of the box experience
Arduino UNO Development Board out of the box experience 1.Arduino Brief 1.1 What is Arduino Arduino is an open source electronic design platform, including software and hardware. The hardware part is ...
20 yuan experience IoT development-homemade Arduino environment monitor
Hardware preparation Today we will lead you to complete a journey of IoT development with a budget of only 20 yuan! Thanks to the omnipotent Taobao, we can purchase the esp8266 devel...