EB Tresos Studio import/export epc/arxml format file
tags: Tools EB Tresos Studio
EB Tresos Studio import/export epc/arxml format file
Author: Stephen Du
Disclaimer: This article is a personal study notes and summary, only represents personal views, as far as possible to ensure the accuracy of the content. Please indicate the source/author for copying/forwarding.
Welcome to add/follow WeChat exchange learning.

1 Introduction
Usually a project is completed by multiple people participating in cooperation. The configuration parameters of each module of MCAL are numerous and complicated, and it takes a lot of effort to configure them. If your project is based on a platform-based project with minor modifications, then you actually don’t have to repeat the round. The AUTOSAR organization has specified a file format for data exchange between configuration tools: .epc/.arxml format files. EB Tresos Studio supports the function of importing and exporting .epc/.arxml files. This article will introduce how to import configuration information from an already configured project to a new project.
A shortcut: If the work platforms you import and export are based on the EB Tresos Studio tool, then there is a quick way to directly copy the .xdm file of the configured module to overwrite the new project. But the method is limited to the tool (because this format is the tool's proprietary format). The .epc/.arxml format introduced in this article is also applicable to different tools. (But in fact, for various reasons, whether the current .epc/.arxml file is compatible with the configuration tools of various manufacturers depends on the consistency/compatibility supported by the developer for the AUTOSAR standard. Usually, the consistency check is provided with the software installation package Report (VSMDReport).
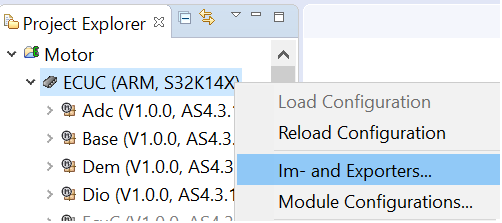
2. Create Importer/Exporter
To open a new project, you first need to add the modules you need to follow the normal process.
- Then select in the right click menu of the engineering office
“Im- and Exporters...”. As shown below:
- Click green in the pop-up window to create a new Importer/Exporter, as shown below:
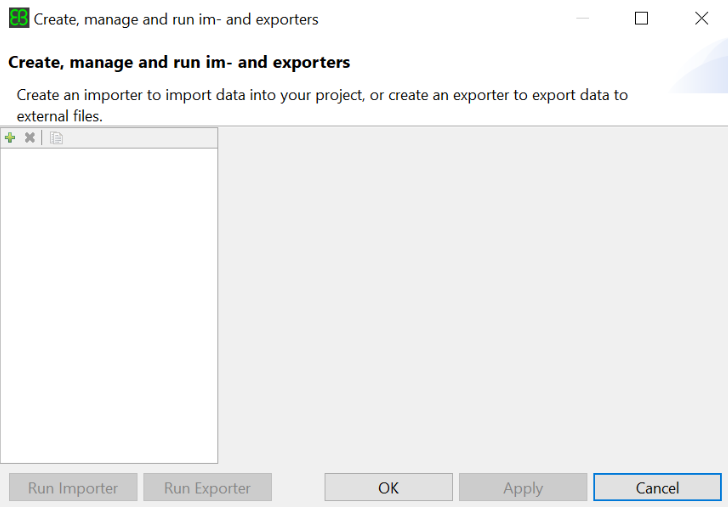
-
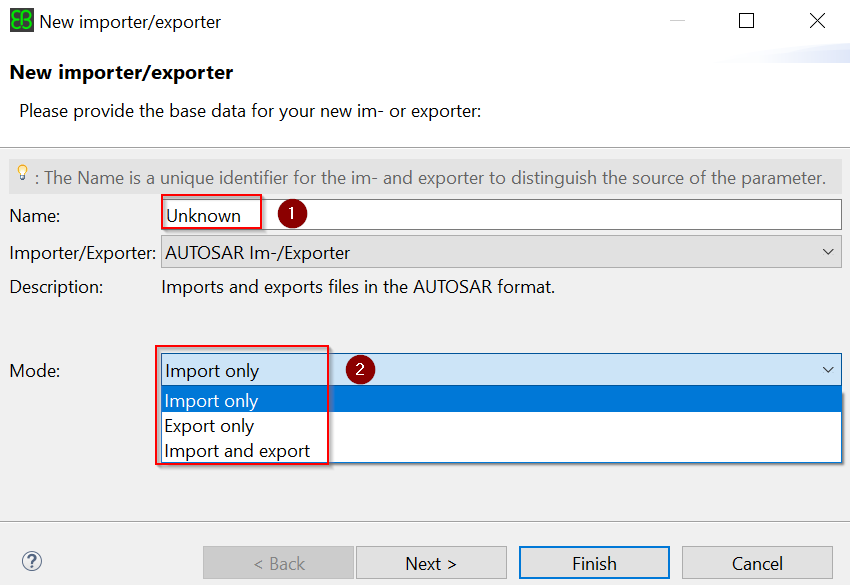
Enter the following information in the new pop-up window:
- Enter the name in Figure 1 below. The name can be entered arbitrarily. It is recommended to keep the same with the module name.
- Select the mode in Figure 2 below, select different options here, the options in the next window interface after clicking Next will be different.
- then clickNextButton
-
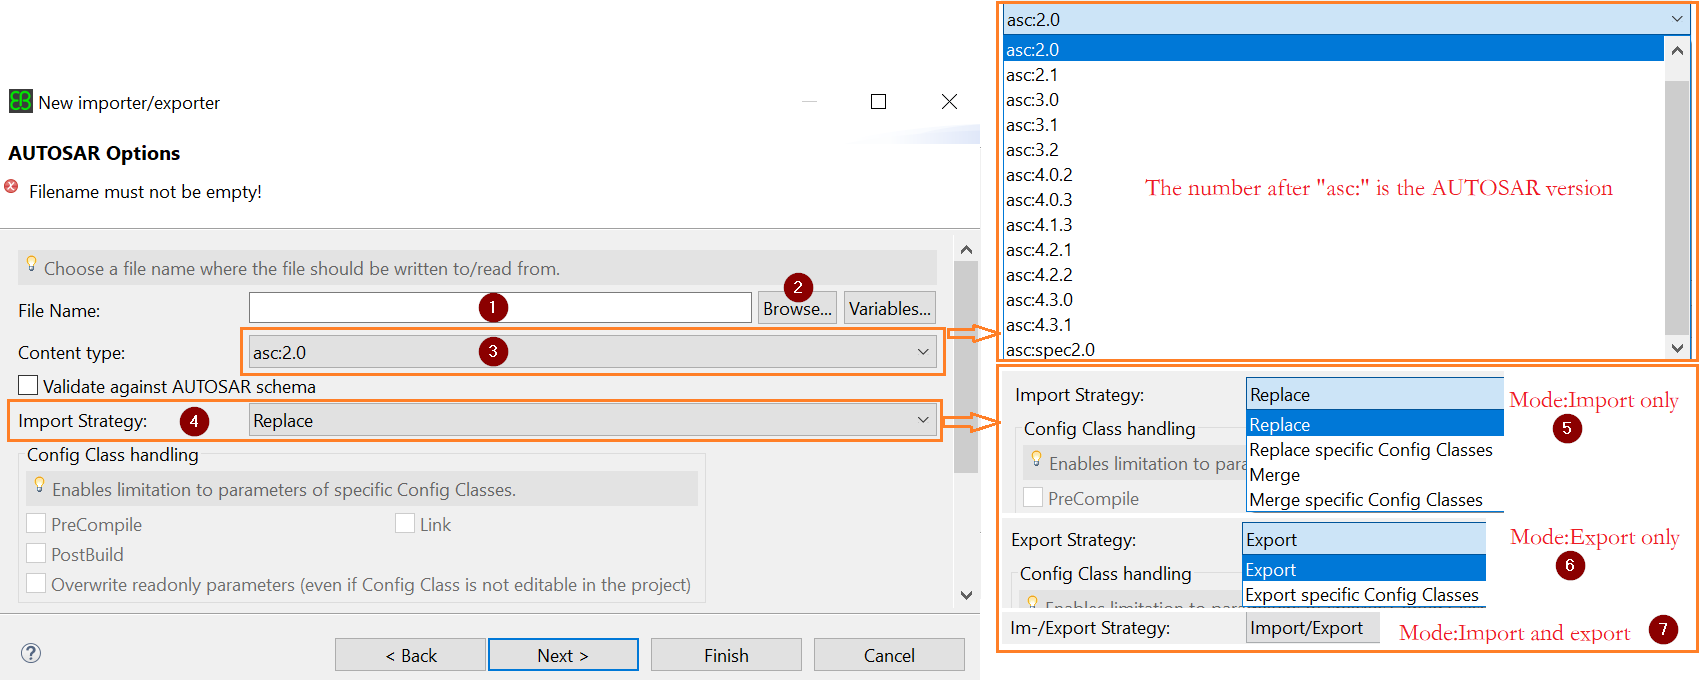
Enter the following information in the new form:
-
If the mode selected in the previous window is import and the imported source file is in the project root directory (in the same directory as the .project file), you can directly enter the file name (including the extension) in Figure 1 below, for example: Adc. epc/Adc.arxml. But this method can not automatically identify the Content type (Figure 3 below).
-
If the mode selected in the previous window is import, but the source file to be imported is in another directory, click on the following figure 2Browse…Press the button to select the corresponding file. This method can automatically identify and set the Content type (Figure 3 below).
-
If the mode selected in the previous window is export, fill in the file name (including the extension) directly here, and the export file will be generated by default in the project root directory (in the same directory as the .project file). If you want to export to another directory, clickBrowse…Button to select the path.
-
If it is the manually-filled file name mentioned above, select the version of the corresponding file to import at Figure 3 below; otherwise, it can be ignored and the browsing method will be automatically recognized.
note:
If it is in import mode, the version number of the imported source file can only beLess than or equal toThe version number of the corresponding module of the new project.
If in export mode, the export file can only be selectedgreater or equal toThe version number of the corresponding module of the current project.
Except for special circumstances, it is not recommended to mix and use multiple versions of a project.
-
It is recommended to check the check box below Figure 3: Validate against AUTOSAR schema.
-
According to the different modes selected in the previous window at Figure 4 below, the display here will be different, as shown in the area indicated by the right arrow at Figure 4 below. Choose according to your needs.
-
If the imported module name is different from the target module name, clickNextButton, Otherwise clickFinishButton.
note:
This is the module name, not the file name. The module name is in the content of the epc/arxml file. Usually, if it is an installation package, each module is the default, so do not modify it.
-
-
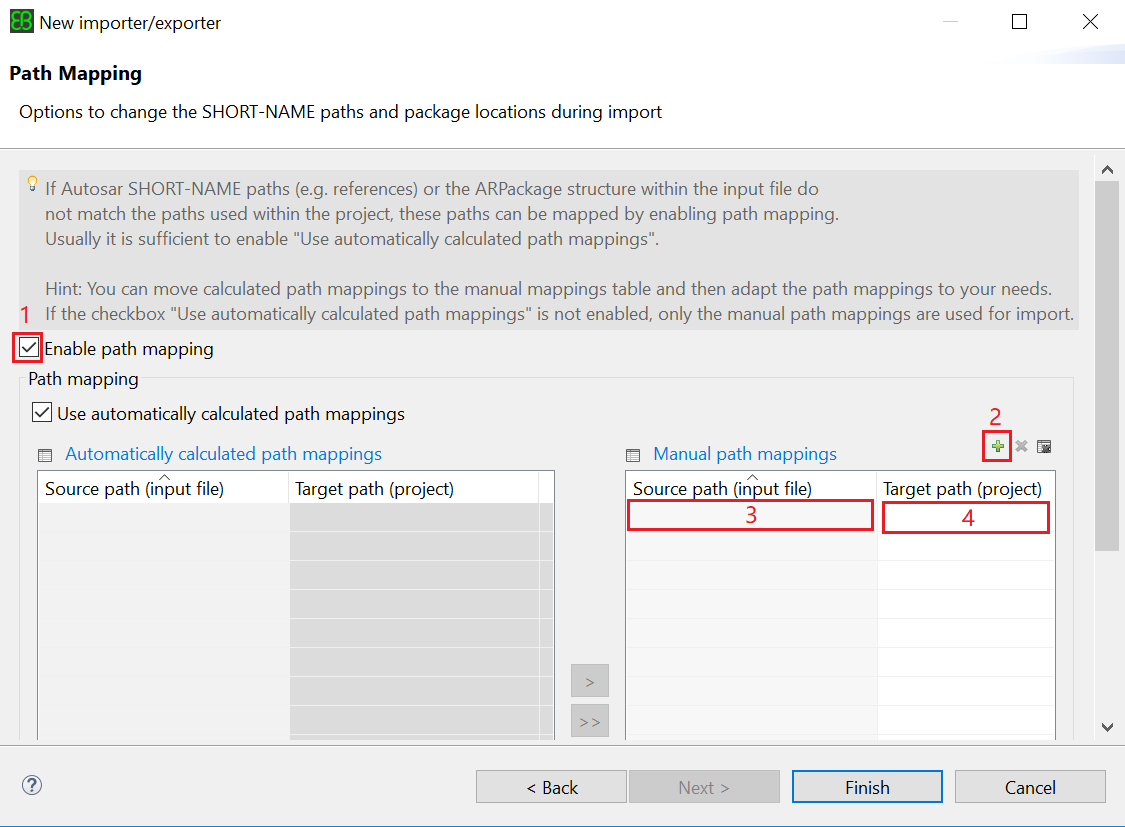
If the name of the imported module and the name of the target module are different, please see the following figure: (if the same, please skip this step)
- Tick the enable path mapping function in Figure 1 below.
- Click the green in the figure 2 below to add the mapping path.
- Enter the full path of the import file at Figure 3 below.
- Select the new engineering module path at Figure 4 below.
- Last clickFinishButton to complete the new process.
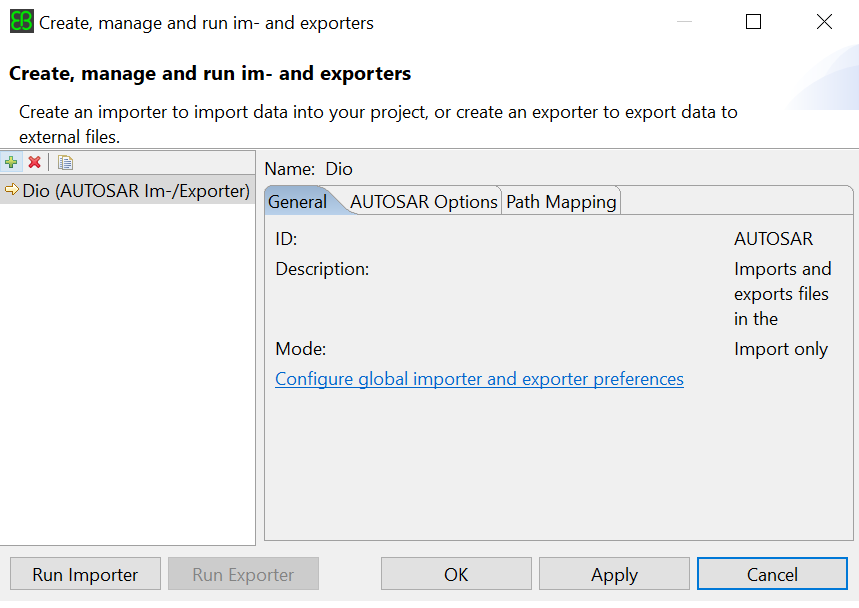
- ClickFinishAfter pressing the button, it will return to the main interface for creating Importer/Exporter. ClickApplyButton to save. If some parameters are incorrectly configured and need to be modified, you can modify them in the tabs on the right side of the interface. See below:
note:
Each Importer can only import one module, and Exporter exports all modules at once. It is recommended that each module create its own Importer. Repeat the above steps to create.
3. Run Importer
After creating Importer/Exporter, select an Importer/Exporter, and then clickRun ImporterPress the button to import/export the configured parameter information.
Intelligent Recommendation
Spark-Core using txt file import and export format
Each row of the target file loudacre.txt (files stored in my Linux trainer above /home/training/Documents/loudacre.txt) files with a split TAB Code: ...
Database import/export csv format data file + add new fields
forward from: 1. Simple but slower method, use Navicat for MySQL Fool-style import database: The process is as follows: After the installation is complete and the connection is configured, the interfa...
C # import and export the Excel file (.xls and .xlsx format) with NPOI
Method 1 (Method 1) transfer ************************************************************************************************************* Method Two 1, install NPOI Right click on item → "M...
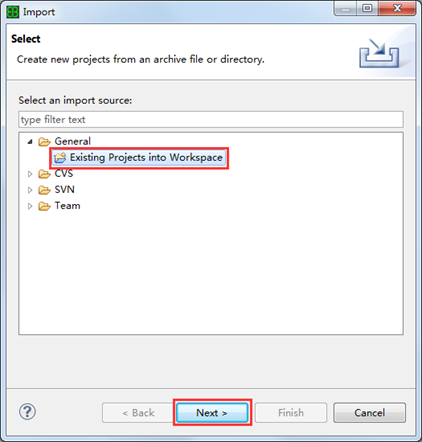
How to use EB software - import existing project
Select File → Import Open the Import dialog. . Select EXisting Projects Into Workspace in the Import dialog and click Next to pop up the Administration dialog box. 3. Select Root Directory in the...
Import and export csv format
fgetcsv() read csv file fputcsv() write to csv file php://input and PHP: //output $data=[] Users PHP5.5 or above. The code above ----- import csv Online example Written by myself--fgetcsv() Export csv...
More Recommendation
DEV GridControl import and export Excel files - Export a single table to a different file format
1, namespaces 2, the code 3, call the method 4, more details can be found other blog articles ~ Code ways from multi-copy, use correct before uploading. Please accommodating ~...
Export excel format file
1- In the controller to pass 3 parameters to the exportExcelz method, the exported collection, the exported file name, HttpServletResponse request parameters 2- Static method for exporting excel files...
Export xml file format
Define XML format sequence of values and storing, in the entity classes are restricted as follows: Quickly create an entity class method bean objects and XML Conversion Tools Test class, if you expo...
PLY format file export
PLY format exports the code snippet. Note that Vertex and Tri are all (n, 3) formats, and the triangular number starts from 1....