iTerm2 + zsh + Oh My Zsh + Powerlevel10k build the strongest terminal under Mac
tags: Technology Station linux zsh ohmyzsh iTerm2
This article first appeared on my personal blogSui Xin’s Blog
Original:https://suixinblog.cn/2019/09/beautify-terminal.html
OF: Sui Xin
iTerm2 + zsh + Oh My Zsh + Powerlevel10k build the strongest terminal under Mac
Write in front
For developers, the two types of applications that deal with the most every day are code editors and terminals. An easy-to-use code editor and terminal can greatly increase efficiency. The code editor has VSCode, so there should be such a cool terminal.
In addition to iTerm2, this article is also applicable to most Linux terminals and WSL (Windows Subsystem for Linux). The same effect can be achieved through the following steps.
First, the two configuration results:
Classic Prompt Style:
Rainbow Prompt Style:
Install iTerm2
For Linux and WSL users, you can skip this step. Linux uses the default terminal, WSL usesWindows Terminal To achieve the same effect.
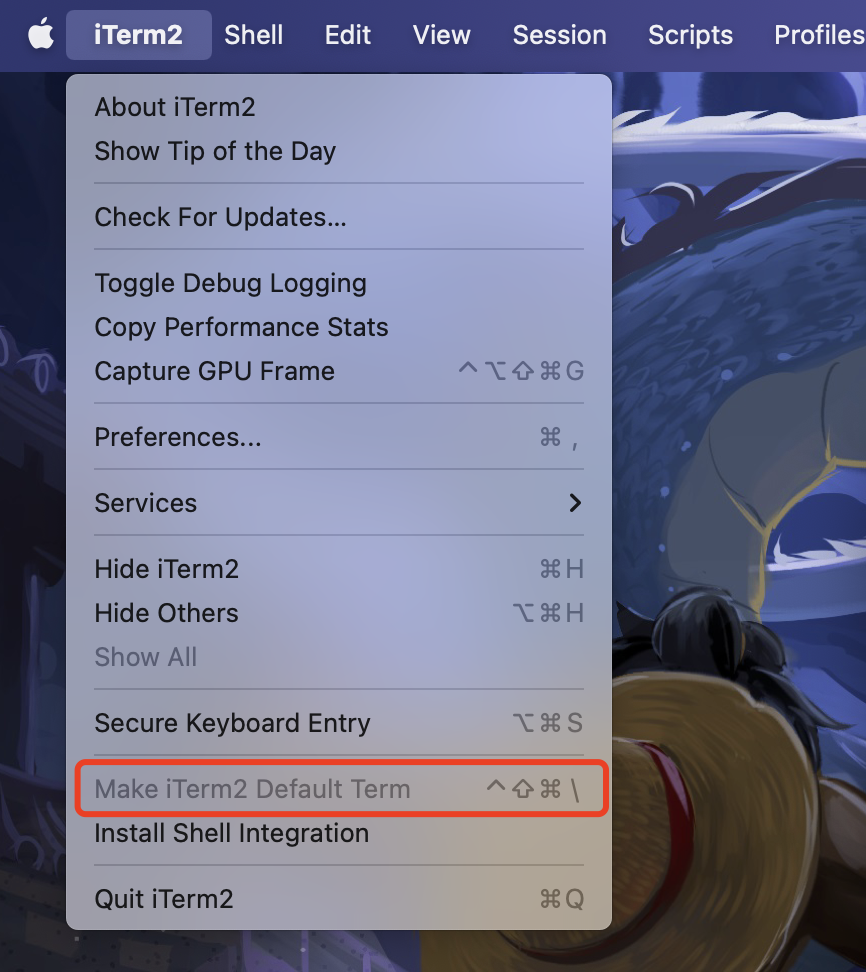
For macOS users,iTerm2 It is a good solution to replace the system's built-in terminal. It has many quick and small functions that can greatly improve efficiency, and it also has a beautiful and personalized interface with greater freedom.
Install zsh
Check if it is installed
zsh --version
installation
# macOS
brew install zsh zsh-completions

# Ubuntu
sudo apt-get install zsh

# CentOS
sudo yum -y install zsh
Switch to the default shell
chsh -s /bin/zsh
Install Oh My Zsh
Oh My Zsh You can do a lot of customized content, including rich themes and plug-ins, let you call AMAZING!!
Choose one of two ways:
# Use curl command
sh -c "$(curl -fsSL https://raw.github.com/robbyrussell/oh-my-zsh/master/tools/install.sh)"

 # Or use wget command
sh -c "$(wget https://raw.github.com/robbyrussell/oh-my-zsh/master/tools/install.sh -O -)"
Install Powerlevel10k
Oh My Zsh has manytheme/External theme, I think it’s easier to usePowerlevel9k, It took about a year, but the response time became slower and slower, so I switched to its updated versionPowerlevel10k, It can be directly compatible with the configuration of Powerlevel9k, or you can directly use the menu-based configuration script it provides, and simply answer some questions to generate a beautiful configuration.
git clone --depth=1 https://github.com/romkatv/powerlevel10k.git ${ZSH_CUSTOM:-~/.oh-my-zsh/custom}/themes/powerlevel10k
After cloning, in the zsh configuration file~/.zshrc Middle settingZSH_THEME=powerlevel10k/powerlevel10k OK.
Install Nerd Font
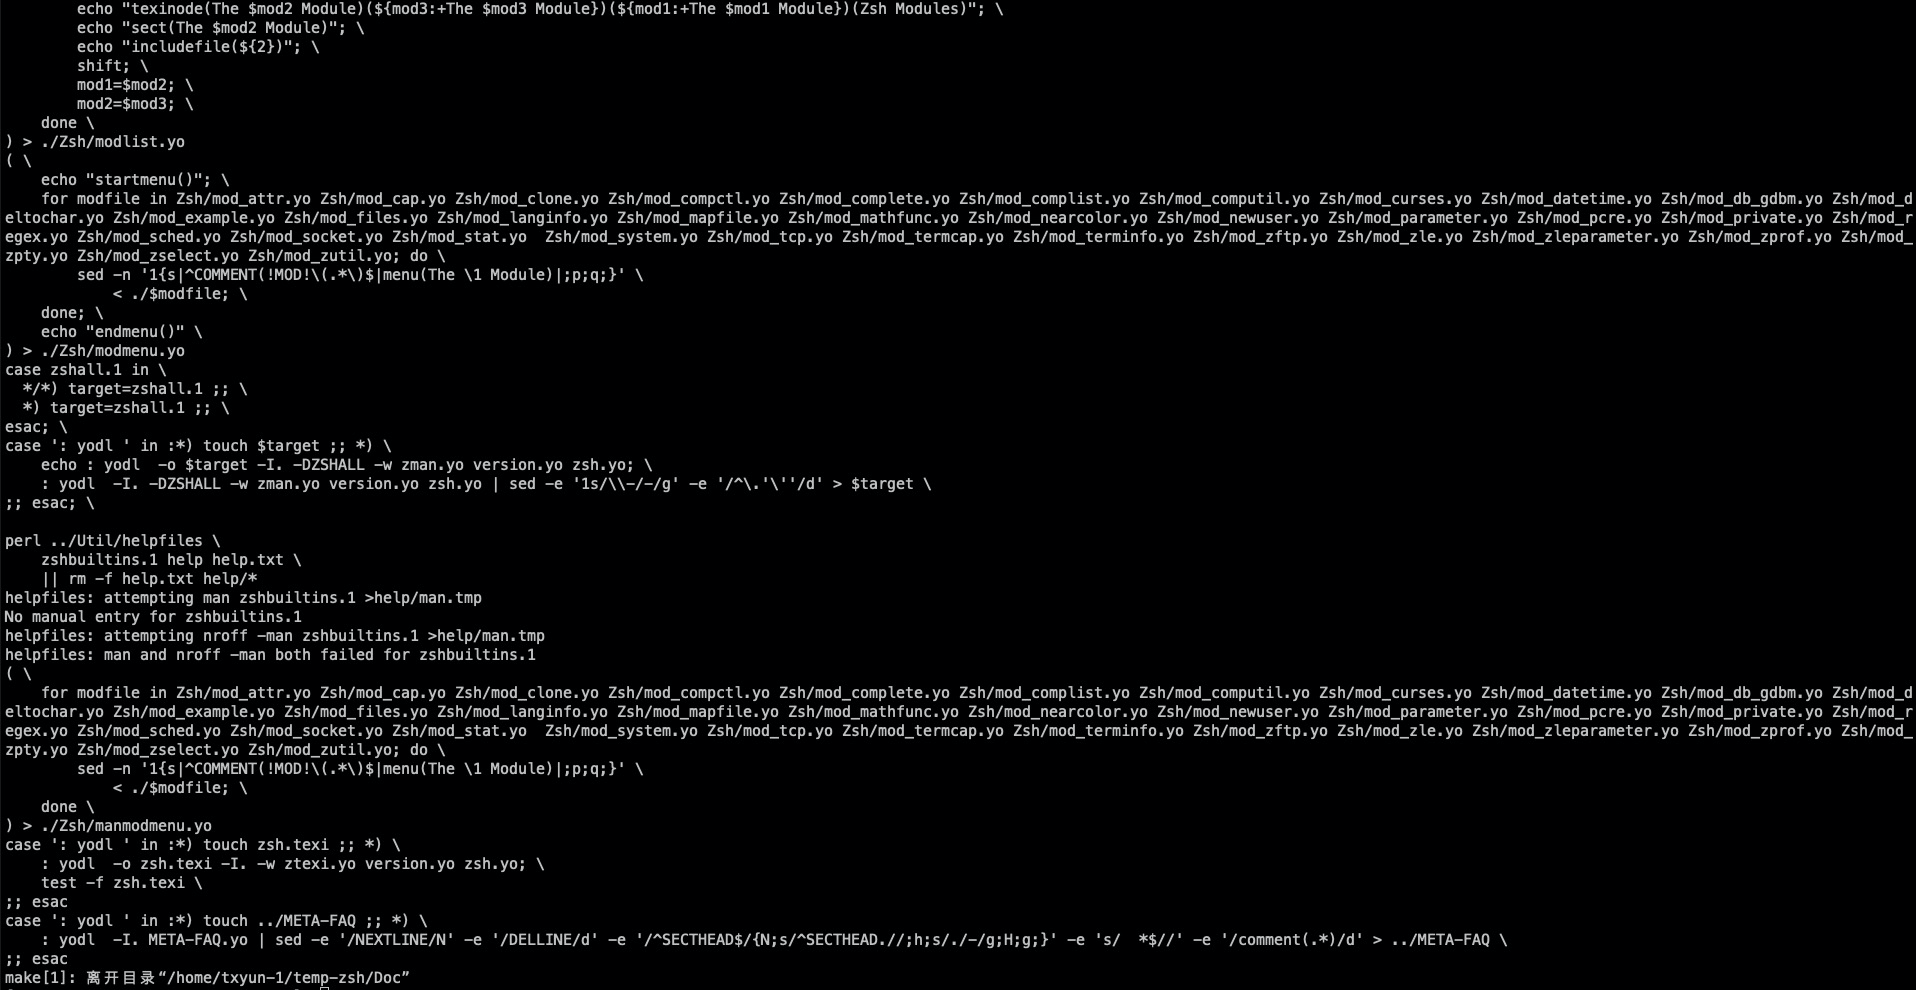
After completing the above operations, you may find garbled characters on the terminal. This is because your computer does not support so many fonts and you need to install extended fonts.
Nerd font is the one that supports the most icons and can be used directlynerd-fonts GitHub orOfficial websiteDownload Hack Nerd Font. Recommended by the author of Powerlevel10kMeslo Nerd Font Fonts, but I found that Hack Nerd Font looks better under iTerm2. It is safer to download Meslo Nerd Font for other systems.
For macOS and WSL, double-click the downloaded ttf file to install. For Linux, you need to put the file in the specified directory and refresh the cache, please seeHere。
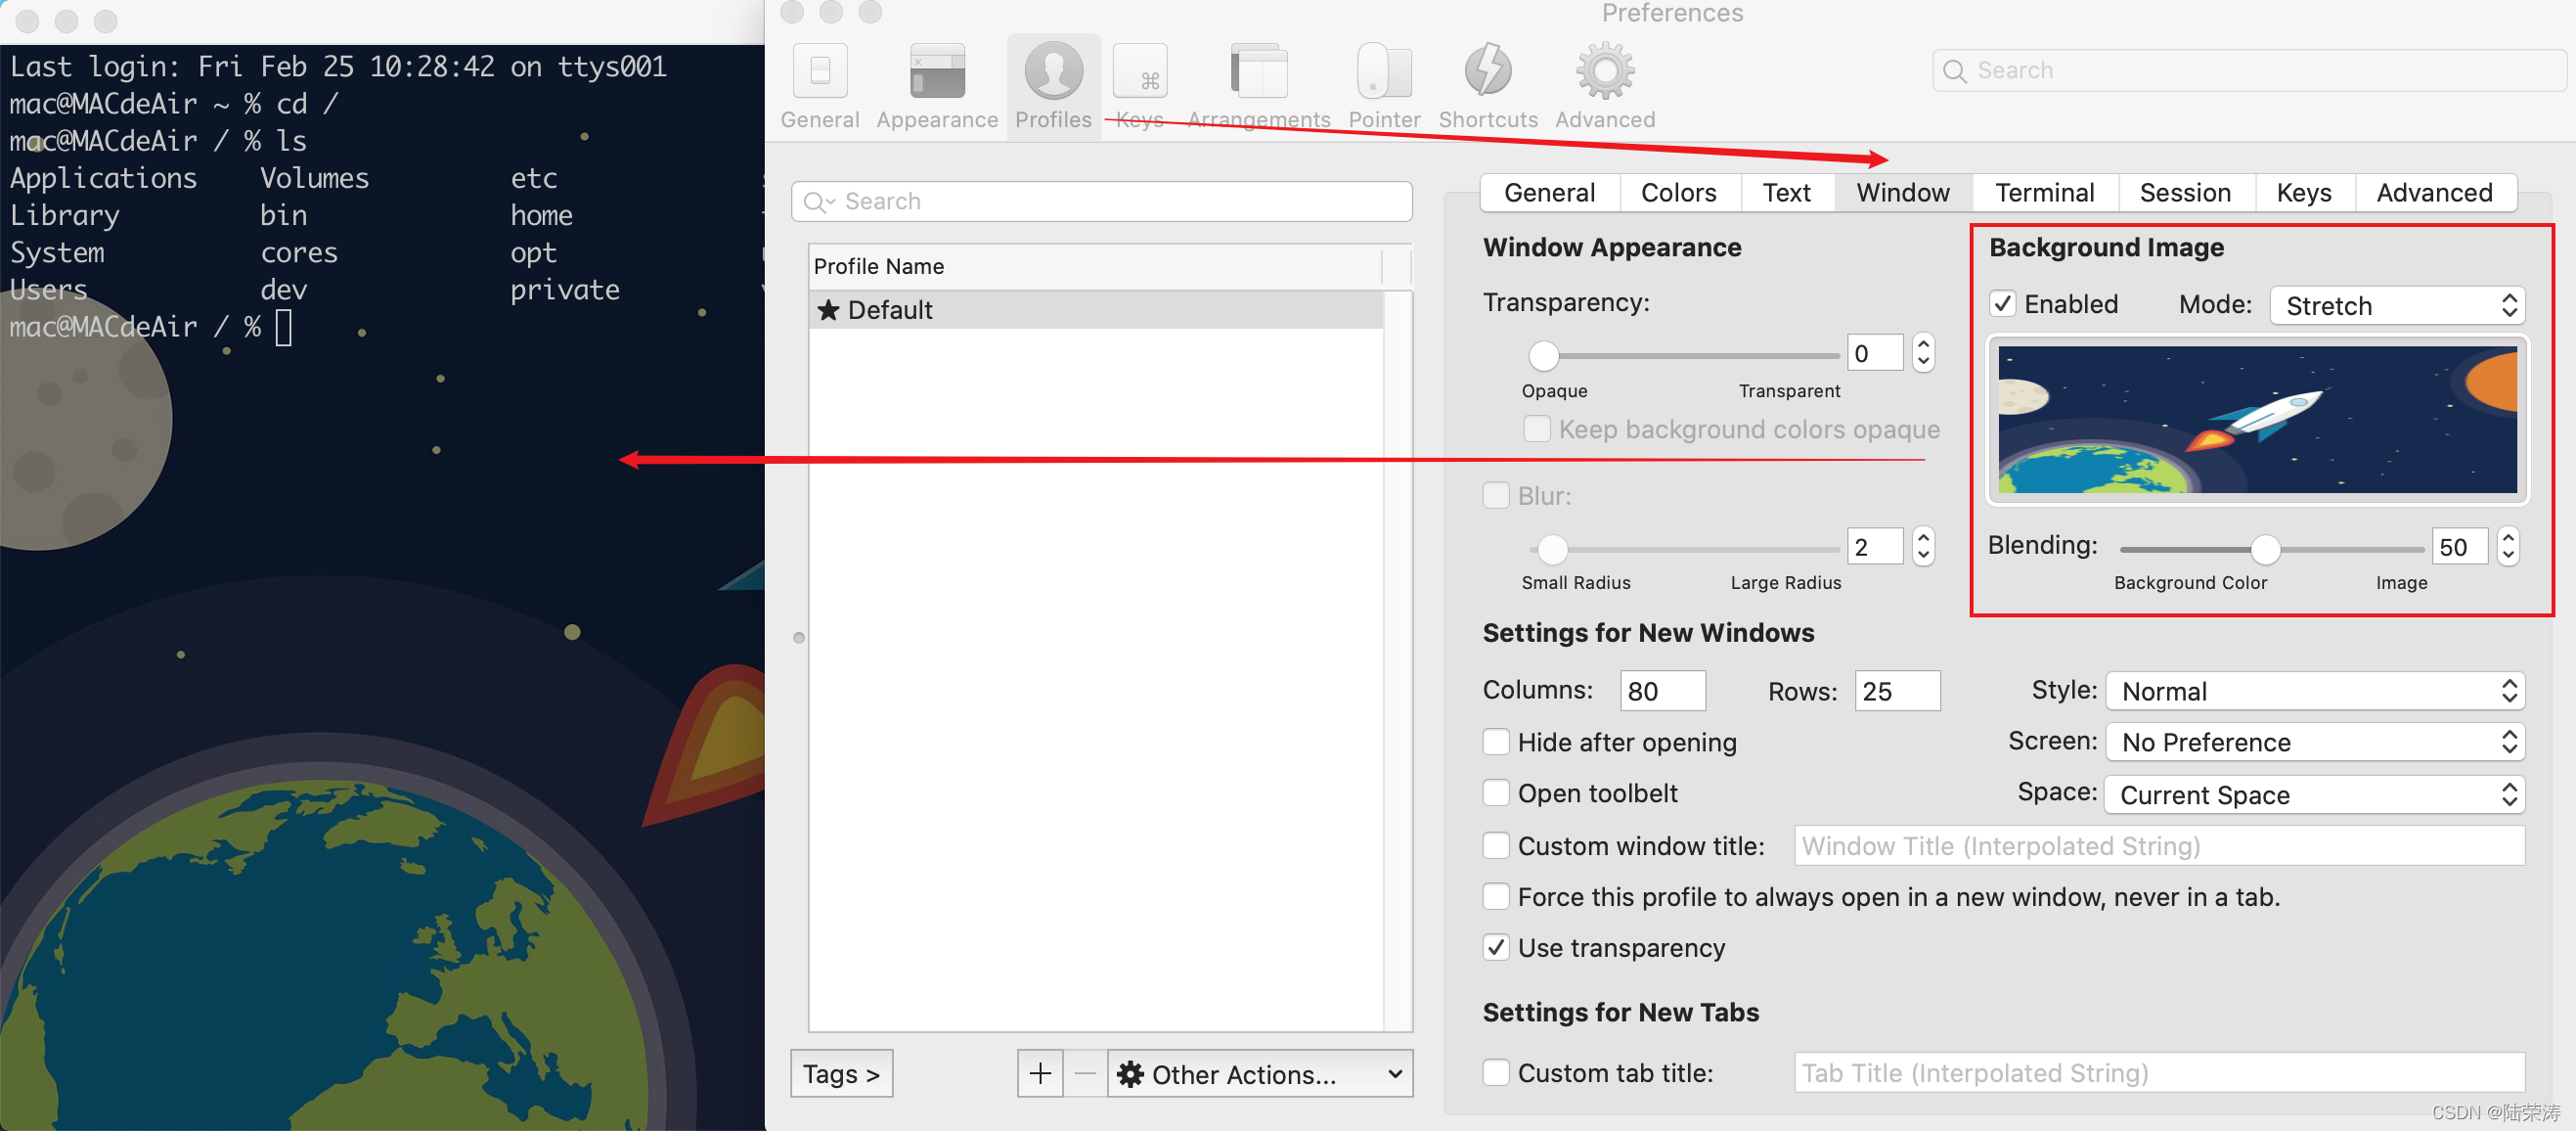
After installation, for iTerm2, inPreferences-Profiles-Text-Font Set to the corresponding font. Windows Terminal is insettings.json Add in configuration"fontFace": "MesloLGS NF" OK.
Configure Powerlevel10k
The configuration is divided into two steps. First, use an automated configuration script, and secondly, personalize settings according to personal preferences.
Automatic configuration script
Powerlevel10k provides a configuration script. After running the script, you only need to answer a few simple questions to complete the configuration.
Direct inputp10k configure You can enter the configuration Q&A interface, and a configuration file will be generated after completion~/.p10k.zshAnd in~/.zshrc Automatically added in
# To customize prompt, run `p10k configure` or edit ~/.p10k.zsh.
[[ -f ~/.p10k.zsh ]] && source ~/.p10k.zsh
It should be noted during the configuration process thatInstant Promt Mode Choose to open as much as possible to speed up the terminal startup speed, please seeHere。
Personalization
Newly generated configuration file in Powerlevel10k~/.p10k.zsh Personalize settings in accordance with personal preferences.
After each configuration file modification, restart the terminal or open a new tab to display it.
invimCan pass:/strTo perform the search throughNOrnKey to jump to the previous result or the next result.
Icon display in left and right columns
Left column icon modificationPOWERLEVEL9K_LEFT_PROMPT_ELEMENTS Content in the right column, modify the icon in the right columnPOWERLEVEL9K_RIGHT_PROMPT_ELEMENTS Content. The author wrote more detailed notes, which can be modified as needed, and the display order can also be adjusted. See all configurable contentHere, You can also implement one yourself.
Left and right separator
That is, the delimiter like the fire in the second image of the text, actually two Unicode characters are used\uE0C0 with \uE0C2. There are other shapes of characters, pleaseNerd Font Cheat Sheet search for E0。
# Separator between different-color segments on the left.
typeset -g POWERLEVEL9K_LEFT_SEGMENT_SEPARATOR='\uE0C0'
# Separator between different-color segments on the right.
typeset -g POWERLEVEL9K_RIGHT_SEGMENT_SEPARATOR='\uE0C2'
# The right end of left prompt.
typeset -g POWERLEVEL9K_LEFT_PROMPT_LAST_SEGMENT_END_SYMBOL='\uE0C0'
# The left end of right prompt.
typeset -g POWERLEVEL9K_RIGHT_PROMPT_FIRST_SEGMENT_START_SYMBOL='\uE0C2'
Long path folding
Powerlevel10k folds the long path to show only the top and bottom layers by default, which is somewhat inconvenient. You can change it as follows. 2 or 3 is recommended.
# Don't shorten this many last directory segments. They are anchors.
typeset -g POWERLEVEL9K_SHORTEN_DIR_LENGTH=2
Command success prompt
The command success prompt (that is, the leftmost check mark in the right column) is sometimes obscured. It may be a small bug. I hope the author can fix it later. Now you can avoid it by adding a space in front:
typeset -g POWERLEVEL9K_STATUS_OK_VISUAL_IDENTIFIER_EXPANSION=' '

typeset -g POWERLEVEL9K_STATUS_OK_PIPE_VISUAL_IDENTIFIER_EXPANSION=' '
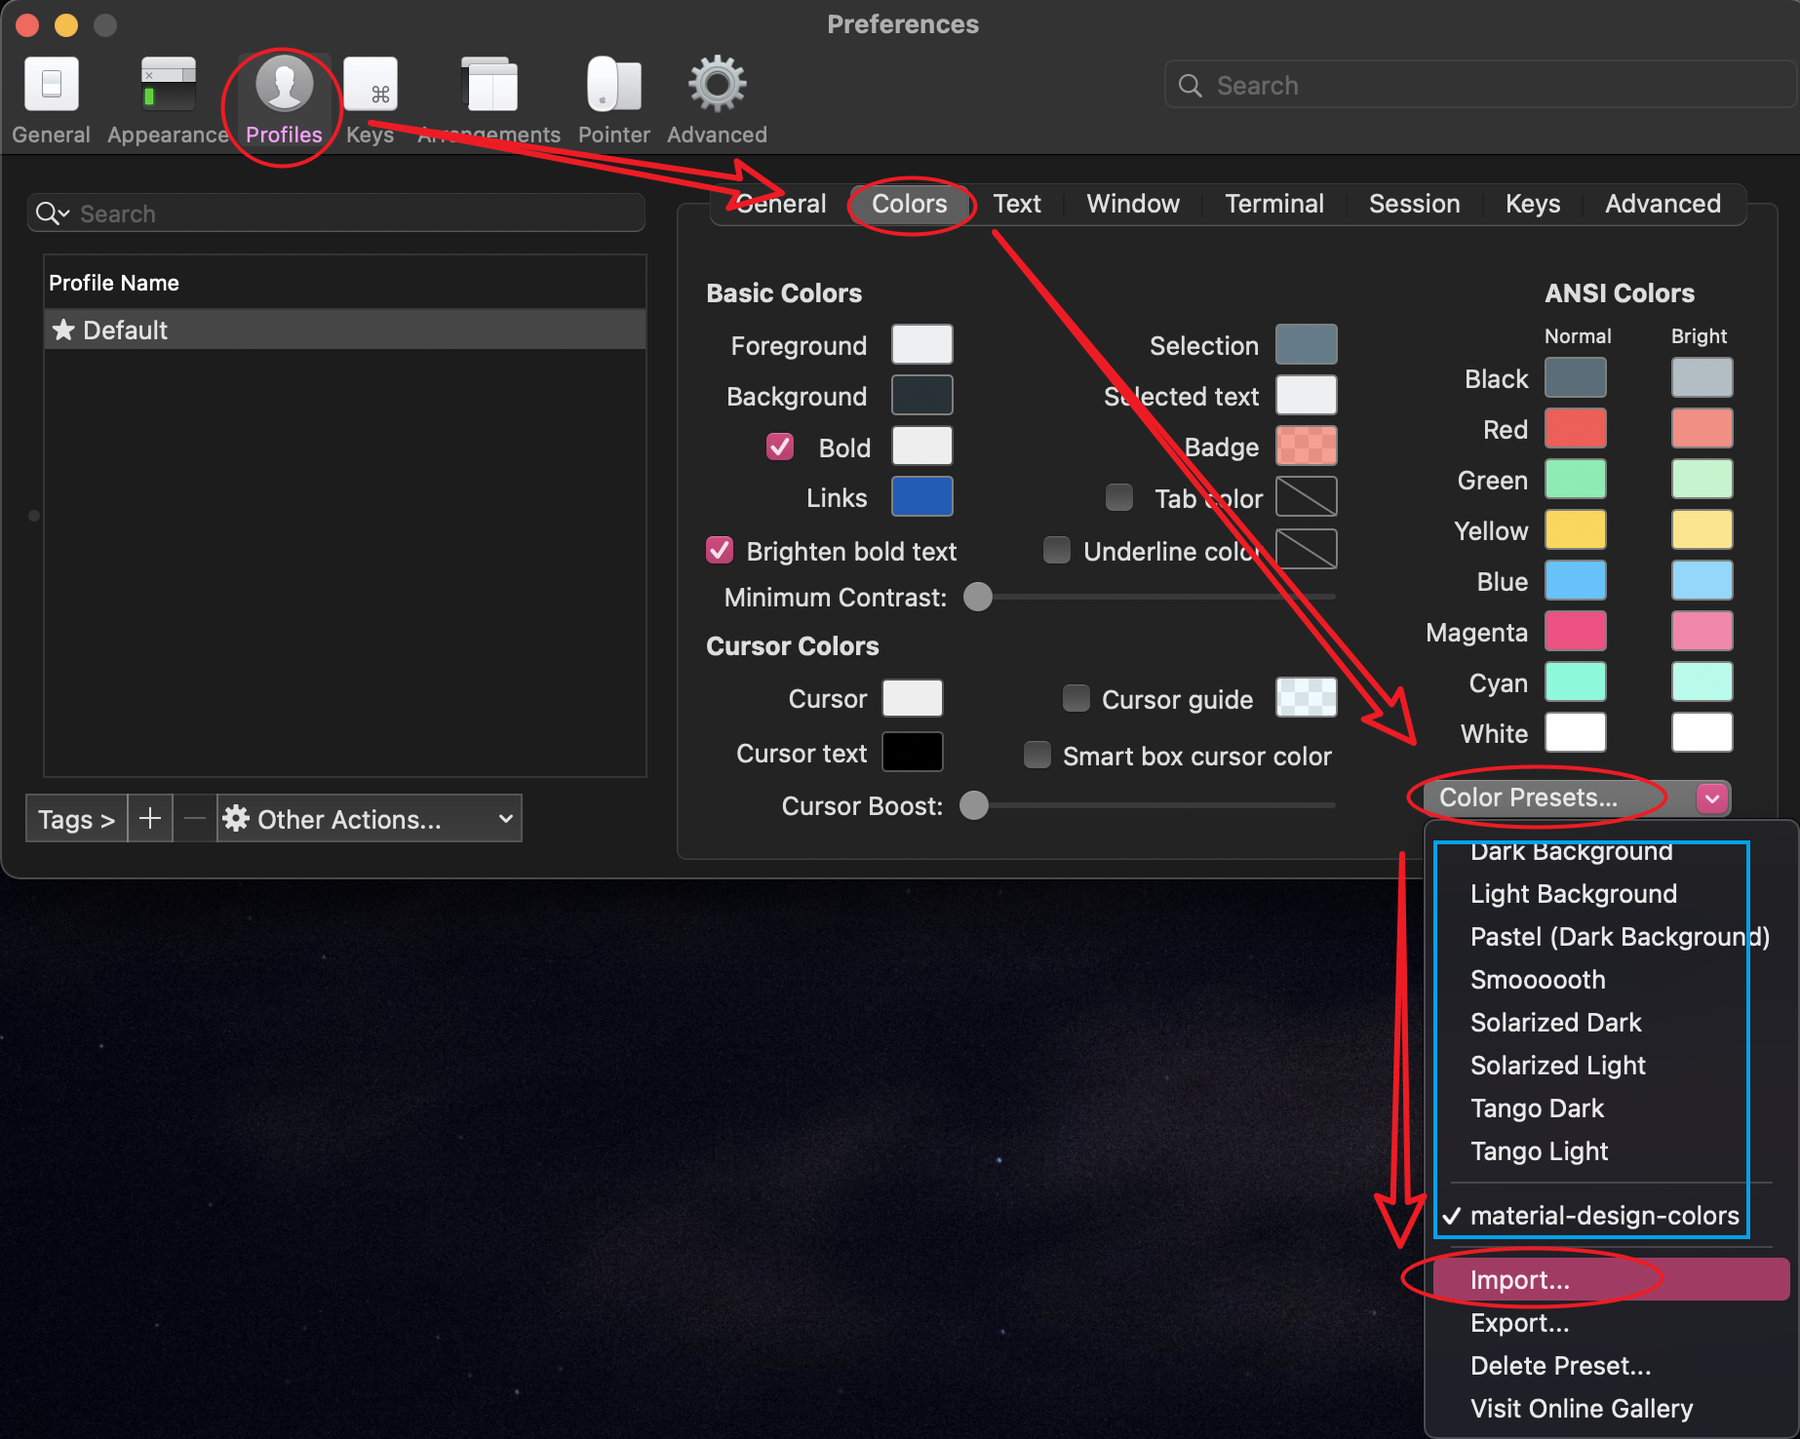
Color scheme
View all available colors:
for i in {0..255}; do print -Pn "%K{$i} %k%F{$i}${(l:3::0:)i}%f " ${${(M)$((i%6)):#3}:+$'\n'}; done
Modify the color of the directory to black text:
##################################[ dir: current directory ]##################################
# Current directory background color.
# typeset -g POWERLEVEL9K_DIR_BACKGROUND=4
# Default current directory foreground color.
typeset -g POWERLEVEL9K_DIR_FOREGROUND=0

# Color of the shortened directory segments.
typeset -g POWERLEVEL9K_DIR_SHORTENED_FOREGROUND=238
# Color of the anchor directory segments. Anchor segments are never shortened. The first
# segment is always an anchor.
typeset -g POWERLEVEL9K_DIR_ANCHOR_FOREGROUND=0
# Display anchor directory segments in bold.
typeset -g POWERLEVEL9K_DIR_ANCHOR_BOLD=true
Modify the time display block color to make it less glaring:
typeset -g POWERLEVEL9K_TIME_BACKGROUND=255
Actually~/.p10k.zsh In, almost all colors can be modified, and the author's comments are also clearly written, and you can configure it according to your preferences.
Oh My Zsh plugin
Oh My Zsh has very richPlug-in, The use of plug-ins can double the efficiency of the terminal. Here are five plug-ins that I commonly use.
All plug-ins need to be in the configuration file~/.zshrc Write it out as follows:
plugins=(
  git
  github
  autojump
  zsh-syntax-highlighting
  zsh-autosuggestions
)
git
git plugin
provides a wealth of git aliases and several useful functions.
github
github plugin
provides several shortcut functions.
autojump
autojump
can record your previouscd All the directories visited, you don’t need to enter the full path when you want to go to that directory next time.j somedir It can be reached, even the name of the target directory can be entered at the beginning.
zsh-syntax-highlighting
zsh-syntax-highlighting
The terminal command syntax is highlighted.
# Clone
git clone https://github.com/zsh-users/zsh-syntax-highlighting.git ${ZSH_CUSTOM:-~/.oh-my-zsh/custom}/plugins/zsh-syntax-highlighting
# ~/.zshrc Configuration
plugins=(zsh-syntax-highlighting)
zsh-autosuggestions
zsh-autosuggestions
The terminal commands are automatically recommended, and the previously used commands will be recorded. When you enter the beginning, the previous history commands will be darkly prompted for you to choose. You can directly press the right arrow key to select the command .
# Clone
git clone https://github.com/zsh-users/zsh-autosuggestions ${ZSH_CUSTOM:-~/.oh-my-zsh/custom}/plugins/zsh-autosuggestions
# ~/.zshrc Configuration
plugins=(zsh-autosuggestions)
Modify the terminal of VSCode
The terminal interface of VSCode can also be consistent, just simply set the font.
Open the VSCode settings, searchterminal font, Make the following modifications:
Intelligent Recommendation
MacOS configuration zsh+iTerm2+oh-my-zsh+antigen+powerlevel10k
Install antigen management zsh plugin Configure ~/.antigenrc Configure ~/.zshrc restart iTerm2 Configure powerlevel10k theme After restarting iTerm2, there will be an interaction of p10k theme configu...
Give your Mac whole use of the command line ITERM2 + ZSH + OH-MY-ZSH + PowerLevel10K
Give your Mac whole use of the command line ITERM2 + ZSH + OH-MY-ZSH + PowerLevel10K Introduction iTerm2 It is a terminal simulator under MacOS, and other terminals are inherently different. However, ...
[Tools] terminal iterm2 + zsh + oh-my-zsh
iTerm2 Mac terminal is not easy to use, it is time to change a terminal to iTerm2, Download:https://iterm2.com/ You have to say where you can use it, you can check this out. https://iterm2.com/feature...

mac iterm2 + zsh + oh-my-zsh + agnoster
One, renderings Two, iterm2 installation Go to iterm2 official website to download Three, zsh installation 1. Zsh is a kind of script, supports standard shell, and has powerful functions such as autom...
Mac installation ZSH + iterm2 + OH-MY-ZSH
Mac installation ZSH + iterm2 + OH-MY-ZSH 1. Install zsh 2. Install iterm2 2.1. Set iterm2 to the default terminal 3. Install oh-my-zsh 3.1. Two installation methods of the official website 3.2. Use g...
More Recommendation

[Mac article] Mac terminal interface beautification (Item2+zsh+Oh-My-Zsh+agnoster-Powerlevel10k theme)
Mac terminal interface optimization Preface Effect picture Required environment and knowledge Specific steps step1: download iTem2 step2: install oh my zsh step3: Install PowerLine step4: Install Powe...
Install ZSH, OH-MY-ZSH, Powerlevel10k beautification terminal under Linux CentOS7.6
I stepped on countless pits, so I will summarize it here Table of contents 1. Install git 2. Install ZSH ①、clone zsh ②, component required for installation ③, installation ⑤ View 3. Install OH-MY-ZSH ...
Teach you to configure ITERM2+OH-MY-ZSH+POWERLEVEL10K
As an IT practitioner, learning to use Terminal is an essential skill, and a beautiful terminal interface will greatly improve production efficiency. This article will explain to a partner of a termin...
Mac configuration terminal homebrew, oh-my-zsh, iTerm2
Summary Install Homebrew Install oh-my-zsh Install iTerm2 Set the color scheme of oh-my-zsh iTerm2 Install Homebrew Mac OS X (Mac OS IX is called Mac OS X) is based on Unix systems, and Lilux is an im...
Mac terminal customization (ITERM2 + OH-MY-ZSH + PowerLine + Solarized + Agnoster)
First, install ITERM2 ITERM2 official website Second, install OH-My-ZSH 2.1 installation 2.2 Uninstall OH-my-zsh installation success rendering: Third, install Powerline Font Library Configure ITERM2 ...