Tutorial: Python Open3d completes ICP point cloud registration
tags: Original 3d rendering artificial intelligence Computer vision python
Python Open3d completes ICP point cloud registration
About Open3d
Open3D is a 3D data processing and visualization library on Python and C++ platforms. It was completed by Qian-Yi Zhou, Jaesik Park, and Vladlen Koltun. Among them, Dr. Zhou obtained a master's degree from Tsinghua University in China, and obtained his Ph.D. and post-doctoral degrees from USC and Stanford respectively. He is currently the chief research and development officer of Forma in San Francisco. Open3D currently supports Windows, OSX, and Linux platforms.
3D point cloud registration
Complete the demonstration of registration:

Read data
Here is the data used in this registration, you can download it and use it with me:Point cloud data
In order to complete the point cloud registration, the first step we need to do is of course to read in the two point clouds we need to register. We create a new python file and name it display_pcd .py, and enter the following code:
import open3d as o3d

#Read the ply point cloud file in the computer
source = o3d.read_point_cloud("plys/6.ply")  #source is the point cloud that needs to be registered
target = o3d.read_point_cloud("plys/0.ply")  #target is the target point cloud

# Is different colors on the two point clouds
source.paint_uniform_color([1, 0.706, 0])    #source is yellow
target.paint_uniform_color([0, 0.651, 0.929])#target is blue

#Create an o3d.visualizer class
vis = o3d.visualization.Visualizer()
vis.create_window()

#Put two point clouds into visualizer
vis.add_geometry(source)
vis.add_geometry(target)

#Let visualizer render the point cloud
vis.update_geometry()
vis.poll_events()
vis.update_renderer()

vis.run()
In the above code, o3d.visualization.visualizer is a very commonly used simple class for viewing point clouds. The input parameter it accepts is a list, which needs to include the point cloud you want to view.
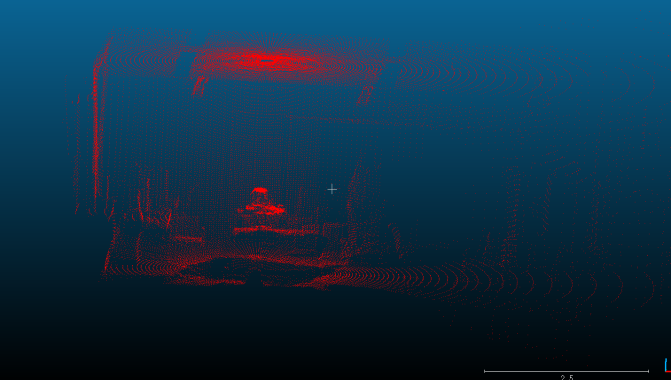
Running the above code, we get two point clouds before registration:

Each time the visualizer performs rendering, it will automatically initialize a perspective according to the size and position of the point cloud. The above picture is initialized by itself. After scrolling the mouse to zoom in, we can see the following Picture:

So here you need to use the mouse to adjust the perspective to a place you feel comfortable, and then press crtl + c on the screen, so that open3d will save the perspective you just saw. When you re-enter the visualizer and display the point cloud, just press ctrl + v to return to the previously saved perspective.
data processing
Before the formal registration, we need to do the following processing on the point cloud: outlier removal. At present, most of the point cloud images taken by depth cameras contain noise and non-existent points. Most of them are caused by production errors and the noise of the camera itself. We do not want to include these points that are recorded due to errors during registration. Therefore, in order to improve the efficiency and accuracy of registration, we must first remove these special cases.

We open a new python file, name it outlier_removal.py, and enter the following code:
import open3d as o3d

#Read the ply point cloud file in the computer
source = o3d.read_point_cloud("plys/6.ply")  #source is the point cloud that needs to be registered
target = o3d.read_point_cloud("plys/0.ply")  #target is the target point cloud

# Is different colors on the two point clouds
source.paint_uniform_color([1, 0.706, 0])    #source is yellow
target.paint_uniform_color([0, 0.651, 0.929])#target is blue

#Outlier removal for two point clouds separately
processed_source, outlier_index = o3d.geometry.radius_outlier_removal(source,
                                              nb_points=16,
                                              radius=0.5)

processed_target, outlier_index = o3d.geometry.radius_outlier_removal(target,
                                              nb_points=16,
                                              radius=0.5)

#o3d.geometry.radius_outlier_removal This function uses the sphere to determine a special case. It needs
#Two parameters: nb_points and radius. It will draw a sphere with radius radius for each point in the point cloud, such as
#If the number of other points in this sphere is less than nb_points, this algorithm will judge this point as a special case and delete it.


#Show two point clouds
#o3d.visuzlization_draw_geometries is a simpler function to display point clouds, it does not need to be created
#A visualizer class, call this function directly, and put a list containing the point cloud you want to display in the parameter.
o3d.visualization.draw_geometries([processed_source,processed_target])
Run the above code, we get the following point cloud, is it much cleaner?

Start registration
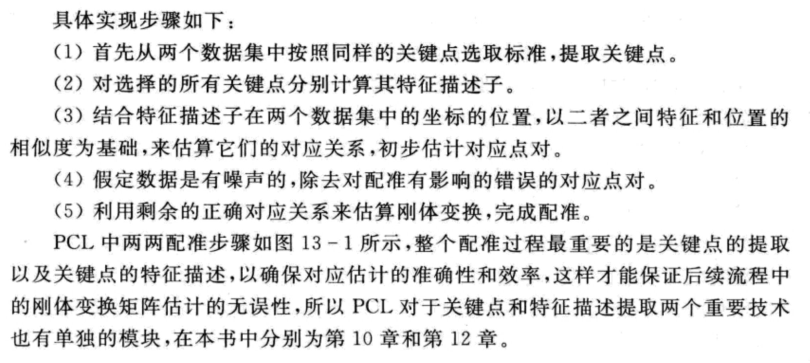
ICP (iterative closest point) is currently the most commonly used method for point cloud registration. The principle is to continuously transform a point cloud, calculate the distance between each point and another point cloud set, and convert it into a fitness score. Then keep changing until the total distance is minimized. Generally speaking, icp is used after global registration, which means that two point clouds must be roughly registered first, and then icp will complete the fine-tuning of the registration.
Now that we know how to display and process our point cloud, the next step is to integrate what we have learned and register them. We create a new python file, call it icp_registration.py, and enter the following code.
import open3d as o3d
import numpy as np
#Read the ply point cloud file in the computer
source = o3d.read_point_cloud("plys/6.ply") #source is the point cloud that needs to be registered
target = o3d.read_point_cloud("plys/0.ply") #target is the target point cloud
# Is different colors on the two point clouds
source.paint_uniform_color([1, 0.706, 0]) #source is yellow
target.paint_uniform_color([0, 0.651, 0.929])#target is blue
#Outlier removal for two point clouds separately
processed_source, outlier_index = o3d.geometry.radius_outlier_removal(source,
nb_points=16,
radius=0.5)
processed_target, outlier_index = o3d.geometry.radius_outlier_removal(target,
nb_points=16,
radius=0.5)
threshold = 1.0 #Movement range threshold
trans_init = np.asarray([[1,0,0,0], # 4x4 identity matrix, this is a transformation matrix,
[0,1,0,0], # It means there is no displacement, no rotation, we enter
[0,0,1,0], # This matrix is the initial transformation
[0,0,0,1]])
#Run icp
reg_p2p = o3d.registration.registration_icp(
processed_source, processed_target, threshold, trans_init,
o3d.registration.TransformationEstimationPointToPoint())
#Transform our matrix according to the output transformation matrix
print(reg_p2p)
processed_source.transform(reg_p2p.transformation)
#Create an o3d.visualizer class
vis = o3d.visualization.Visualizer()
vis.create_window()
#Put two point clouds into visualizer
vis.add_geometry(processed_source)
vis.add_geometry(processed_target)
#Let visualizer render the point cloud
vis.update_geometry()
vis.poll_events()
vis.update_renderer()
vis.run()
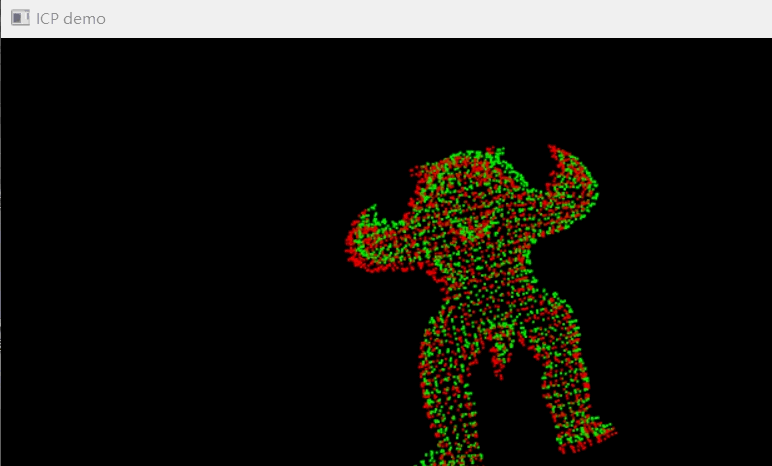
Run the above code, we get

and
console: registration::RegistrationResult with fitness = 1.000000, inlier_rmse = 0.093900, and correspondence_set size of 12849
In the returned results,
fitness The algorithm scores this registration,
inlier_rmse It represents the root of covariance, that is, the sum of the distances between all matching points divided by the square root of the number of all points, which can be expressed by the following mathematical formula:
Among them, a is the target matrix, b is the registered matrix, and n is the number of points in b.
correspondence_size Representative after registration
versus
The number of coincident points in.
By looking at the results of our registration visually and the results of the registration from the parameters, this time the registration is quite successful.
about me
Okay, we have completed the point cloud registration this time. I hope friends have learned something. If you have questions about this article or have something to say to me, please comment below, send me a private message, or email dcheng728@gmail .com. Thanks for reading my article!
Intelligent Recommendation
The principle of ICP point cloud registration
The principle of ICP point cloud registration Article Directory 1. Background and significance 2. Theoretical basis of point cloud registration Second, use steps to sum up 1. Background and significan...
Point cloud registration NDT+ICP
Point cloud registration NDT+ICP...
ICP algorithm for point cloud registration
First, the principle of algorithm Registration Given two three-dimensional data points set from different coordinate systems, find the transformation relationship between two point set spaces, so that...

ICP point cloud registration algorithm
ICP point cloud registration algorithm Introduction to ICP algorithm ICP algorithm flow chart Advantages and disadvantages and improvements of ICP algorithm Advantages of ICP algorithm The shortcoming...

PCL in the point cloud registration (Registration) ICP algorithm
introduction Given two-dimensional point set data from different coordinate system, find the transformation between two points set in the space, so that the two point sets can be unified to the same c...
More Recommendation

Point cloud registration (Registration) ICP algorithm in PCL
introduction Given two three-dimensional data point sets from different coordinate systems, find the spatial transformation relationship between the two point sets, so that the two point sets can be u...
Run the problem record of Open3D ICP point cloud distribution code
Tutorial: Python Open3D completes the ICP point cloud allocation standard 1. The fourth sentence reads point cloud data time report error: Solution: Replace the statement to 2. Rendering Times error: ...
Iterative closest point (ICP) for point cloud registration
ICP algorithm principle This part is explained in many blogs. I will not repeat it here, but provide a few blog links. Those who are interested, please study by yourself. This article mainly introduce...
Point cloud registration method: ICP and GICP
ICP has become the mainstream algorithm for point cloud registration, so the two ICP functions in the PCL library were tested in these two days: pcl::GeneralizedIterativeClosestPoint< PointSource, ...
PCL-Point Cloud Registration Algorithm ICP
PCL-Point Cloud Registration Algorithm ICP 1. Introduction of ICP: 1. ICP use 2. ICP principle 3. ICP implementation of PCL 2. Use of ICP: 1. ICP registration procedure 2. Official routine-mining pit ...