Build a Spring Boot Java MVC Web App to use NetBeans
tags: java spring spring boot
In this Spring Boot tutorial, we will guide you how to build a MVC Java web application using NetBeans (we use Apache NetBeans 11.1). From the version 9, Apache continues to develop NetBeans IDE. You can also use Eclipse, Intellij or JDeveloper. Building a Java web application can actually create a Java project by using Maven or Gradle to create a Java project than using Maven or Gradle. Especially when we use Spring InitialZR, it will help you create a group of application packages with supported dependencies.
content:
- Step # 1: Generate the Spring Boot Java Web Application
- Step # 2: Create a Java model or entity class
- Step # 3: Create a Java repository interface
- Step # 4: Create a Spring MVC Controller
- Step # 5: Create a Spring MVC view
- Step 6: Run the Spring Boot Java Web Application
As you can see in the directory above, build a MVC Java web application requires a few steps. Start with the creation of the Spring Boot project, Java model, Java repository, Java controller, and Java view. This MVC Java web application also uses the database, we will use the H2 in-Memory database or HSQLDB. For views, we will use Thymeleaf and Bootstrap. Therefore, this tutorial requires the following tools, frames and libraries:
- Java Development Kit (JDK) 8
- Gradle
- Spring Boot
- Spring MVC
- Spring Data JPA
- H2 Database
- Thymeleaf
- Webjars Bootstrap
- Spring Initializer
- Netbeans
- Terminal or cmd
We assume that you must install NetBeans, JDK 8, and Gradle on your machine. So, we only need to generate a new Spring Boot Gradle Java Web App.
Step # 1: Generate the Spring Boot Java Web Application
We will create a new Spring Boot Gradle project using Spring Initializer. Spring initializr provides an extensible API to generate a quick start project and check metadata for generating projects, for example, listing available dependencies and versions. Simply go to Spring Initializer web-based Spring project generator, then fill in the desired framework and library (Spring Web, H2 Database, Thymeleaf, Spring Data JPA, Spring Data JDBC).
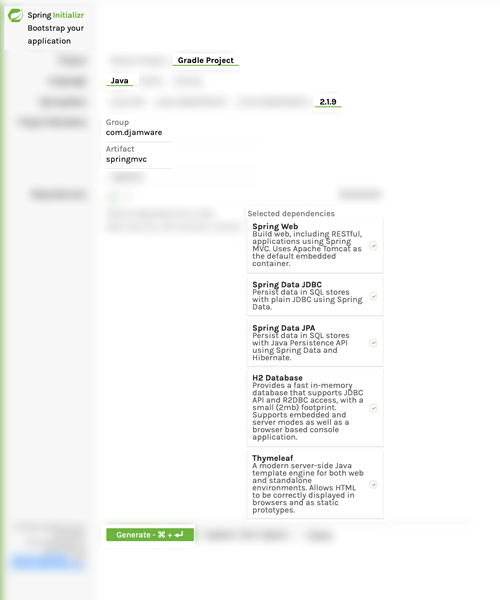
After filling out all the fields, click Generate Project. It will automatically download compressed projects. Next, the compressed item is extracted into your Java project folder, then open the folder from the NetBeans IDE (using the Open Item Menu). Next, expand the project name (our: springmvc) from the Projects panel, then expand the build scripts, you will see the build.gradle file. Open this file and you will see this item information, plugin, repository, and dependencies.
plugins {
    id 'org.springframework.boot' version '2.1.9.RELEASE'
    id 'io.spring.dependency-management' version '1.0.8.RELEASE'
    id 'java'
}

group = 'com.djamware'
version = '0.0.1-SNAPSHOT'
sourceCompatibility = '1.8'

repositories {
    mavenCentral()
}

dependencies {
    implementation 'org.springframework.boot:spring-boot-starter-data-jdbc'
    implementation 'org.springframework.boot:spring-boot-starter-data-jpa'
    implementation 'org.springframework.boot:spring-boot-starter-thymeleaf'
    implementation 'org.springframework.boot:spring-boot-starter-web'
    runtimeOnly 'com.h2database:h2'
    testImplementation 'org.springframework.boot:spring-boot-starter-test'
}
Add this dependency to the Bootstrap and Thymeleaf layout dialect in the dependent text.
dependencies {
  ...
    compile 'org.webjars:bootstrap:3.3.7'
  compile 'nz.net.ultraq.thymeleaf:thymeleaf-layout-dialect:2.4.1'
    ...
}
In NetBeans, right-click the project name, and then click Build to build a project for the first time.
Step # 2: Create a Java model or entity class
We will create a product data sheet for this Spring MVC Java Web application. Now, we will implement the term "m" of Spring MVC by creating a new Java model or entity. Right click on the project name -> New -> Java class. The class name is filled out as Product, the package is filled in com.djamware.springmvc.models, and the other fields remain default, and then click the finish button. The new Java class is automatically opened, and all Java code is replaced with Java entities, automatically generates ID, must-fill fields, constructor, and getter and setter code.
package com.djamware.springmvc.models;

import javax.persistence.Entity;
import javax.persistence.GeneratedValue;
import javax.persistence.GenerationType;
import javax.persistence.Id;

@Entity
public class Product {

    @Id
    @GeneratedValue(strategy = GenerationType.AUTO)
    private Long id;

    private String prodName;

    private String prodDesc;

    private String prodImage;

    private Double prodPrice;

    public Product() {
    }

    public Product(String prodName, String prodDesc, String prodImage, Double prodPrice) {
        this.prodName = prodName;
        this.prodDesc = prodDesc;
        this.prodImage = prodImage;
        this.prodPrice = prodPrice;
    }

    public Long getId() {
        return id;
    }

    public void setId(Long id) {
        this.id = id;
    }

    public String getProdName() {
        return prodName;
    }

    public void setProdName(String prodName) {
        this.prodName = prodName;
    }

    public String getProdDesc() {
        return prodDesc;
    }

    public void setProdDesc(String prodDesc) {
        this.prodDesc = prodDesc;
    }

    public String getProdImage() {
        return prodImage;
    }

    public void setProdImage(String prodImage) {
        this.prodImage = prodImage;
    }

    public Double getProdPrice() {
        return prodPrice;
    }

    public void setProdPrice(Double prodPrice) {
        this.prodPrice = prodPrice;
    }

}
Step # 3: Create a Java repository interface
Next, we must create a User repository for the JPA repository of extended product models. Right click on the project name -> New -> Java interface. Fill in the class productRepository, package name com.djamware.springmvc.repositories, other fields default, click the Finish button. The newly created file will open, and then replace all Java code with these code.
package com.djamware.springmvc.repositories;

import com.djamware.springmvc.models.Product;
import org.springframework.data.jpa.repository.JpaRepository;

public interface ProductRepository extends JpaRepository<Product, Long> {

    Product findByProdName(final String prodName);

}
As you can see, the ProductRepository interface now extends the product type JParePository, which has only one additional product name to find the product's query interface. Starting from Spring Boot 2.1, the overlay is disabled by default. Therefore, override this productRepository will result in this error when running.
Bean 'ProductRepository' defined in Null cannot be registered. Beans with this name have been defined in NULL, and overwrites.
To resolve this issue, simply open and edit "Resources / Application.properties" and add this row to enable overwriting.
spring.main.allow-bean-definition-overriding=true
Step # 4: Create a Spring MVC Controller
Now, it is time to use the "C" terminology of MVC, that is, the controller. To create it on NetBeans, just right click on the project name -> New -> Java class. Plunate the class name with ProductController, with com.djamware.springmvc.controllers. Keep other fields as default and click the "Finish" button. The newly created Java class file will be turned on automatically. Replace all Java code to @ controller, @ requestmapping, @ requestparam, ProductRepository, and all necessary Crud methods for each Crudation operation return to the page.
/*
 * To change this license header, choose License Headers in Project Properties.
 * To change this template file, choose Tools | Templates
 * and open the template in the editor.
 */
package com.djamware.springmvc.controllers;

import com.djamware.springmvc.models.Product;
import com.djamware.springmvc.repositories.ProductRepository;
import org.springframework.beans.factory.annotation.Autowired;
import org.springframework.stereotype.Controller;
import org.springframework.ui.Model;
import org.springframework.web.bind.annotation.PathVariable;
import org.springframework.web.bind.annotation.RequestMapping;
import org.springframework.web.bind.annotation.RequestParam;

@Controller
public class ProductController {

    @Autowired
    ProductRepository productRepository;

    @RequestMapping("/product")
    public String product(Model model) {
        model.addAttribute("products", productRepository.findAll());
        return "product";
    }

    @RequestMapping("/create")
    public String create(Model model) {
        return "create";
    }

    @RequestMapping("/save")
    public String save(@RequestParam String prodName, @RequestParam String prodDesc, @RequestParam Double prodPrice, @RequestParam String prodImage) {
        Product product = new Product();
        product.setProdName(prodName);
        product.setProdDesc(prodDesc);
        product.setProdImage(prodImage);
        product.setProdPrice(prodPrice);
        productRepository.save(product);

        return "redirect:/show/" + product.getId();
    }

    @RequestMapping("/show/{id}")
    public String show(@PathVariable Long id, Model model) {
        model.addAttribute("product", productRepository.findById(id).orElse(null));
        return "show";
    }

    @RequestMapping("/delete")
    public String delete(@RequestParam Long id) {
        Product product = productRepository.findById(id).orElse(null);
        productRepository.delete(product);

        return "redirect:/product";
    }

    @RequestMapping("/edit/{id}")
    public String edit(@PathVariable Long id, Model model) {
        model.addAttribute("product", productRepository.findById(id).orElse(null));
        return "edit";
    }

    @RequestMapping("/update")
    public String update(@RequestParam Long id, @RequestParam String prodName, @RequestParam String prodDesc, @RequestParam Double prodPrice, @RequestParam String prodImage) {
        Product product = productRepository.findById(id).orElse(null);
        product.setProdName(prodName);
        product.setProdDesc(prodDesc);
        product.setProdImage(prodImage);
        product.setProdPrice(prodPrice);
        productRepository.save(product);

        return "redirect:/show/" + product.getId();
    }

}
Step # 5: Create a Spring MVC view
Now, it is a MVC mode view of `v`. Since we use the Thymeleaf library as a view template, we can create the same layout for all HTML pages. Thymeleaf is a Java XML / XHTML / HTML5 template engine that works in Web (based on servlet) and non-web environments. It is more suitable for providing XHTML / HTML5 on the view layer based on MVC-based web applications, but it can even handle any XML files in an offline environment. To create a layout, first create a `default.html` file in the` resources / templas` folder, then use these code rows to add or replace it.
<!DOCTYPE html>
<html lang="en"
      xmlns="http://www.w3.org/1999/xhtml"
      xmlns:th="http://www.thymeleaf.org"
      xmlns:layout="http://www.ultraq.net.nz/thymeleaf/layout">
    <head>
        <meta charset="UTF-8"/>
        <title>Default title for my pages</title>
        <link rel="stylesheet" href="/webjars/bootstrap/3.3.7/css/bootstrap.min.css"/>
        <link rel="stylesheet" href="/webjars/bootstrap/3.3.7/css/bootstrap-theme.min.css"/>
        <link rel="stylesheet" href="/css/style.css" />
    </head>
    <body>
        <nav class="navbar navbar-inverse navbar-fixed-top">
            <div class="container">
                <div class="navbar-header">
                    <button type="button" class="navbar-toggle collapsed" data-toggle="collapse" data-target="#navbar" aria-expanded="false" aria-controls="navbar">
                        <span class="sr-only">Toggle navigation</span>
                        <span class="icon-bar"></span>
                        <span class="icon-bar"></span>
                        <span class="icon-bar"></span>
                    </button>
                    <a class="navbar-brand" href="#">Spring MVC</a>
                </div>
                <div id="navbar" class="collapse navbar-collapse">
                    <ul class="nav navbar-nav">
                        <li class="active"><a href="/product">Home</a></li>
                    </ul>
                </div><!--/.nav-collapse -->
            </div>
        </nav>

        <div class="container">
            <div class="starter-template" layout:fragment="content"></div>
        </div><!-- /.container -->

        <script src="/webjars/jquery/1.11.1/jquery.min.js"></script>
        <script src="/webjars/bootstrap/3.3.7/js/bootstrap.min.js"></script>
    </body>
</html>
This HTML displays the layout template using the Thymeleaf layout. To make this layout work properly, make sure you have other dependencies of the Thymeleaf layout dialect added in the first step. All CSS and JavaScript files are placed on this file and call all pages that use "default.html" as the layout holder. In addition, we call bootstrap and jQuery on this file. Next, we create a view called "Product.html" for your product list and then replace all code of the file.
<!DOCTYPE HTML>
<html lang="en"
      xmlns="http://www.w3.org/1999/xhtml"
      xmlns:th="http://www.thymeleaf.org"
      xmlns:layout="http://www.ultraq.net.nz/thymeleaf/layout"
      layout:decorate="default">
    <head>
        <title>Product List</title>
    </head>
    <body>
        <div layout:fragment="content" class="row">
            <div class="col-xs-8 col-md-8">
                <h3>
                    <a href="/create" class="btn btn-primary"><span class="glyphicon glyphicon-plus-sign"></span> Product</a>
                </h3>
                <h2>Product List</h2>
                <div class="table-responsive">
                    <table class="table" id="product-table">
                        <thead>
                            <tr>
                                <th>Product Name</th>
                                <th>Product Desc</th>
                                <th>Product Price</th>
                            </tr>
                        </thead>
                        <tbody>
                            <tr th:each="product : ${products}">
                                <td><a th:text="${product.prodName}" th:href="@{'/show/' + ${product.id}}"></a></td>
                                <td th:text="${product.prodDesc}"></td>
                                <td th:text="${product.prodPrice}"></td>
                            </tr>
                        </tbody>
                    </table>
                </div>
            </div>
        </div>
    </body>
</html>
Next, create a view of the product form named `Create.html in the` Resources / Templates` folder, then use it to replace all code.
<!DOCTYPE HTML>
<html lang="en"
      xmlns="http://www.w3.org/1999/xhtml"
      xmlns:th="http://www.thymeleaf.org"
      xmlns:layout="http://www.ultraq.net.nz/thymeleaf/layout"
      layout:decorate="default">
    <head>
        <title>Create Product</title>
    </head>
    <body>
        <div layout:fragment="content" class="row">
            <div class="col-xs-8 col-md-8">
                <h3>
                    <a href="/product" class="btn btn-lg btn-primary"><span class="glyphicon glyphicon-list"></span> Product</a>
                </h3>
                <h2>Create Product</h2>
                <form action="/save">
                    <div class="form-group">
                        <label for="email">Product Name:</label>
                        <input type="text" class="form-control" name="prodName" />
                    </div>
                    <div class="form-group">
                        <label for="email">Product Description</label>
                        <textarea class="form-control" name="prodDesc" cols="60" rows="3"></textarea>
                    </div>
                    <div class="form-group">
                        <label for="email">Product Price</label>
                        <input type="number" class="form-control" name="prodPrice" />
                    </div>
                    <div class="form-group">
                        <label for="email">Product Image URL:</label>
                        <input type="url" class="form-control" name="prodImage" />
                    </div>
                    <button type="submit" class="btn btn-success">Save</button>
                </form>
            </div>
        </div>
    </body>
</html>
Next, create a detailed view of the display product named `show.html in the` resources / templates` folder, then replace all code.
<!DOCTYPE HTML>
<html lang="en"
      xmlns="http://www.w3.org/1999/xhtml"
      xmlns:th="http://www.thymeleaf.org"
      xmlns:layout="http://www.ultraq.net.nz/thymeleaf/layout"
      layout:decorate="default">
    <head>
        <title>Show Product</title>
    </head>
    <body>
        <div layout:fragment="content" class="row">
            <div class="col-xs-8 col-md-8">
                <h3>
                    <a href="/product" class="btn btn-primary"><span class="glyphicon glyphicon-list"></span> Product</a>
                </h3>
                <h2 th:text="${product.prodName}"></h2>
                <h2><img th:src="${product.prodImage}" width="200" /></h2>
                <dl class="list">
                    <dt>Product Description</dt>
                    <dd th:text="${product.prodDesc}"></dd>
                    <dt>Product Description</dt>
                    <dd th:text="${product.prodPrice}"></dd>
                </dl>
                <form action="/delete">
                    <input type="hidden" name="id" th:value="${product.id}" />
                    <h2><input type="submit" class="btn btn-danger" value="Delete" onclick="return confirm('Are you sure?');" />
                        <a th:href="@{'/edit/' + ${product.id}}" class="btn btn-warning">Edit</a></h2>
                </form>
            </div>
        </div>
    </body>
</html>
Next, create a product view called `Edit.html in the` Resources / Templates` folder, then replace all code with this.
<!DOCTYPE HTML>
<html lang="en"
xmlns="http://www.w3.org/1999/xhtml"
xmlns:th="http://www.thymeleaf.org"
xmlns:layout="http://www.ultraq.net.nz/thymeleaf/layout"
layout:decorate="default">
<head>
<title>Edit Product</title>
</head>
<body>
<div layout:fragment="content" class="row">
<div class="col-xs-8 col-md-8">
<h3>
<a href="/product" class="btn btn-lg btn-primary"><span class="glyphicon glyphicon-list"></span> Product</a>
</h3>
<h2>Edit Product</h2>
<form action="/update">
<div class="form-group">
<label for="email">Product Name:</label>
<input type="text" class="form-control" name="prodName" th:value="${product.prodName}" />
</div>
<div class="form-group">
<label for="email">Product Description</label>
<textarea class="form-control" name="prodDesc" cols="60" rows="3" th:text="${product.prodDesc}"></textarea>
</div>
<div class="form-group">
<label for="email">Product Price</label>
<input type="number" class="form-control" name="prodPrice" th:value="${product.prodPrice}" />
</div>
<div class="form-group">
<label for="email">Product Image URL:</label>
<input type="url" class="form-control" name="prodImage" th:value="${product.prodImage}" />
</div>
<input type="hidden" name="id" th:value="${product.id}" />
<button type="submit" class="btn btn-success">Save</button>
</form>
</div>
</div>
</body>
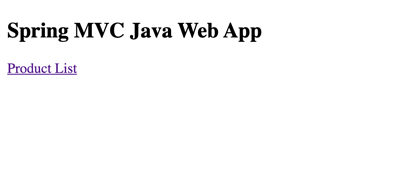
</html>Next, open and edit the static HTML file "resources / static / index.html" and then replace all code with it.
<!DOCTYPE HTML>
<html>
    <head>
        <title>Spring MVC Java Web App</title>
    </head>
    <body>
        <h2>Spring MVC Java Web App</h2>
        <p><a href="/product">Product List</a></p>
    </body>
</html>
This `index.html` is the first page that is displayed on the browser after the web application is running. Next, add a point in a new CSS folder in a static folder, then add a file `style.css`. Add these CSS code lines to the CSS file.
body {
  padding-top: 50px;
}
.starter-template {
  padding: 40px 15px;
  text-align: center;
}
Step 6: Run the Spring Boot Java Web Application
To run the Spring Boot application in NetBeans IDE, simply click on the play button in the toolbar or right-click the project name in the project panel, and then click Run. This is the same as this command input from the terminal.
./gradlew --configure-on-demand -x check bootRunThe complete Spring Boot MVC Java web application is as follows.
It is a way to quickly create Java web applications using Spring Boot, Data, and MVC. You can from ourGitHubGet complete work source code.
Intelligent Recommendation
Build a spring mvc web application
Before learning spring secuity, we first build a spring mvc web application, and the future spring secuity will be built on the basis of this web application. Join dependence We used maven to build th...
Use SpringBoot to build a Spring MVC WEB project under eclipse
First create a maven project with eclipse, ordinary maven project can be Modify the pom as follows: Then create a Java Class Build and run this class with main method as java application Browser acces...
Use Spring Boot to build a simple background for Android App (1)
One, install IDEA Workers must first sharpen their tools if they want to do their best, first download and install the development tool IDEA. If it is already installed, you can skip it directly. Offi...
Configure web app in Spring Boot
Article Directory Add dependency Configure port Configure Context Path Configure error page Stop Spring Boot in the program Configure log level Register Servlet Switch nested server Configure web app ...

【java web】spring web MVC
Official manual:https://docs.spring.io/spring/docs/current/spring-framework-reference/web.html 1 Spring Web MVC Spring web MVC is the original web framework built on the Servlet API and was included i...
More Recommendation

Quickly build Spring Boot+Spring MVC
The emergence of Spring Boot greatly simplifies the initial setup and development process of the Spring project. Today we quickly build a Spring Boot environment with page rendering (themeleaf templat...
Spring Boot - 2 minutes to build spring web mvc REST style HelloWorld
Sweep and pay attention to my public number My new book purchase address There was an article before5 minutes to build spring web mvc REST style HelloWorld"Introduction to the commo...
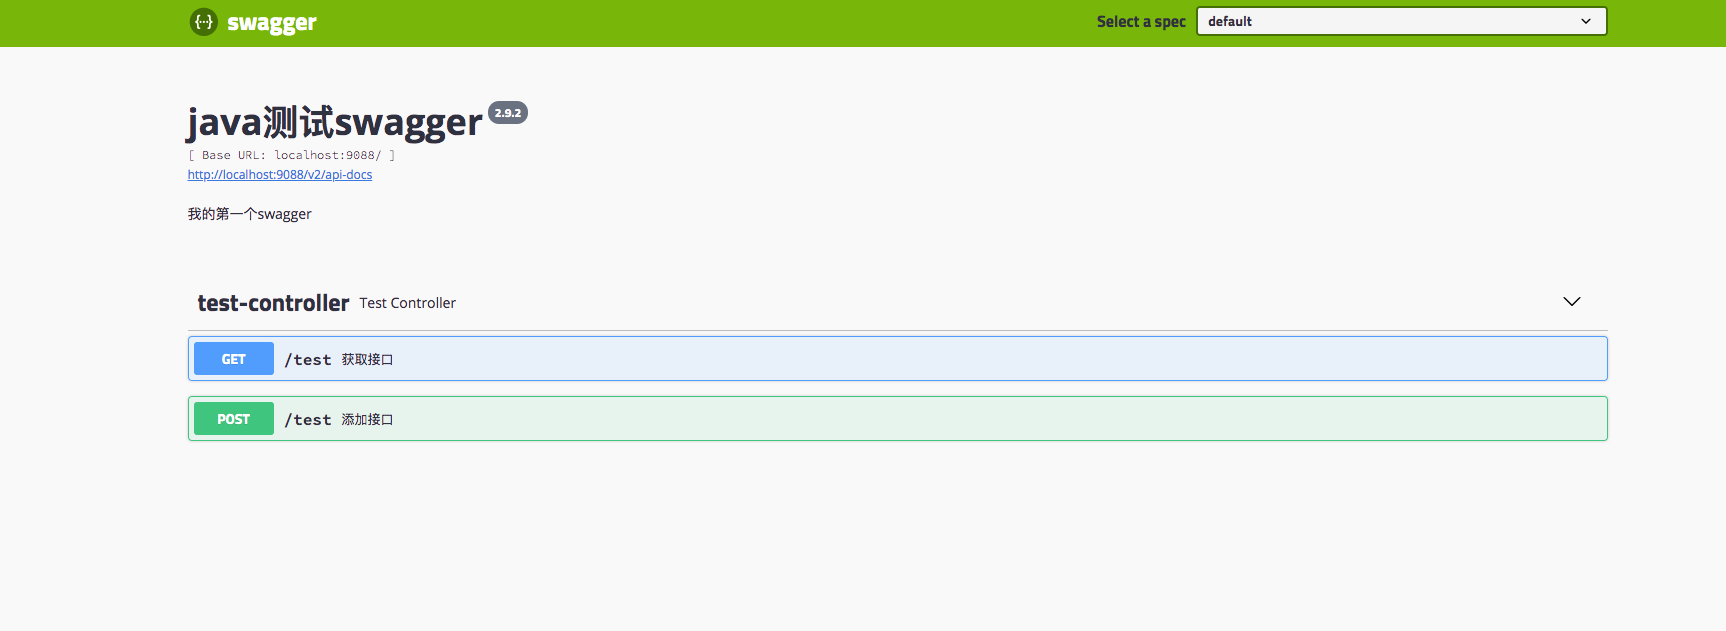
Use swagger in the Java Spring boot web project
Introduction Create a config package in the project directory and create a swaggerconfig class (with Controller's same class) Note from your own Controller effect...

Spring Boot & Spring Web MVC
:)Spring mvc is the premise Add dependency Other libraries that this start depends on Configuration information About the configuration of the beanWebMvcAutoConfiguration In this class, this class is ...
My Java Web Road-Initial Use of Spring MVC and Spring IoC
This series of articles aims to record and summarize their knowledge, experience, problems and thoughts on the road to Java Web development, hoping to help more code farmers and those who want to beco...