Harbor ---- Use Harbor to install packaging and deploy Harbor
tags: docker Operation and maintenance container
- 1. Harbor installation preparation conditions
- 2. Download Harbor's installation package file
- 3. Configure installation Harbor
1. Harbor installation preparation conditions
Taking Harbor 2.5.3 version as an example
1.1 hardware requirements
The requirements of Harbor's installation of hardware resource CPU, memory and hard disk are as follows:
| resource | Minimum requirements | Recommended configuration |
|---|---|---|
| CPU | 2 CPU | 4 CPU |
| Mem | 4 GB | 8 GB |
| Disk | 40 GB | 160 GB |
Use the following commands to view the number of physical CPUs and logic CPUs of the server
# View the number of physical CPUs
cat /proc/cpuinfo |grep "physical id"|sort |uniq|wc -l

 # View logic CPU number
cat /proc/cpuinfo |grep "processor"|wc -l

 # View memory
free -h

 # View site
df -h
1.2 Software requirements
Harbor 2.5.3 requirements for software such as docker, docker-compose
| software | version number |
|---|---|
| docker | 17.06.0 or above |
| docker-compose | 1.18.0 or above |
| openssl |
1.3 Network port requirements
Harbor 2.5.3 version of the requirements for network ports are as follows as shown below
| port | protocol | describe |
|---|---|---|
| 443 | https | HTTPS port, you can modify from the configuration file |
| 4443 | https | Use when Notary is opened, otherwise it does not need to be used. You can modify it by the configuration file |
| 80 | http | HTTP port, you can modify from the configuration file |
2. Download Harbor's installation package file
2.1 Harbor installation package classification
Harbor's installation files are divided into online installation packages and offline installation packages
-
Installed package:
The online installation package downloads the image from the Docker Hub, so the installation package file is relatively small, and it is suitable for the installation server to connect to the network. -
Offline installation package:
The offline installation package contains a pre -compiled mirror file, so the installation file is large, suitable for the installation server without networking.
2.2 Download and decompress the installation package
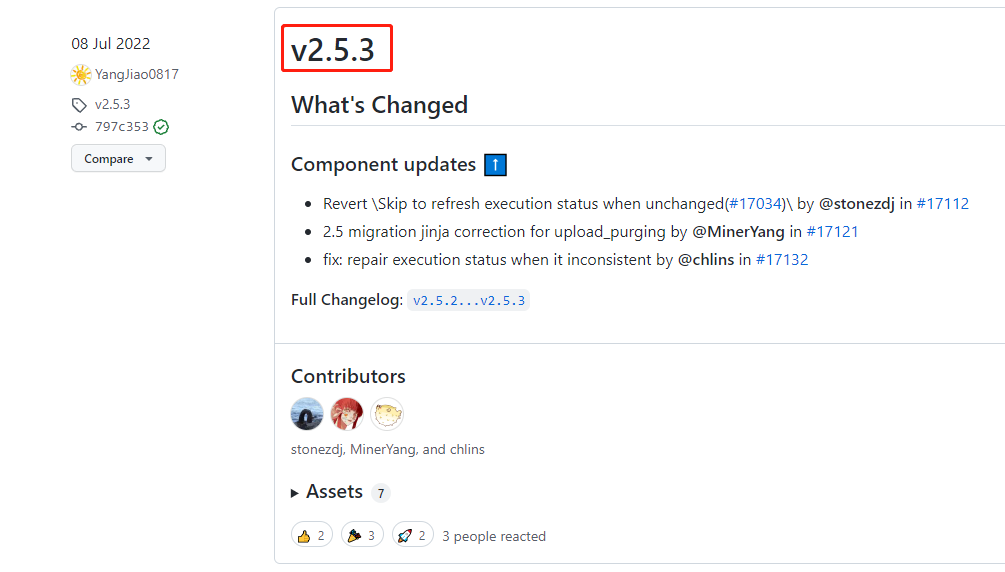
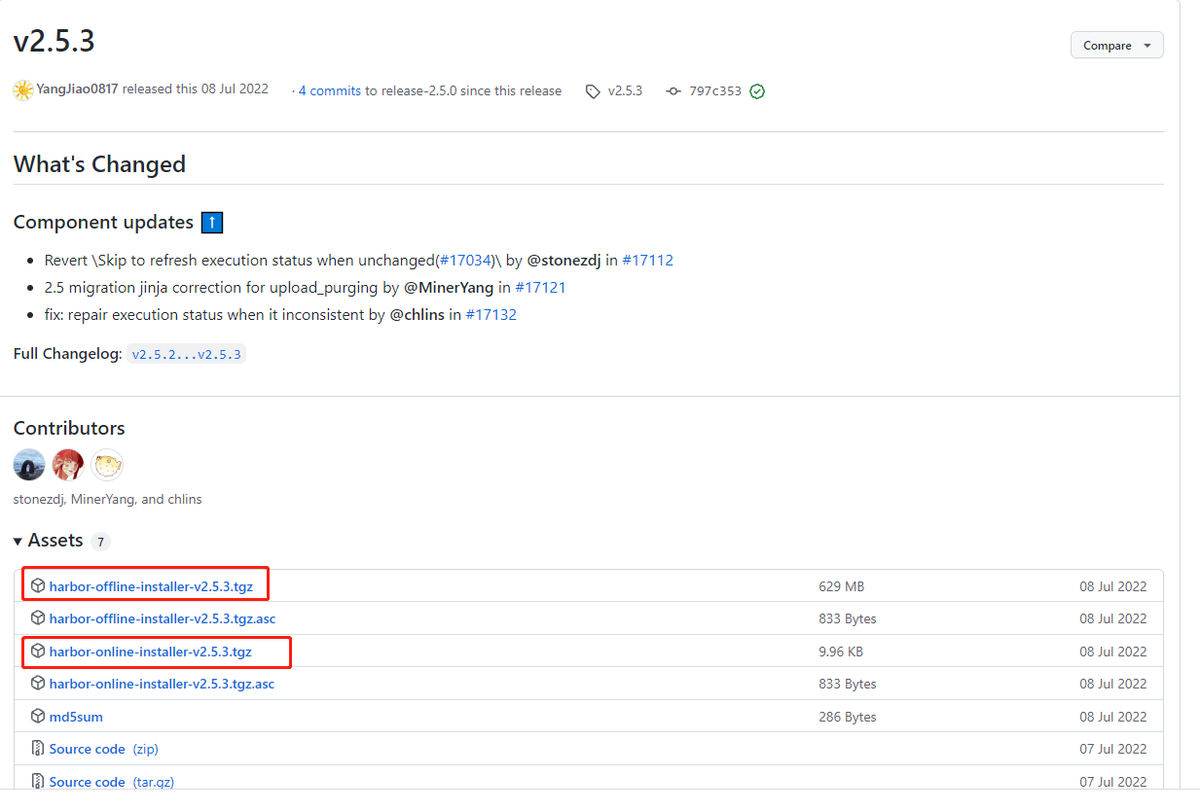
(1) OpenHarbor publishing websiteSelect the right version, for example, select V2.5.3 here, click [V2.5.3] to enter the attachment page, as follows:
(2) Select the version. If the server can connect to the Internet, right -click the link to copy. If the server cannot connect to the Internet, you can only click to download, and then upload the installation package to the server
(3) If the server can connect to the Internet, use WGET to download directly at the server. The command is as follows:
# Download online installation version
wget https://github.com/goharbor/harbor/releases/download/v2.5.3/harbor-online-installer-v2.5.3.tgz

 # Download offline installation version
wget https://github.com/goharbor/harbor/releases/download/v2.5.3/harbor-offline-installer-v2.5.3.tgz
(4) Declaining
#Clash online installation version
tar -zxvf harbor-online-installer-v2.5.3.tgz

 #Clash offline installation version
tar -zxvf harbor-offline-installer-v2.5.3.tgz
3. Configure installation Harbor
3.1 Install the default Harbor based on the HTTP protocol
The default installation command does not enable Notary, Trivy and Chart Repository Services.
- Notary: Mirror Signature Authentication
- Trivy: container vulnerability scanning
- Chart Repository Service: Helm Chart Warehouse Service
Generally, in the case of the inner network, you can use HTTP to access it directly. This method is relatively simple to install and deploy. After the Harbor Compressed package decompress
[root@redrose2100 online]# ls
harbor harbor-online-installer-v2.5.3.tgz
[root@redrose2100 online]# cd harbor
[root@redrose2100 harbor]# ls
common.sh harbor.yml.tmpl install.sh LICENSE prepare
[root@redrose2100 harbor]#
It can be found that there is a Harbor.yml in the Harbor folder. TMPL file, modify its file name to Harbor.yml
[root@redrose2100 harbor]# mv harbor.yml.tmpl harbor.yml
[root@redrose2100 harbor]# ls
common.sh harbor.yml install.sh LICENSE prepare
[root@redrose2100 harbor]#
Then edit the Harbor.yml file via vi hartor.yml
3.1.1 Configuration domain name
Configure the domain name of Harbor. If you do not use the domain name inside, you can directly set the host name or IP
# The IP address or hostname to access admin UI and registry service.
# DO NOT use localhost or 127.0.0.1, because Harbor needs to be accessed by external clients.
hostname: harbor.redrose2100.com
3.1.2 Configure the port of HTTP
The default is 80, here is modified to 10001
# http related config
http:
# port for http, default is 80. If https enabled, this port will redirect to https port
port: 10001
3.1.3 Note HTTPS configuration
For the time being, you can first comment on HTTPS configuration
# https related config
#https:
# https port for harbor, default is 443
#port: 443
# The path of cert and key files for nginx
#certificate: /your/certificate/path
#private_key: /your/private/key/path
3.1.4 Configure the password of the admin user
The default password is HARBOR12345. Here you can modify your own password
# The initial password of Harbor admin
# It only works in first time to install harbor
# Remember Change the admin password from UI after launching Harbor.
harbor_admin_password: Harbor12345
3.1.5 execute the script of the installation HARBOR
Other configurations temporarily maintain the default configuration, and execute the Ruian script
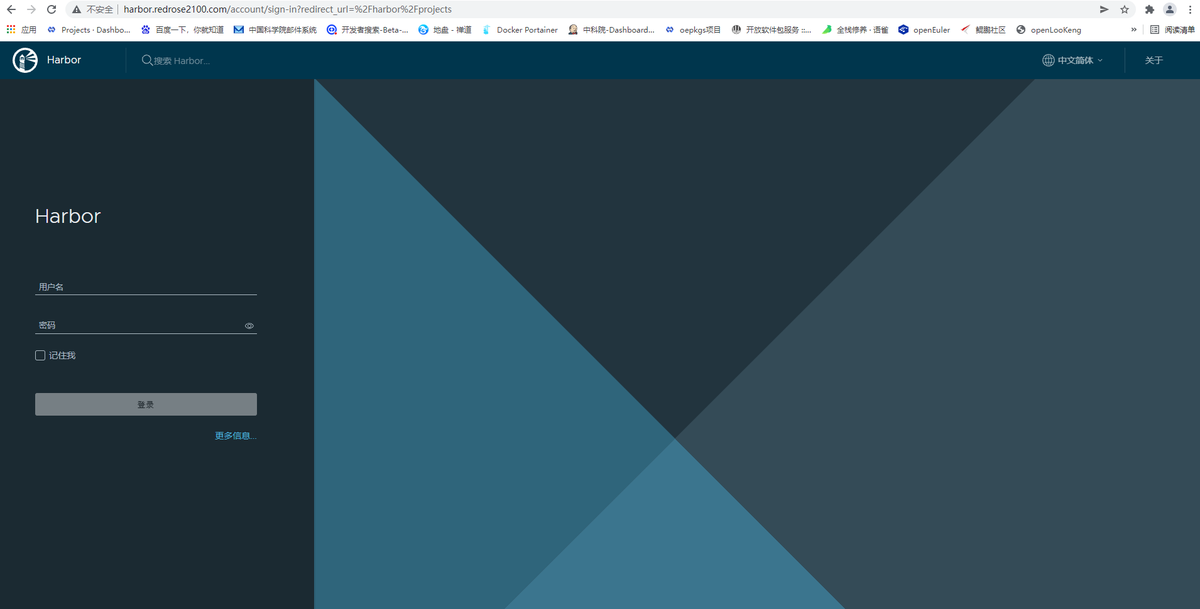
./install.shAfter the installation is completed, open it in the browserhttp://harbor.redrose210.comYou can open Harbor's page
3.1.6 Modify the docker configuration file
After the installation is installed, because the HTTP protocol is used at this time, you need to add the following content in the docker configuration file /etc/docker/daemon.json:
"insecure-registries":["harbor.redrose2100.com"],The complete content is shown below:
[root@redrose2100 harbor]# cat /etc/docker/daemon.json
{
"exec-opts":["native.cgroupdriver=systemd"],
"registry-mirrors":[
"https://ooe7wn09.mirror.aliyuncs.com",
"https://registry.docker-cn.com",
"http://hub-mirror.c.163.com",
"https://docker.mirrors.ustc.edu.cn"
],
"insecure-registries":["harbor.redrose2100.com"],
"dns": ["114.114.114.114", "8.8.8.8"]
}
Then restart the docker
systemctl restart dockerRestart Harbor and execute the following two commands in the Harbor folder
# Stop Harbor
docker-compose down -v

 #
docker-compose up -d
3.1.7 Verification Harbor
# Modify the tag value of the hello-free mirror image
docker tag hello-world:latest harbor.redrose2100.com/redrose2100/hello-world:latest

 #
 docker login harbor.redrose2100.com -u admin -P xxxx (Harbor's password)

 #
docker push harbor.redrose2100.com/redrose2100/hello-world:latest
Then on the page, you can find that the mirror image has been pushed to Harbor at this time
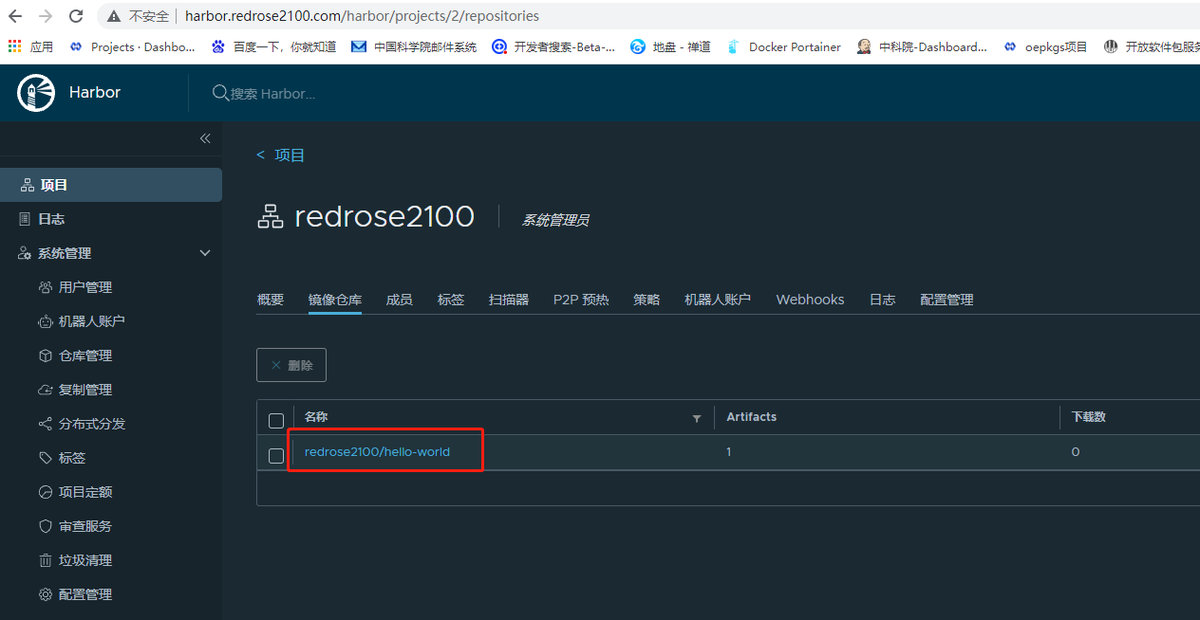
At this point, the simplest HARBOR based on the HTTP protocol is installed.
3.2 Configure https access Harbor
In the production environment, you need to obtain a certificate from the CA. In the test environment, you can generate the CA certificate through OpenSSL and generate a service terminal certificate and client certificate through the CA generation
As follows, assume that the domain name of Harbor is: Harbor.redrose2100.com
3.2.1 Configuration to generate a CA certificate
(1) First create a directory to store the generated documents and other documents
mkdir ssl
cd ssl
(2) Generate CA certificate private key
openssl genrsa -out ca.key 4096(3) Generate a CA certificate, pay attention to modify the domain name
openssl req -x509 -new -nodes -sha512 -days 3650 \
-subj "/C=CN/ST=Beijing/L=Beijing/O=example/OU=Personal/CN=harbor.redrose2100.com" \
-key ca.key \
-out ca.crt
3.2.2 Generate service -side certificate
(1) Generate the private key of the server, pay attention to replace your own domain name
openssl genrsa -out harbor.redrose2100.com.key 4096(2) Generate certificate signature
openssl req -sha512 -new \
-subj "/C=CN/ST=Beijing/L=Beijing/O=example/OU=Personal/CN=harbor.redrose2100.com" \
-key harbor.redrose2100.com.key \
-out harbor.redrose2100.com.csr
(3) Generate the V3 extension file, pay attention to replace it with your own domain name
cat > v3.ext <<-EOF
authorityKeyIdentifier=keyid,issuer
basicConstraints=CA:FALSE
keyUsage = digitalSignature, nonRepudiation, keyEncipherment, dataEncipherment
extendedKeyUsage = serverAuth
subjectAltName = @alt_names

[alt_names]
DNS.1=harbor.redrose2100.com
EOF
(4) Generate certificate for Harbor host
openssl x509 -req -sha512 -days 3650 \
-extfile v3.ext \
-CA ca.crt -CAkey ca.key -CAcreateserial \
-in harbor.redrose2100.com.csr \
-out harbor.redrose2100.com.crt
3.2.3 A certificate to Harbor and Docker
(1) Copy the server certificate to/data/cert/directory
mkdir -p /data/cert/
cp harbor.redrose2100.com.crt /data/cert/
cp harbor.redrose2100.com.key /data/cert/
(2) Convert the CRT file to a Cert file and use it for docker
openssl x509 -inform PEM -in harbor.redrose2100.com.crt -out harbor.redrose2100.com.cert(3) Copy Harbor.redrose2100.com.cert Harbor.redrose2100.com.Key CA.CRT file to the Docker's certificate directory, pay attention to replace it with its own domain name
mkdir -p /etc/docker/certs.d/harbor.redrose2100.com/
cp harbor.redrose2100.com.cert /etc/docker/certs.d/harbor.redrose2100.com/
cp harbor.redrose2100.com.key /etc/docker/certs.d/harbor.redrose2100.com/
cp ca.crt /etc/docker/certs.d/harbor.redrose2100.com/
It should be noted here that if HTTPS does not use the default 443 port for HTTPS and modify it to other ports, the directory you need to create at this time is: /etc/docker/certs.d/yourdomain.com: Port, or or or /etc/docker/certs.d/harbor_ip:port
(4) Restart Docker
systemctl restart docker3.2.4 Modify the Harbor.yml configuration file
Modify the configuration and open the HTTPS configuration. As below, the HTTPS part is annotated when the HTTP mode is deployed in the previous deployment.
# https related config
https:
# https port for harbor, default is 443
port: 8443
# The path of cert and key files for nginx
certificate: /data/cert/harbor.redrose2100.com.crt
private_key: /data/cert/harbor.redrose2100.com.key
Then execute the following command to update Harbor
./install.sh3.2.5 nginx configuration https
Modify the nginx.conf configuration, increase the supervision of port 443, and jump to port 8443 of Harbor. In addition, you need to specify the path of the certificate file
server {
listen 443 ssl;
server_name harbor.redrose2100.com;

ssl_certificate /data/cert/harbor.redrose2100.com.crt;
ssl_certificate_key /data/cert/harbor.redrose2100.com.key;
ssl_protocols TLSv1 TLSv1.1 TLSv1.2;
ssl_ciphers ECDHE-RSA-AES128-GCM-SHA256:HIGH:!aNULL:!MD5:!RC4:!DHE;

ssl_session_cache shared:SSL:1m;
ssl_session_timeout 5m;

location / {
client_max_body_size 1024M;
client_body_buffer_size 1024M;
proxy_redirect off;
proxy_pass https://172.22.27.162:8443;

proxy_set_header Host $host;

proxy_set_header X-Real-IP $remote_addr;

proxy_set_header X-Forwarded-For $proxy_add_x_forwarded_for;
}

error_page 500 502 503 504 /50x.html;
location = /50x.html {
root html;
}
}
Then turn the http to HTTPS
server {
listen 80;
server_name harbor.redrose2100.com;
return 301 https://harbor.redrose2100.com$request_uri;
}
Then reload the configuration file
nginx -s reloadYou can pass in the browser at this timehttp://harbor.redrose2100.com and https://harbor.redrose2100.comAccess, use ithttp://harbor.redrose2100.comI will find that automatic jump to turn tohttps://harbor.redrose2100.com
3.2.6 nginx configuration may encounter a problem
Note that if there is a similar error:
nginx: [emerg] unknown directive "ssl_certificate" in /usr/local/nginx/conf/nginx.confOr similar to the following errors;
error: SSL modules require the OpenSSL library.Explain that nginx is not installed with SSL. At this time, enter the source code directory of nginx and execute the following command
./configure --prefix=/usr/local/nginx --with-http_stub_status_module --with-http_ssl_module --with-openssl=/usr/local/src/openssl-1.1.1oin:
- /usr/local/src/opensl-1.1.1O Directory is the decompression directory of OpenSSL source bag
Then use make compile, note that do not use make install, otherwise it will cover
makeThen backup the original nginx command and the directory of the newly compiled Nginx copy of the Nginx command is located
# Back to rename the original command
mv /usr/local/nginx/sbin/nginx /usr/local/nginx/sbin/nginx.bark
 # Copy the newly compiled Nginx command to the directory of the nginx command
cp objs/nginx /usr/local/nginx/sbin/
nginx -V , , —with-http_ssl_module
[root@redrose2100 nginx-1.21.4]# nginx -V
nginx version: nginx/1.21.4
built by gcc 4.8.5 20150623 (Red Hat 4.8.5-44) (GCC)
built with OpenSSL 1.1.1o 3 May 2022
TLS SNI support enabled
configure arguments: --prefix=/usr/local/nginx --with-http_stub_status_module --with-http_ssl_module --with-openssl=/usr/local/src/openssl-1.1.1o
[root@redrose2100 nginx-1.21.4]#
Then execute the following command to reload the nginx configuration again
nginx -s reload3.3 Install mirror signature
When installing the signature, you only need to bring the-With-Notary parameter when you execute the command of the ./install.sh
./install.sh --with-notary3.4 Installation scanner
When installing the scanner, you only need to bring-the With-Trivy parameter when you execute the command of the ./install.sh.
./install.sh --with-trivy3.5 Install Chart Repository service
When installing the Chart repository service, you only need
./install.sh --with-chartmuseum3.6 Install the signature, scanner, Chart Repository service
At the same time, you only need to bring all three parameters when installing the signature, scanner, and Chart repository service.
./install.sh --with-notary --with-trivy --with-chartmuseumIntelligent Recommendation
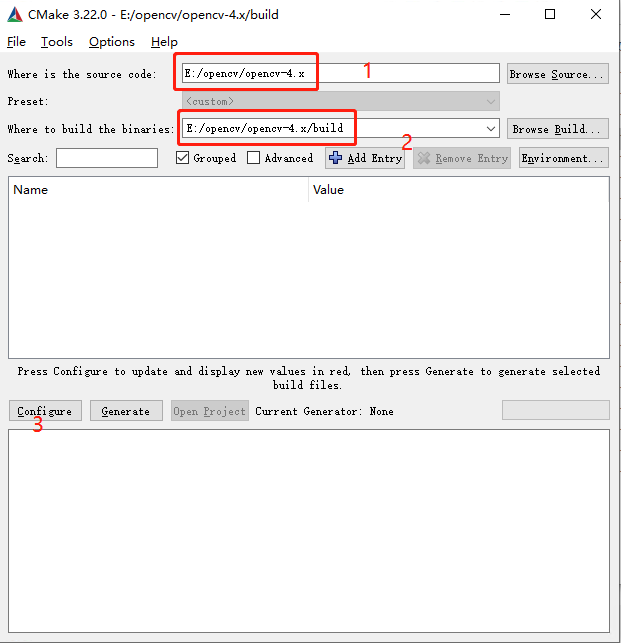
Compile OpenCV under Window
Compile OpenCV environment: cpu:E5-2667 v2 gpu : RTX 2080 super computer system : win10 professor Software: (The official website can be downloaded) cuda11.3 cuda_11.3.0_465.89_win10.exe cudnn cudnn-1...

IntelliJ IDEA common settings-Tomcat installation and use
Article Directory download installation start up shut down Tomcat deployment project Tomcat integrated into IDEA IDAE-Deploy WEB project download Official website address:http://tomcat.apache.org/ ins...
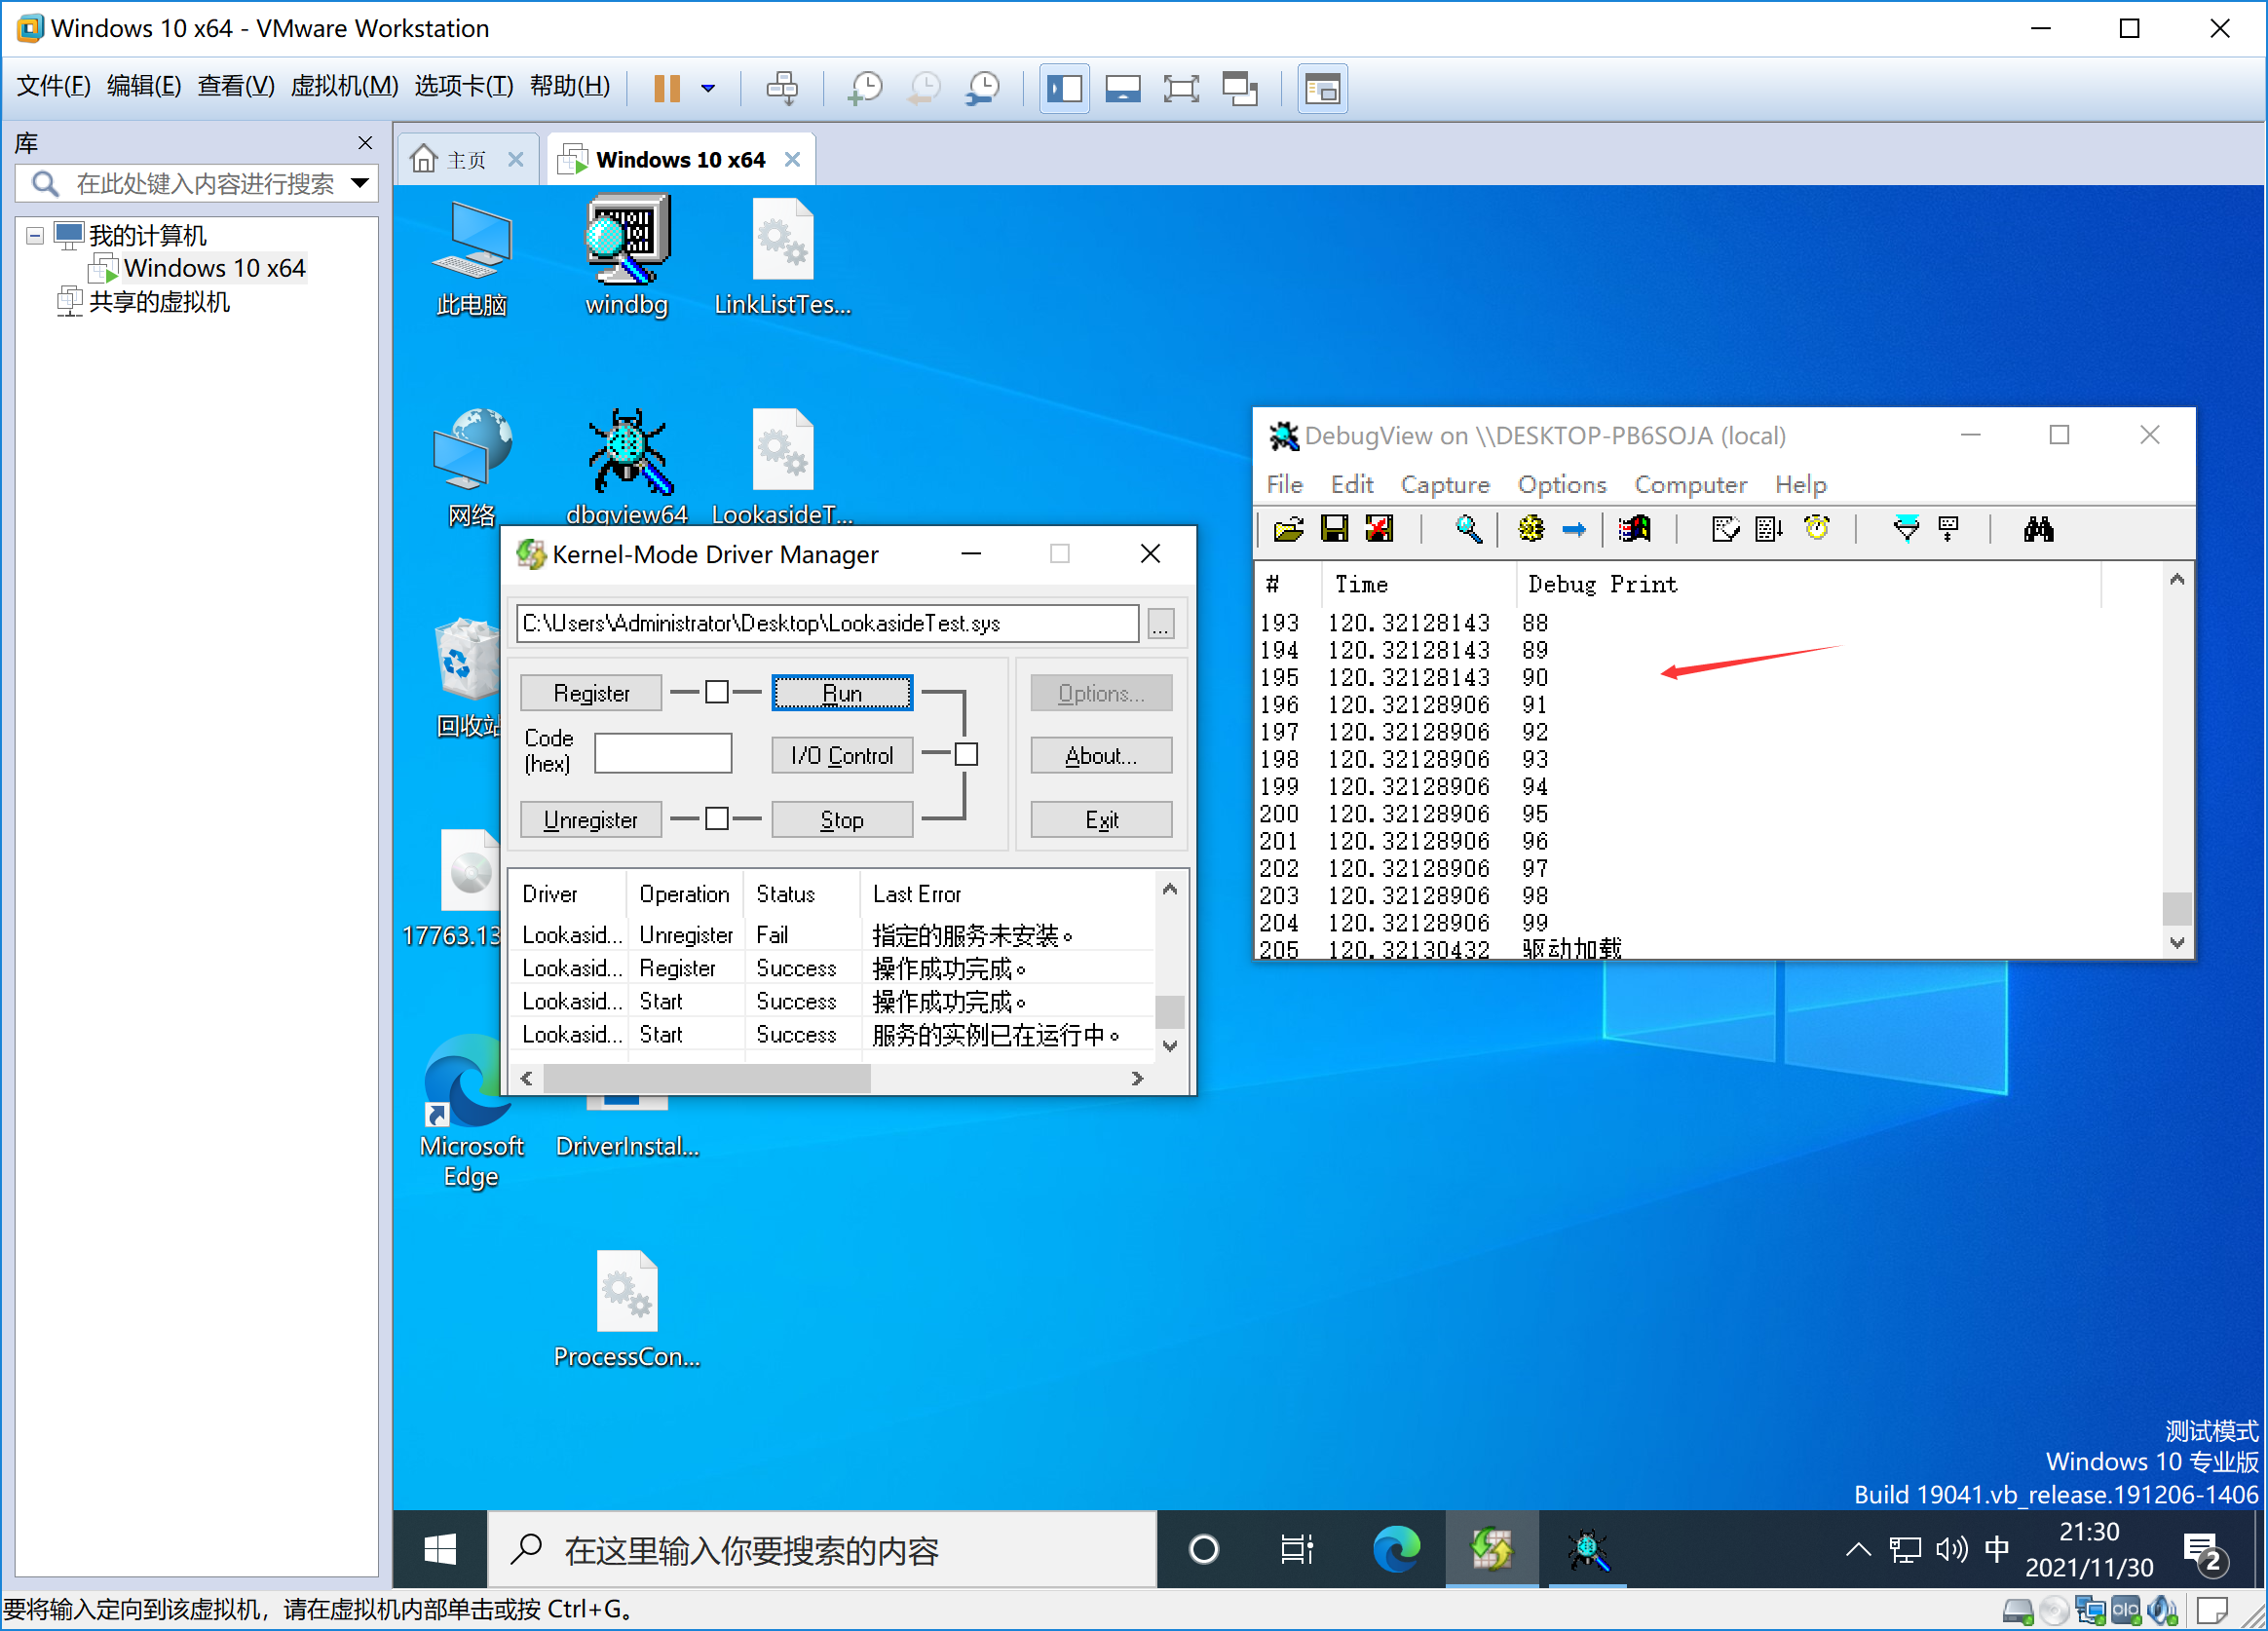
Win10 driver development 7 —— pagination fast check table (lookaside)
Non -pagination Pagination ExInitializeNPagedLookasideLIst ExInitializePagedLookasideLIst ExAllocateFromNPagedLookasideList ExAllocateFromPagedLookasideList ExFreeToNPagedLookasideList ExFreeToPagedLo...
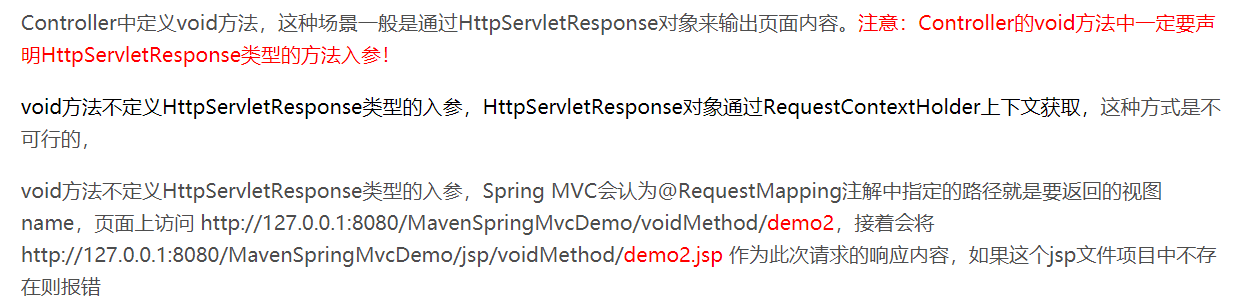
Note that springboot asynchronous ajax, @GetMapping return type is void
purpose: Pass the business layer data into the database through the click event, but do not need to return any value, only need to perform the operation Focus! The void method is defined in the Contro...
More Recommendation
PTA B --1007 prime suspect for C ++ implementation
Prime topic for speculation Let d n is defined as: d n = p n + 1 -p n, where p i is the i-th prime number. Clearly there is d 1 = 1, and for n> 1 d n there is an even number. "Primes to guess&...
Spring 2.X transaction configuration strategy
[color=red]profile[/color]:...

Using your own data, make a cifar10 data set in python (transfer)
Original address: Preliminary preparations: 60,000 3-channel pictures. If you don't have such a large amount of data, you need to change the definition in cifar-10-API, which will be described in deta...
Weather query by vue and axios
Use axios to call interface, vue to get and bind data Enter event query, and hotkey query...
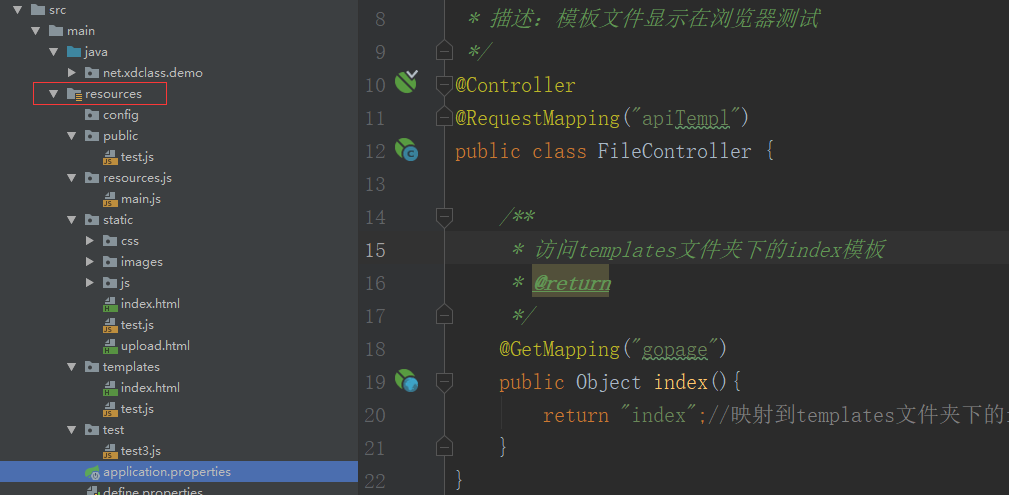
day004-- Explanation of SpringBoot directory file structure [Directory explanation, introduction of template engine, custom static resource directory, static resource files stored in CDN]
Explain the SpringBoot directory file structure and officially recommended directory specifications 1. Catalogue explanation src/main/java: store the code src/ma...