Ardunio completes the serial communication program for STM32 boards
tags: Embedded Linux system arduino stm32 Serial communication
Article catalog
Foreword
Reference link:
1、Using the Arduino IDE development STM32F10X
2、
Require tools:
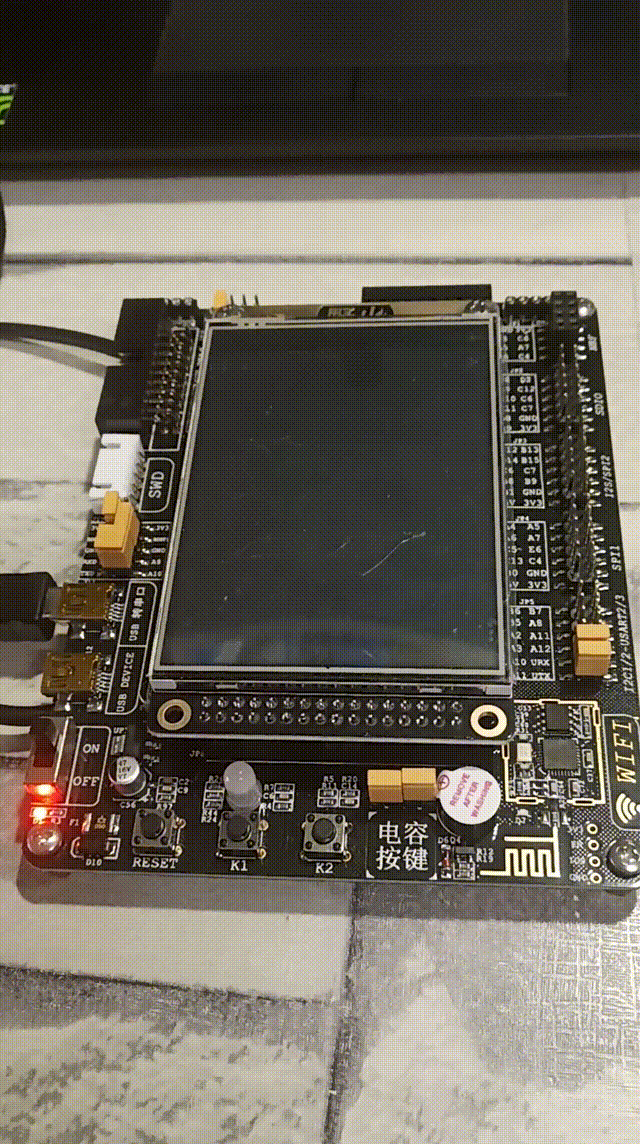
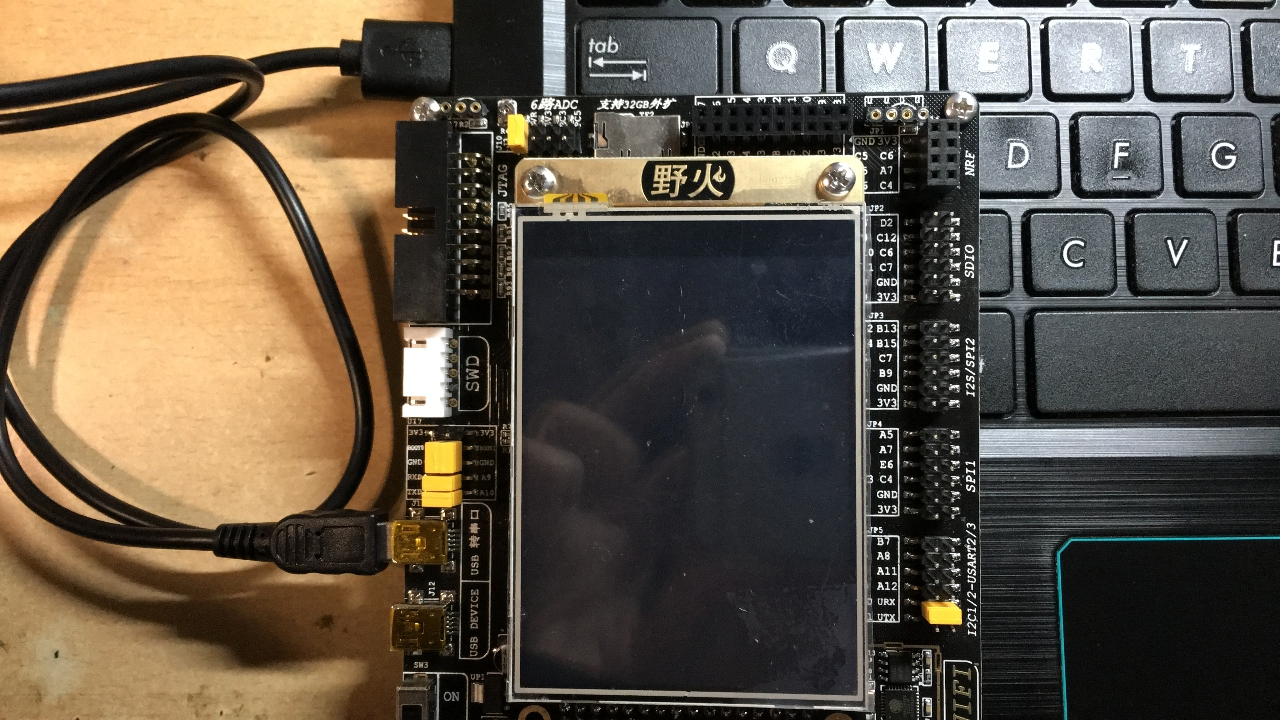
STM32F103 development board, my wildfire - guide
The required resource file:
Extraction code: Q251
First, install
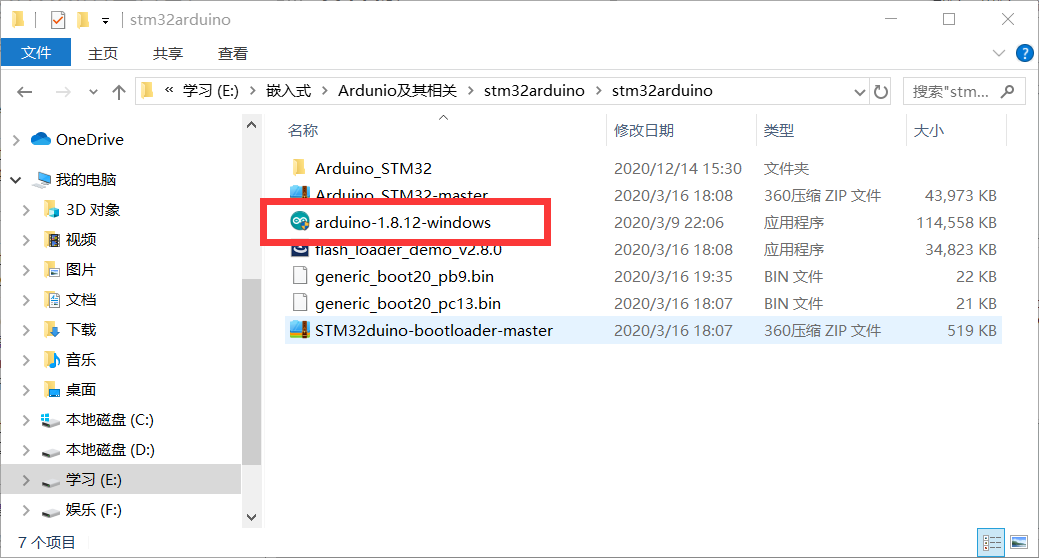
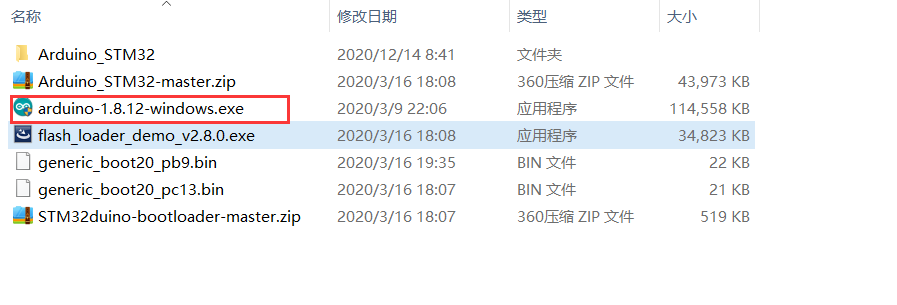
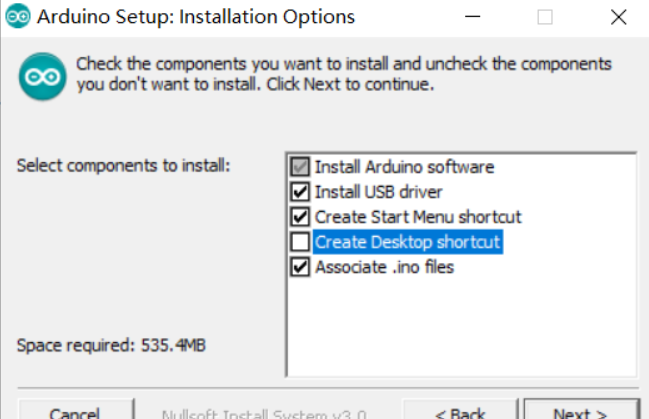
1. Double-click Arduino-1.8.12-Windows, install, do not need to click on other options during installation, and you can click Next.
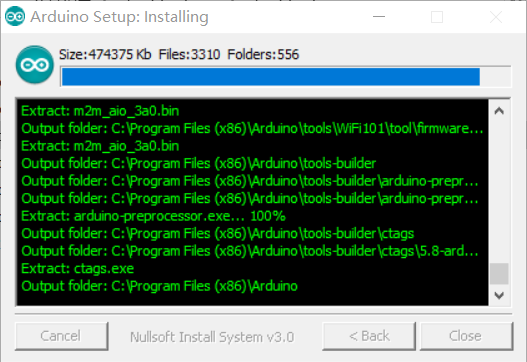
2, wait for the installation to complete
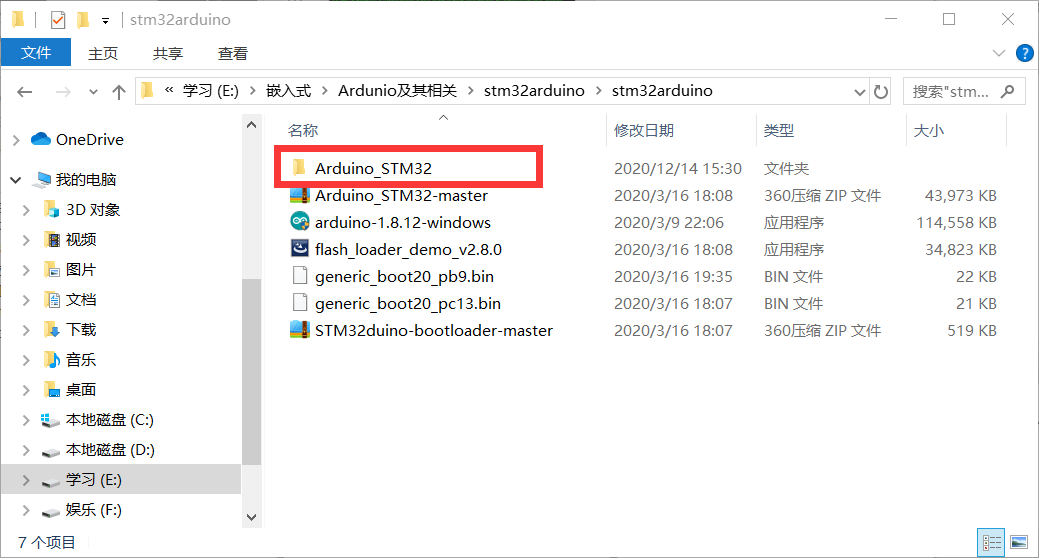
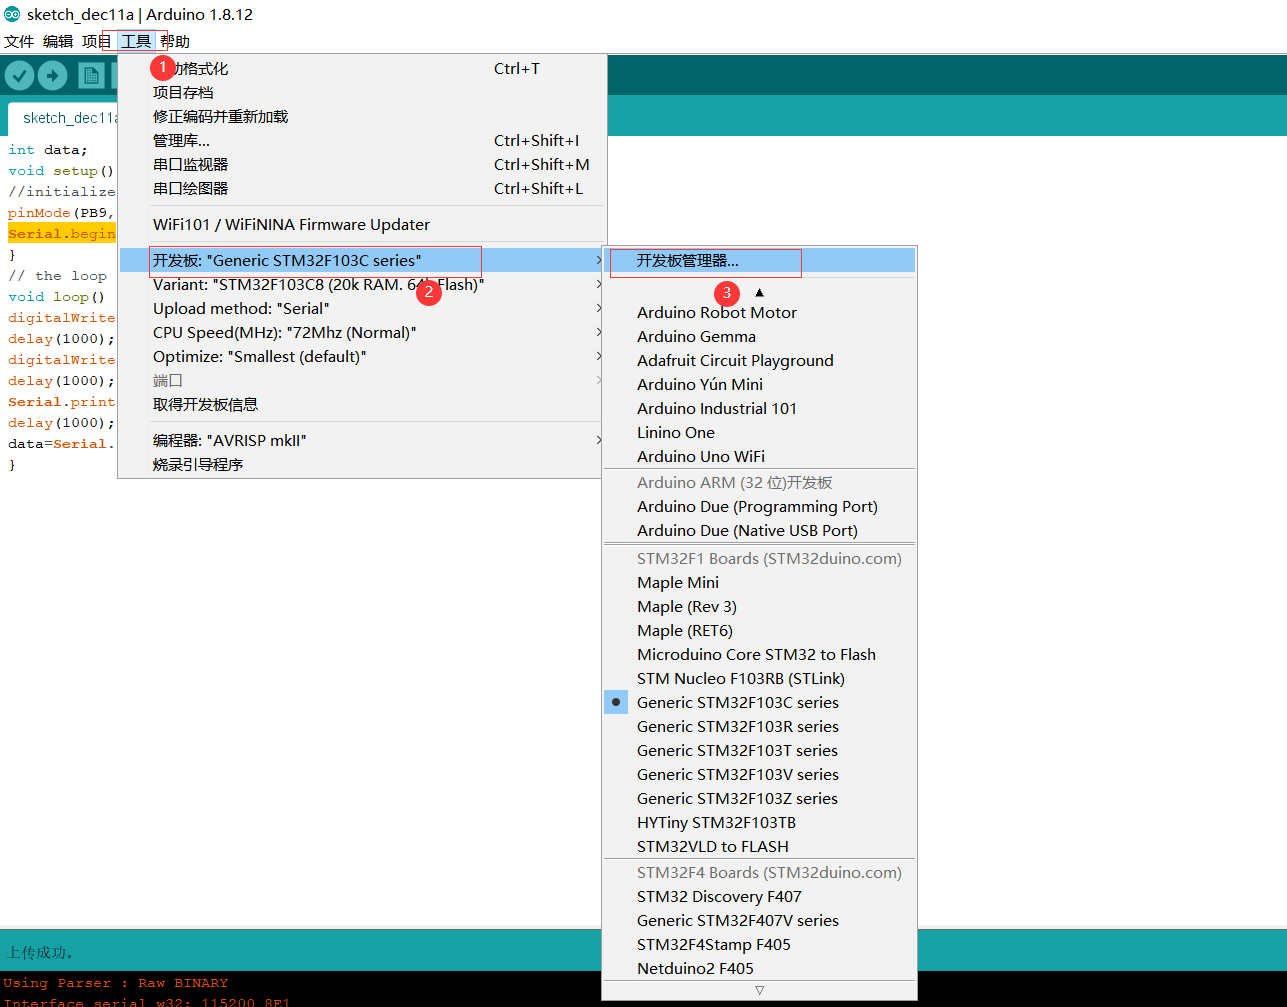
3. Copy the Arduino_STM32 of the package file to the HareWare under the Arduino IDE installation directory, I am C: \ Program Files (x86) \ Arduino \ Hardware. These profiles are written abroad, and his latest configuration files are on the github website https://github.com/rogerclarkmelbourne/ARDUINO_STM32.
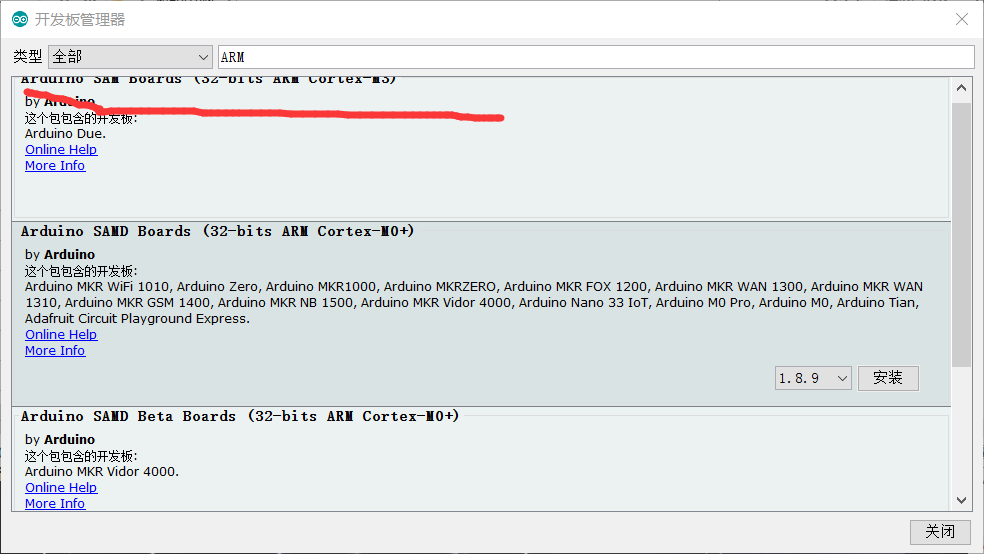
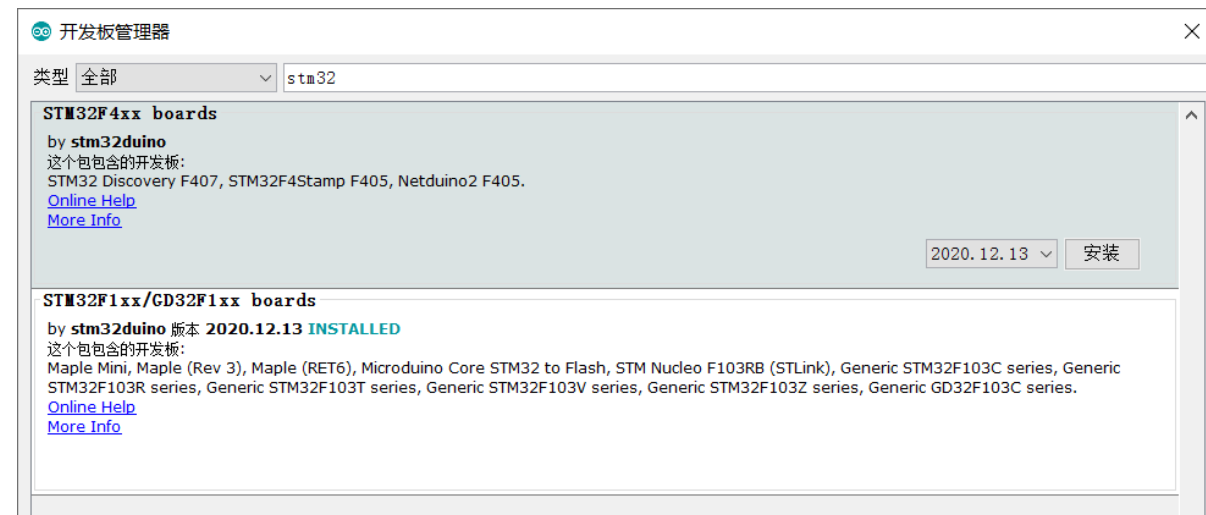
4. Enter the ARM key search in the Tool \ Development Board \ Development Board Manager, select the Cortex-M3 series compile support file and install
Second, serial port communication
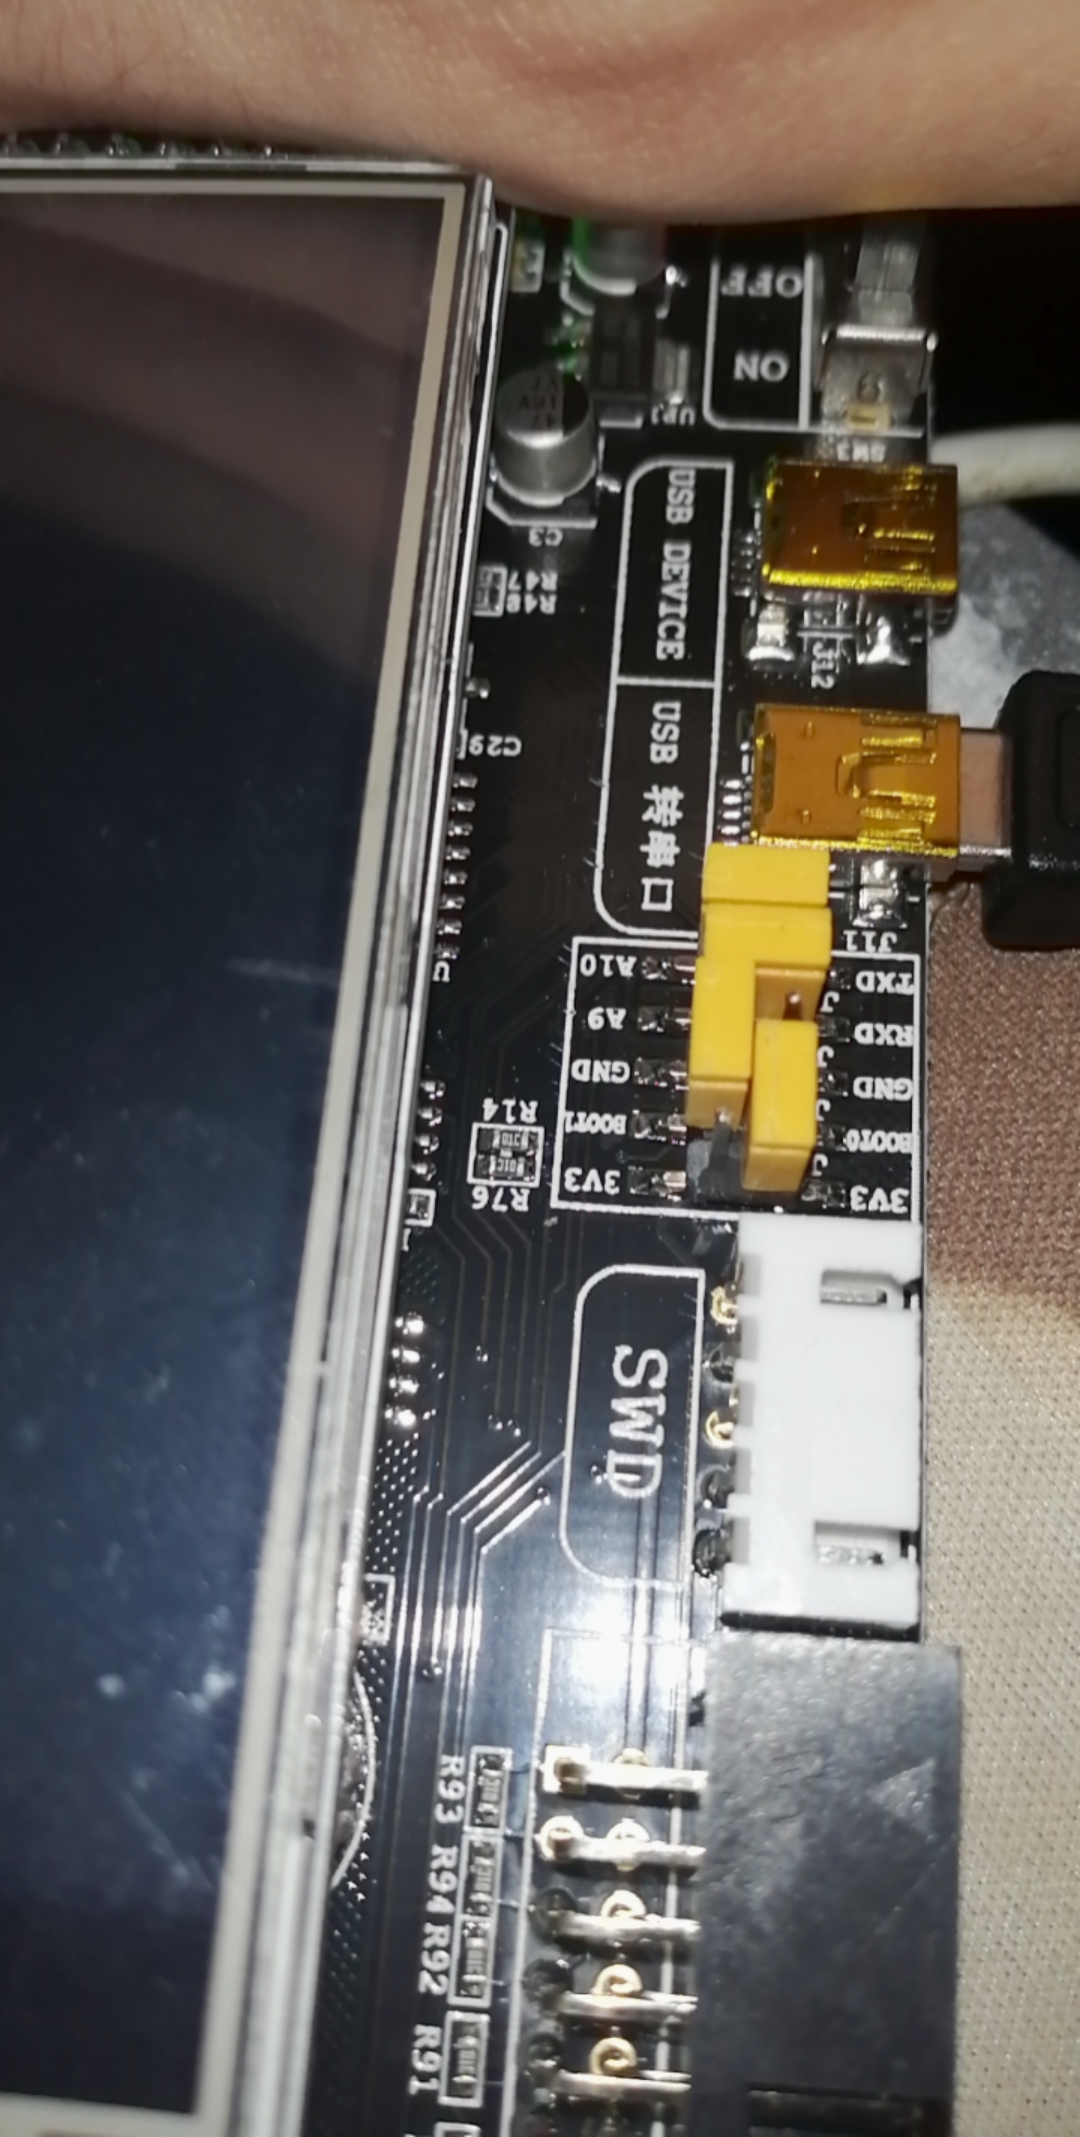
1, connection method
(1), connect the computer with the development board with the USB cable.
(2), re-enhancing the boot0 with 3V3, Boot1 is connected to GND, and the RXD is connected to A9, and the TXD is connected to the A10.
2, serial communication program
Features:
1) Continue to output "Hello World!" To the serial port;
2) When receiving "STOP!", The output is stopped.
Code:
int flag=1;
char Stop[]="stop\n";
void setup() {
//initialization
pinMode(PB0, OUTPUT);// PB0 is green, PB1 is blue, PB5 is red, can be changed as needed
Serial.begin(115200);
}
void loop() {
int i=0,flag_s=0;
char inByte[50];
digitalWrite(PB0, HIGH); // small light
delay(500); // delay
digitalWrite(PB0, LOW); // small light
delay(500); // delay
while (Serial.available()> 0)     // When the transmission buffer has data
{
        inByte[i] = Serial.read();    / / Remove and read a BYTE data from the buffer of the serial port
        delay(10);
        i++ ;
}
if(Stop[i]=inByte[i])
{
  if(Stop[i-1]==inByte[i-1]&&Stop[i-2]==inByte[i-2]&&Stop[i-3]==inByte[i-3])
  {
  flag=0;
  Serial.println("Roger that!");
  }// Stop and reply when you receive the STOP command
}
if(flag==1)
{
Serial.println("Hello World!");/ / Send data to the serial port
delay(100); // delay
}
}
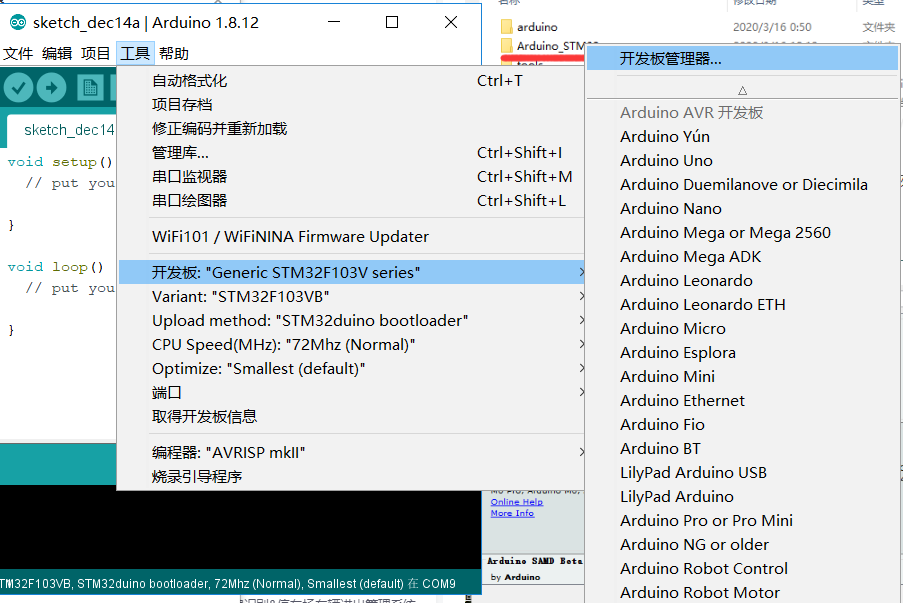
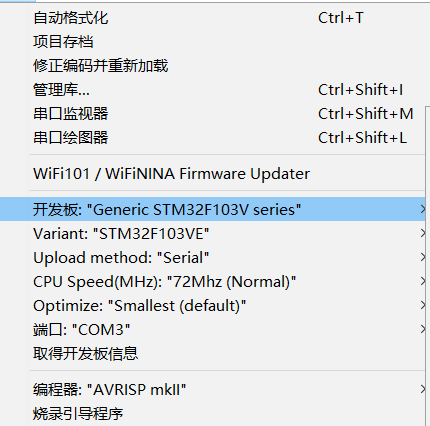
3, configuration. Point open tool configuration as shown
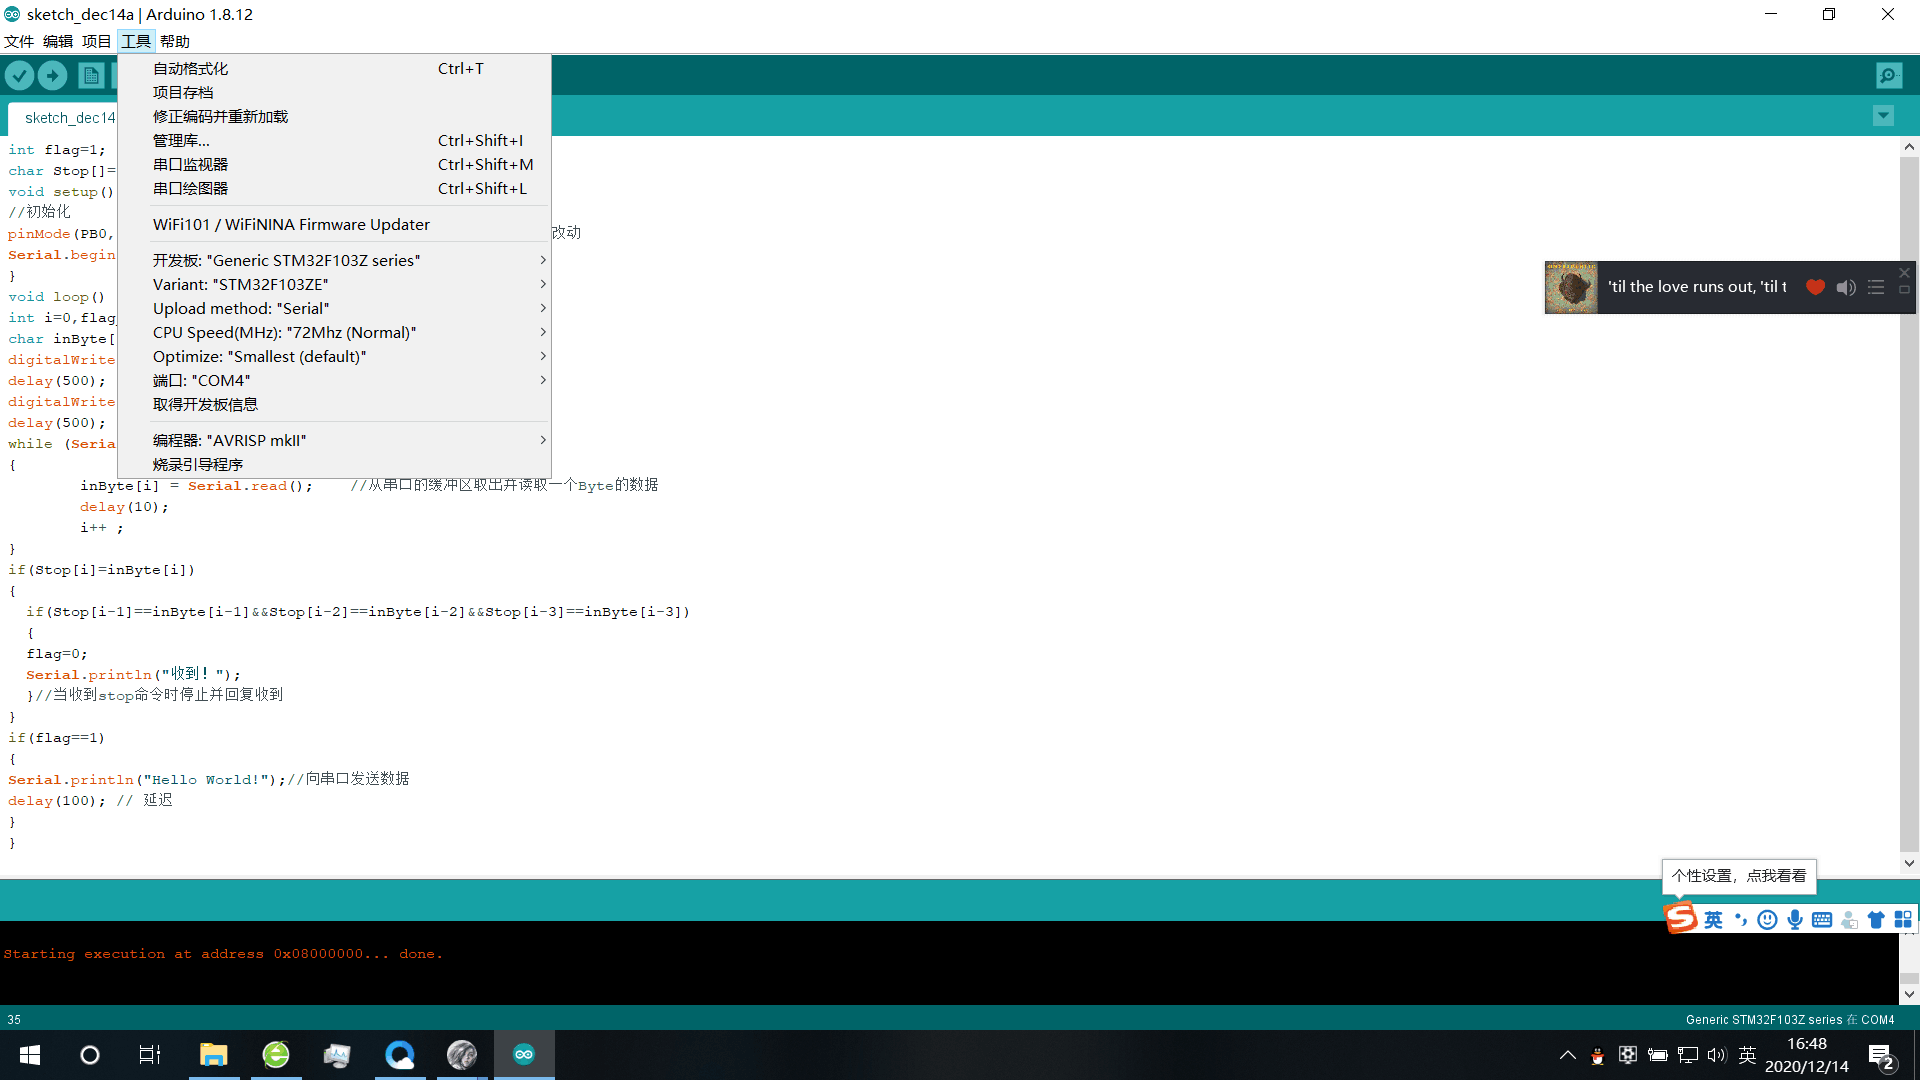
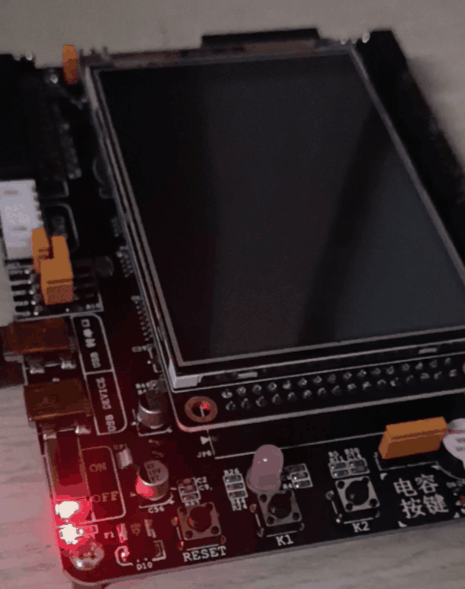
4, compile, upload. Click on the verification in the upper left corner, upload
5, open the serial number monitor
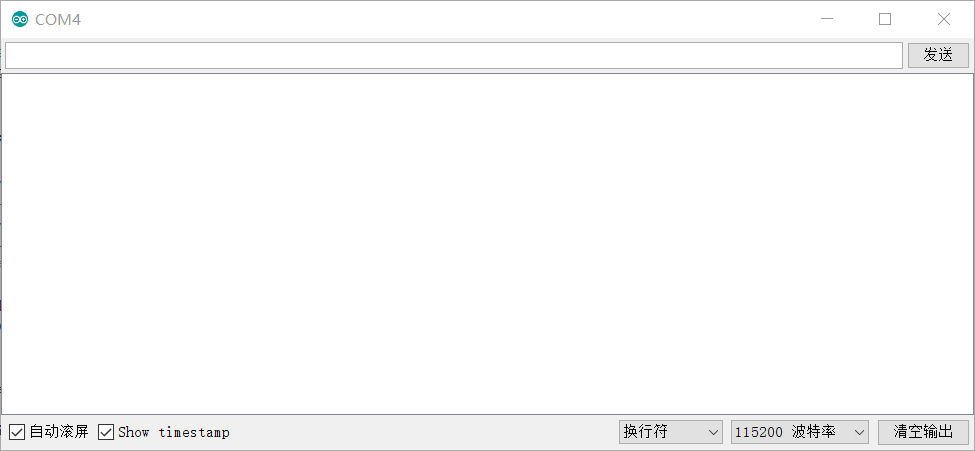
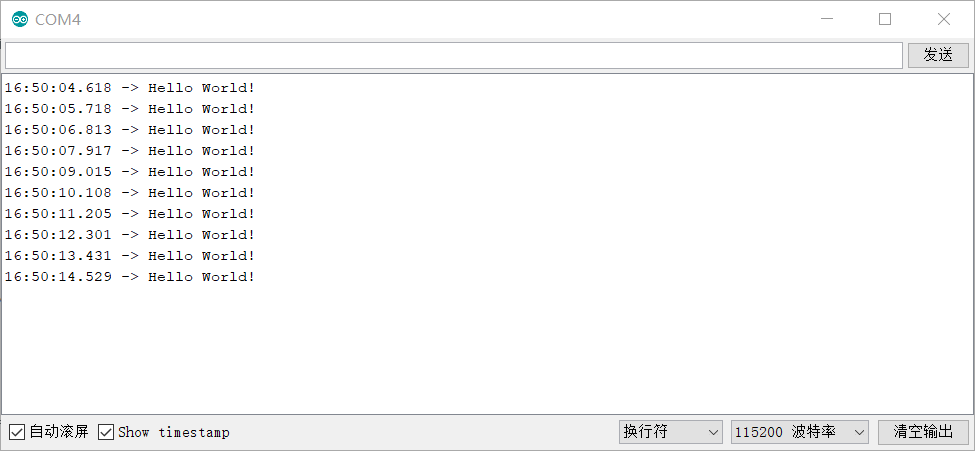
Enter STOP stop sending

to sum up
1. In the serial port communication, if you accept garbled, you can try to modify the baud rate.
2, must pay attention to various configurations, otherwise it will be wrong.
Intelligent Recommendation
STM32 serial communication under Ardunio
STM32 serial communication under Ardunio STM32 serial communication under Ardunio Install Ardunio IDE Configuring Ardunio IDE Connection STM32F103 Guide Development Board Burning program to the develo...

Serial communication of STM32 under Ardunio
Serial communication of STM32 under Ardunio I. Serial communication of STM32 under Ardunio IDE Ardunio and IDE Install Ardunio IDE Configuring Ardunio IDE Connect STM32 development board Burning progr...
Serial communication of STM32 on Ardunio IDE
Serial communication of STM32 on Ardunio IDE Ardunio IDE installation with STM32 support library installation Ardunio completes continuous serial output "Hello World! Ardunio IDE installation wit...
Complete STM32 serial communication in Ardunio
table of Contents Experimental description Experimental preparation Configure Code writing operation result stduino IDE Experimental description Use Ardunio to complete the serial communication progra...
Use Ardunio to complete the serial communication program of the STM32 board
Article catalog Brief introduction to Arduino Ide First, install Ardunio IDE and related software support libraries Second, the serial communication program of STM32 board is completed in Ardunio 1. C...
More Recommendation
Ardunio completes STM32 serial port communication, realizing host control start sending and stopping sending
Ardunio completes STM32 serial communication First, install Ardunio IDE Second, configure the STM32 development environment Third, STM32 serial communication Arduino is an open source electronic proto...
Install the Ardunio IDE and related software support library, serial port communication programs for STM32 boards in Ardunio: 1) Continuously output "Hello World!"; 2) When "STOP!" Is received, the output is stopped.
Ardunio uses STM32 Conclude I. Item Description II. Install Ardunio IDE and related software support libraries 1) Installation 2) Configuration III. SECTRIAL INDUST (Serial Communication Procedure for...
Ardunio IDE performs STM32 serial communication
table of Contents First, install and configure the Arduino IDE development environment Introduction to 1.Arduino 2. Software installation and configuration Second, compilation and burning 1, configure...

Serial communication of STM32 board under Ardunio
Serial communication of STM32 board under Ardunio First, complete the serial communication of STM32 under Ardunio (1) Introduction (2) Install Ardunio (3) Configuring Ardunio (4) program code (5) Conn...
Use Ardunio IDE to implement STM32 serial communication
Use Ardunio IDE to implement STM32 serial communication First, install Ardunio IDE Second, Ardunio IDE configures the development environment and configuration of STM32F10X Third, the serial communica...